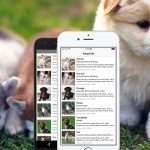
Learn how to display a map with pins and custom callouts by creating an app that will help Santa deliver Christmas presents.
If you don’t have any experience with React Native check out 3 Steps to Build Your First Mobile App with React Native. It explains the basics and how to set up required software to get started.
Table of contents
What We Will Be Building
We’re going to build an app that shows pins with custom callouts that include images on the map. That’s how it’s going to look like.
Outlining the App Structure
It’s always a good idea to plan you app code structure in advance. Let’s list the files that we’re going to need to build all of the components for the app.
index.ios.jsorindex.android.js. Entry points into the app for iOS or Android platforms respectively. Both are going to render just one component calledMap.Map.js. Renders map with pins and custom callouts using the data fromdata.js.Callout.js. A component that used to display custom callouts.data.js. File that stores the data for the map.
Let’s Get Started
Let’s start off by creating a new app. Open Terminal App and run these commands to initialize a new project.
react-native init SantasMap;
cd SantasMap;
Install react-native-maps
Next, install react-native-maps module, which provides MapView component for rendering map, markers, and callouts. Run the following commands to install it and link the dependencies.
npm install react-native-maps --save
react-native link
Launch the Simulator
Now, launch the app in the simulator.
react-native run-ios;
If you’re having troubles launching Android version, make sure Android SDK Build-tools package and Google Play Services packages are installed. Consult with 3 Steps to Build Your First Mobile App with React Native for instructions on installing packages using Android SDK manager.
Enable Hot Reloading
Once your app is up and running, press ⌘D and select Enable Hot Reloading. This will save you some time having to reload the app manually every time you make a change.
Data
We’ll use characters from Home Alone 2 movie for our map pins. Each character has a name, image, and a boolean flag whether they were good or bad this year.
Create a new file and call it data.js. Paste the following code into the file.
export const characters = [
  {
    name: 'Kevin',
    image: 'https://img.buzzfeed.com/buzzfeed-static/static/2016-12/8/10/asset/buzzfeed-prod-fastlane03/sub-buzz-3484-1481210659-5.png',
    coordinate: [ 40.764466, -73.974488 ],
    good: true,
  },
  {
    name: 'Uncle Frank',
    image: 'https://img.buzzfeed.com/buzzfeed-static/static/2016-12/8/10/asset/buzzfeed-prod-fastlane02/sub-buzz-25788-1481210705-7.png',
    coordinate: [ 40.764656, -73.980907 ],
    good: false,
  },
  {
    name: 'Aunt Leslie',
    image: 'https://img.buzzfeed.com/buzzfeed-static/static/2016-12/8/10/asset/buzzfeed-prod-fastlane01/sub-buzz-5211-1481210889-4.png',
    coordinate: [ 40.764838, -73.981193 ],
    good: false,
  },
  {
    name: 'The guy with the same coat as Kevin’s dad',
    image: 'https://img.buzzfeed.com/buzzfeed-static/static/2016-12/8/10/asset/buzzfeed-prod-fastlane03/sub-buzz-4392-1481212051-3.jpg',
    coordinate: [ 40.748418, -73.985702 ],
    good: false,
  },
  {
    name: 'Donald Trump',
    image: 'https://img.buzzfeed.com/buzzfeed-static/static/2016-12/8/11/asset/buzzfeed-prod-fastlane03/sub-buzz-5109-1481213313-1.png',
    coordinate: [ 40.762389, -73.973817 ],
    good: false,
  },
  {
    name: 'The lady from Plaza Hotel reservations',
    image: 'https://img.buzzfeed.com/buzzfeed-static/static/2016-12/8/11/asset/buzzfeed-prod-fastlane01/sub-buzz-6769-1481213418-3.png',
    coordinate: [ 40.779707, -73.979012 ],
    good: false,
  },
  {
    name: 'This scary ass big-tilted Santa',
    image: 'https://img.buzzfeed.com/buzzfeed-static/static/2016-12/8/10/asset/buzzfeed-prod-fastlane02/sub-buzz-27082-1481212691-2.png',
    coordinate: [ 40.747067, -74.004496 ],
    good: false,
  },
  {
    name: 'Random cousins/siblings',
    image: 'https://img.buzzfeed.com/buzzfeed-static/static/2016-12/8/11/asset/buzzfeed-prod-fastlane01/sub-buzz-7903-1481215701-1.png',
    coordinate: [ 40.765298, -73.976022 ],
    good: false,
  },
  {
    name: '“Watch it kid HAHAHAHA” guy',
    image: 'https://img.buzzfeed.com/buzzfeed-static/static/2016-12/8/11/asset/buzzfeed-prod-fastlane01/sub-buzz-8357-1481215914-1.png',
    coordinate: [ 40.791939, -73.963466 ],
    good: false,
  },
  {
    name: 'The taxi driver near Central Park',
    image: 'https://img.buzzfeed.com/buzzfeed-static/static/2016-12/8/11/asset/buzzfeed-prod-fastlane01/sub-buzz-8061-1481216019-8.png',
    coordinate: [ 40.792364, -73.964200 ],
    good: false,
  },
  {
    name: 'The prostitutes near Central Park',
    image: 'https://img.buzzfeed.com/buzzfeed-static/static/2016-12/8/11/asset/buzzfeed-prod-fastlane03/sub-buzz-6355-1481215967-1.png',
    coordinate: [ 40.791646, -73.964681 ],
    good: false,
  },
  {
    name: 'Buzz',
    image: 'https://img.buzzfeed.com/buzzfeed-static/static/2016-12/8/10/asset/buzzfeed-prod-fastlane03/sub-buzz-4009-1481211103-1.png',
    coordinate: [ 40.764298, -73.971752 ],
    good: false,
  },
  {
    name: 'Esther Stone, hotel lady',
    image: 'https://img.buzzfeed.com/buzzfeed-static/static/2016-12/8/11/asset/buzzfeed-prod-fastlane01/sub-buzz-6874-1481213534-3.png',
    coordinate: [ 40.764116, -73.973581 ],
    good: false,
  },
  {
    name: 'Fuller',
    image: 'https://img.buzzfeed.com/buzzfeed-static/static/2016-12/8/10/asset/buzzfeed-prod-fastlane02/sub-buzz-26273-1481211159-3.png',
    coordinate: [ 40.763241, -73.975782 ],
    good: false,
  },
  {
    name: 'Mrs. McCallister',
    image: 'https://img.buzzfeed.com/buzzfeed-static/static/2016-12/8/10/asset/buzzfeed-prod-fastlane02/sub-buzz-25796-1481211030-8.png',
    coordinate: [ 40.758702, -73.978598 ],
    good: false,
  },
  {
    name: 'Mr. McCallister',
    image: 'https://img.buzzfeed.com/buzzfeed-static/static/2016-12/8/10/asset/buzzfeed-prod-fastlane03/sub-buzz-4020-1481211789-2.png',
    coordinate: [ 40.758889, -73.985125 ],
    good: false,
  },
  {
    name: 'The NYC cop who takes Mrs. McCallister to Rockefeller Plaza',
    image: 'https://img.buzzfeed.com/buzzfeed-static/static/2016-12/8/13/asset/buzzfeed-prod-fastlane01/sub-buzz-21202-1481220551-1.png',
    coordinate: [ 40.771156, -73.979802 ],
    good: true,
  },
  {
    name: 'The woman that slaps/punches Marv twice',
    image: 'https://img.buzzfeed.com/buzzfeed-static/static/2016-12/8/11/asset/buzzfeed-prod-fastlane03/sub-buzz-5073-1481213214-2.png',
    coordinate: [ 40.761432, -73.977645 ],
    good: false,
  },
  {
    name: 'Harry',
    image: 'https://img.buzzfeed.com/buzzfeed-static/static/2016-12/8/11/asset/buzzfeed-prod-fastlane01/sub-buzz-6492-1481212963-3.png',
    coordinate: [ 40.792084, -73.966925 ],
    good: false,
  },
  {
    name: 'Tim Curry',
    image: 'https://img.buzzfeed.com/buzzfeed-static/static/2016-12/8/11/asset/buzzfeed-prod-fastlane01/sub-buzz-6839-1481213501-1.png',
    coordinate: [ 40.764859, -73.975421 ],
    good: true,
  },
  {
    name: 'Duncan',
    image: 'https://img.buzzfeed.com/buzzfeed-static/static/2016-12/8/11/asset/buzzfeed-prod-fastlane02/sub-buzz-28268-1481214964-2.png',
    coordinate: [ 40.763560, -73.972198 ],
    good: true,
  },
  {
    name: 'Marv',
    image: 'https://img.buzzfeed.com/buzzfeed-static/static/2016-12/8/11/asset/buzzfeed-prod-fastlane02/sub-buzz-27059-1481212962-1.png',
    coordinate: [ 40.791871, -73.966812 ],
    good: false,
  },
  {
    name: 'The Pigeon Lady',
    image: 'https://img.buzzfeed.com/buzzfeed-static/static/2016-12/8/11/asset/buzzfeed-prod-fastlane02/sub-buzz-27109-1481213135-7.png',
    coordinate: [ 40.765126, -73.979924 ],
    good: true,
  },
];
Index Files
Next, let’s update our index files. Since we’re going to re-use the same code for both, iOS and Android, so we don’t need two different index files. We’ll be using the same Map component in both index files.
Open index.ios.js file and scrap all of the React Native boilerplate code to start from scratch. Do the same for index.android.js. And add the following code to both of index files.
import { AppRegistry } from 'react-native';
import Map from './Map';

AppRegistry.registerComponent('SantasMap', () => Map);
This code imports Map component from Map.js file and registers it as main app container. If you took at look at the simulator at this point, you would see an error screen. That’s because Map.js doesn’t exist yet, and therefore can’t be imported. So, let’s fix it.
Map Component
Next, let’s define our Map component that renders the map with pins. Create a new file and call it Map.js.
Import Modules and Data
First, add the following import statements to import modules, components, and the data that we’re going to use in the component.
import React, { Component } from 'react';
import {
  StyleSheet,         // CSS-like styles
  Text,               // Renders text
  TouchableOpacity,   // Pressable container
  View                // Container component
} from 'react-native';
import MapView from 'react-native-maps';
// Import data
import { characters } from './data';
Define Component Class
In the next step define Map class that includes state definitions and render() method.
export default class Map extends Component {

  state = {
    // Show good or all characters flag
    showGoodOnly: false,
  }

  render() {
    return (
      <View style={styles.container}>
        {/* Map*/}
        <MapView
          style={styles.map}
          // Position on Manhattan, New York
          initialRegion={{
            latitude: 40.77096,
            longitude: -73.97702,
            latitudeDelta: 0.0491,
            longitudeDelta: 0.0375,
          }}
        >
          {/* Loop through characters and add pins on the map */}
          {characters.map((character, index) =>
            // If showGoodOnly is true, but the character is bad - do not show it
            this.state.showGoodOnly && !character.good || <MapView.Marker
              coordinate={{
                latitude: character.coordinate[0],
                longitude: character.coordinate[1],
              }}
              // Greed color for good characters and red for others
              pinColor={character.good ? '#009688' : '#f44336'}
              key={index}
            />
          )}
        </MapView>
        {/* Button */}
        <View style={styles.buttonContainer}>
          <TouchableOpacity
            style={styles.button}
            // Toggle this.state.showGoodOnly
            onPress={() => this.setState({
              showGoodOnly: !this.state.showGoodOnly
            })}
          >
            <Text>{this.state.showGoodOnly ? 'Show All' : 'Show Good Only'}</Text>
          </TouchableOpacity>
        </View>
      </View>
    );
  }
}
Define Styles
Finally, let’s define the styles.
const styles = StyleSheet.create({
  container: {
    flex: 1,                            // Take up the whole screen
    justifyContent: 'flex-end',         // Arrange button at the bottom
    alignItems: 'center',               // Center button horizontally
  },
  map: {
    ...StyleSheet.absoluteFillObject,
  },
  buttonContainer: {
    marginVertical: 20,
  },
  button: {
    alignItems: 'center',
    backgroundColor: 'rgba(255,255,255,0.7)',
    borderRadius: 20,
    padding: 12,
    width: 160,
  },
});
We used StyleSheet.absoluteFillObject object in our styles:
map: {
  ...StyleSheet.absoluteFillObject,
},
Which is essentially a shorter version of this:
map: {
  position: 'absolute',
  top: 0,
  left: 0,
  right: 0,
  bottom: 0,
},
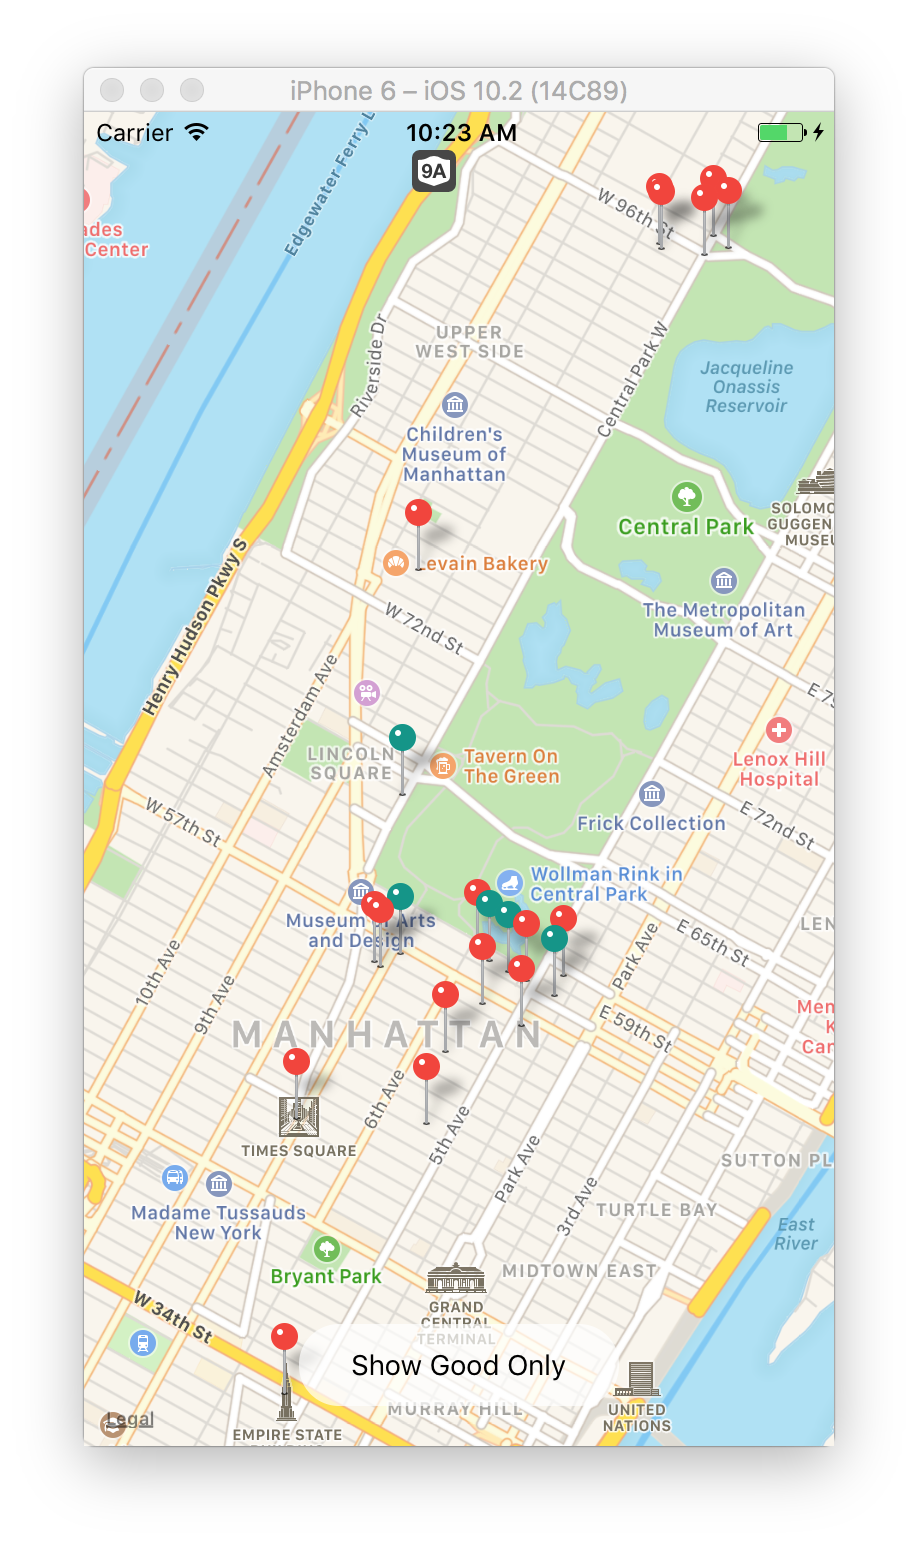
Check Out the Progress
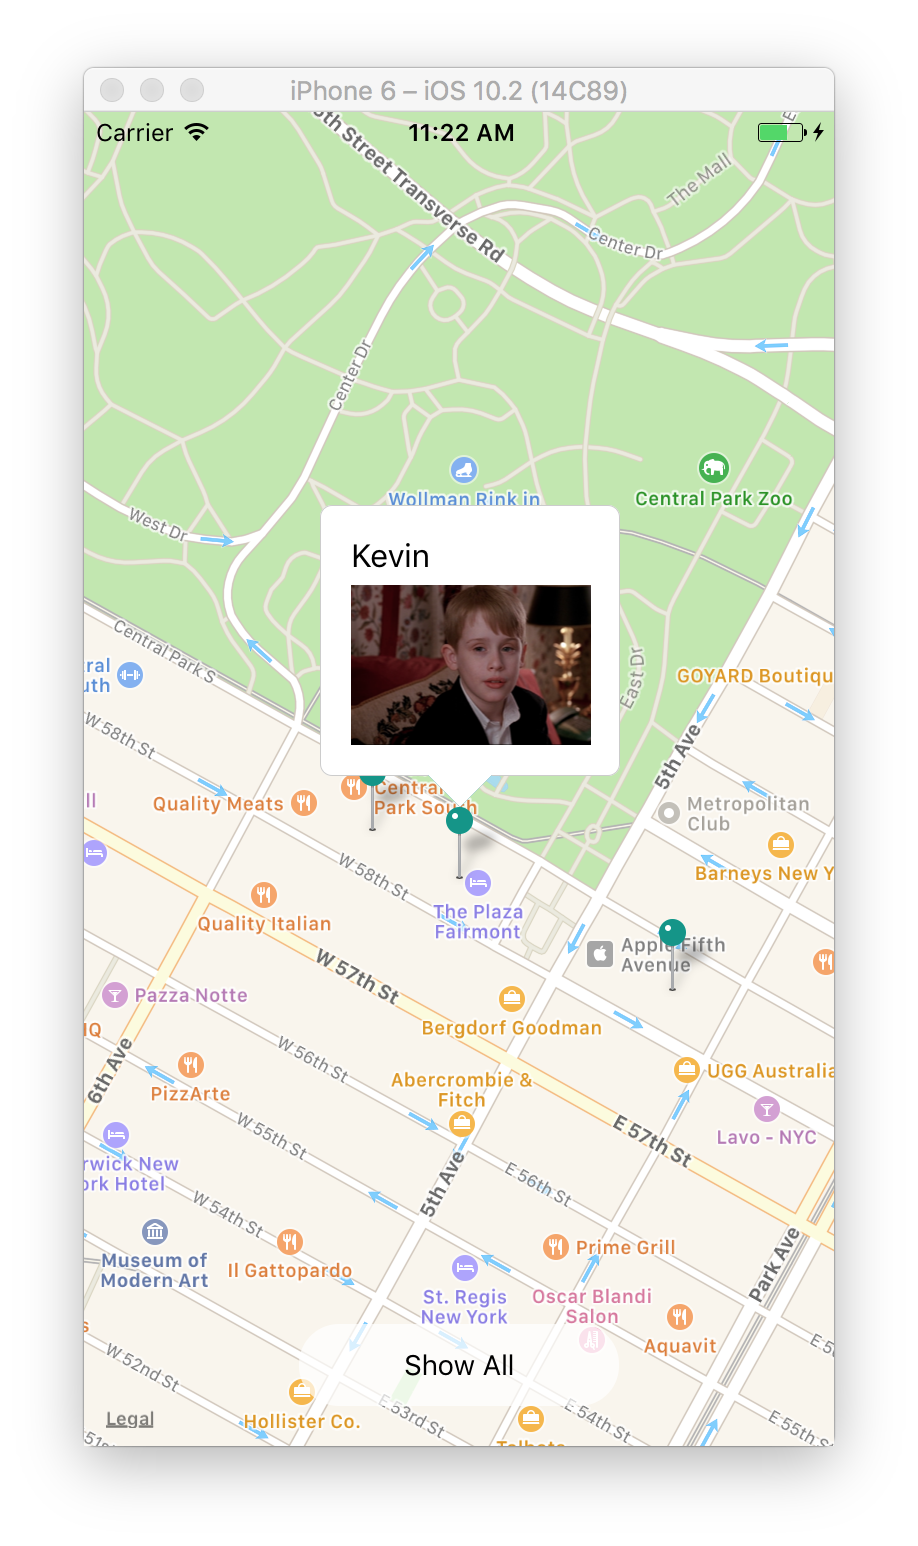
Bring up the simulator window and see what we’ve got so far. You can see the map with all of the pins on it. That’s great, but if you click on a pin, nothing happens. How would Santa know whom he is supposed to deliver presents to? That’s not helpful. So, let’s add some callouts in the next step.
Callout Component
Create a new file with the following content and call it Callout.js.
import React, { Component } from 'react';
import {
  Image,              // Renders images
  StyleSheet,         // CSS-like styles
  Text,               // Renders text
  View,               // Container component
} from 'react-native';

export default class Callout extends Component {
  render() {
    const { name, image } = this.props;
    return (
      <View style={styles.container}>
        <View style={styles.bubble}>
          <View>
            <Text style={styles.name}>{name}</Text>
            <Image
              style={styles.image}
              source={{ uri: image }}
            />
          </View>
        </View>
        <View style={styles.arrowBorder} />
        <View style={styles.arrow} />
      </View>
    );
  }
}

const styles = StyleSheet.create({
  container: {
    flexDirection: 'column',
    alignSelf: 'flex-start',
  },
  // Callout bubble
  bubble: {
    flexDirection: 'row',
    alignSelf: 'flex-start',
    backgroundColor: '#fff',
    borderRadius: 6,
    borderColor: '#ccc',
    borderWidth: 0.5,
    padding: 15,
    width: 150,
  },
  // Arrow below the bubble
  arrow: {
    backgroundColor: 'transparent',
    borderColor: 'transparent',
    borderTopColor: '#fff',
    borderWidth: 16,
    alignSelf: 'center',
    marginTop: -32,
  },
  arrowBorder: {
    backgroundColor: 'transparent',
    borderColor: 'transparent',
    borderTopColor: '#007a87',
    borderWidth: 16,
    alignSelf: 'center',
    marginTop: -0.5,
  },
  // Character name
  name: {
    fontSize: 16,
    marginBottom: 5,
  },
  // Character image
  image: {
    width: 120,
    height: 80,
  },
});
Update Map Component
First of all, add one more import statement for Callout component we just created.
// ... existing imports
import Callout from './Callout';
Next, modify characters.map loop inside render method. You need to add two things:
- Add
calloutOffsetprop toMapView.Marker. - Add
Calloutwrapped inMapView.CalloutinsideMapView.Marker.
  render() {
    return (
      // ... existing code
          {characters.map((character, index) =>
            // If showGoodOnly is true, but the character is bad - do not show it
            this.state.showGoodOnly && !character.good || <MapView.Marker
              coordinate={{
                latitude: character.coordinate[0],
                longitude: character.coordinate[1],
              }}
              // Callout offset
              calloutOffset={{ x: -8, y: 28 }}
              // Greed color for good characters and red for others
              pinColor={character.good ? '#009688' : '#f44336'}
              key={index}
            >
              {/* Callout */}
              <MapView.Callout tooltip style={styles.callout}>
                <Callout
                  name={character.name}
                  image={character.image}
                />
              </MapView.Callout>
            </MapView.Marker>
          )}
        // ... existing code
And finally, add callout style.
const styles = StyleSheet.create({
  // ... existing styles
  callout: {
    width: 140,
  },
});
That’s It
You learned how to render a map with custom pins and callouts, and filter them using state. If you have any questions or ideas for new tutorials, just leave a comment below.