Challenge
Building a mobile app for iOS and Android can be challenging, because of different programming languages these platforms use. And after you build two different versions of your app you will have to keep them in sync when you add new features.
Table of contents
Solution
So if you are rational like us, then you would want to build only one version of you app in one programming language which would work on both platforms. That’s when React Native comes into play. It allows you to build native apps for both platforms using one code base written in JavaScript.
Pros and Cons of React Native
Cons
- It’s relatively new framework and changing very rapidly;
- Steeper learning curve if you came from front end web development comparing to other cross-platform solutions like Cordova, Ionic, etc..
Pros
- Truly native. Although you write JavaScript with React Native, the components you define will end up rendering as native platform widgets;
- Ease of learning. It’s much easier to read comparing to native platform’s code;
- Vibrant ecosystem. There are hundreds of modules available;
- Cross-platform. Apps built with React Native work on both iOS and Android platforms;
- Great performance. Much better performance than other cross-platform solutions like Cordova, Ionic, etc.;
- Great development experience. There is no need to rebuild the whole app every time you make changes, you see the result right away;
- Tons of apps built, including Facebook, Instagram, Walmart, Tesla, Discord and more;
- Build and supported by Facebook.
Let’s go ahead and build your fist mobile app with React Native.
Step 1. Get Ready
In order to build your app for iOS and Android platforms you need to have a Mac. If you are using Linux or Windows you will be able to build Android apps only. And since you don’t want to miss out on iOS app market I recommend you to get a Mac if you don’t already have one.
Step 2. Install Required Software
Install Xcode
To run iOS apps you will need to install Xcode.
Launch App Store app from your dock at the bottom of your screen or by clicking magnifying glass icon on top right corner of your desktop and typing in App Store and hitting Return on your keyboard.
Search for Xcode, click Get and then Install App.
![]()
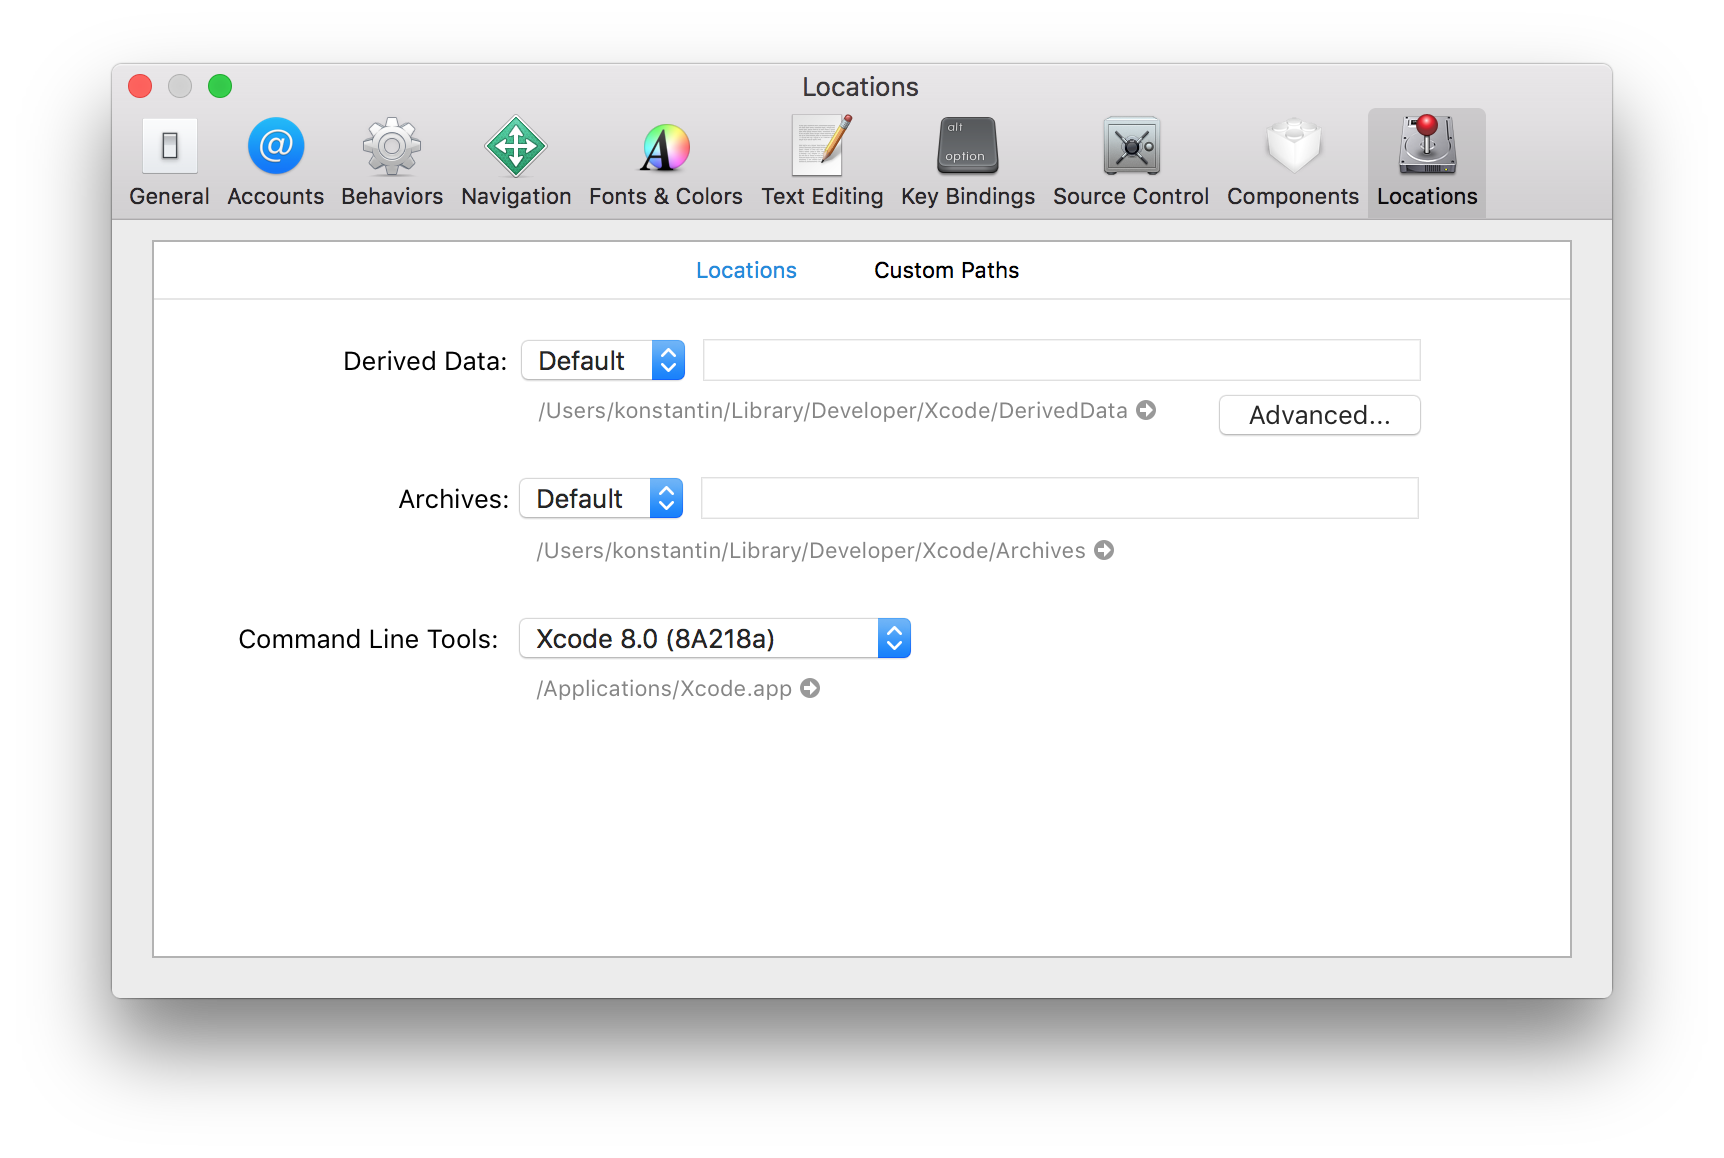
After installation is done launch it and press ⌘, to open settings, click Locations tab and select Xcode from Command Line Tools dropdown menu.
Install Android Studio
![]()
To run Android apps you will need to install Android Studio.
- Download Android Studio here
- Install following these instructions
- Download and install Java SE Development Kit
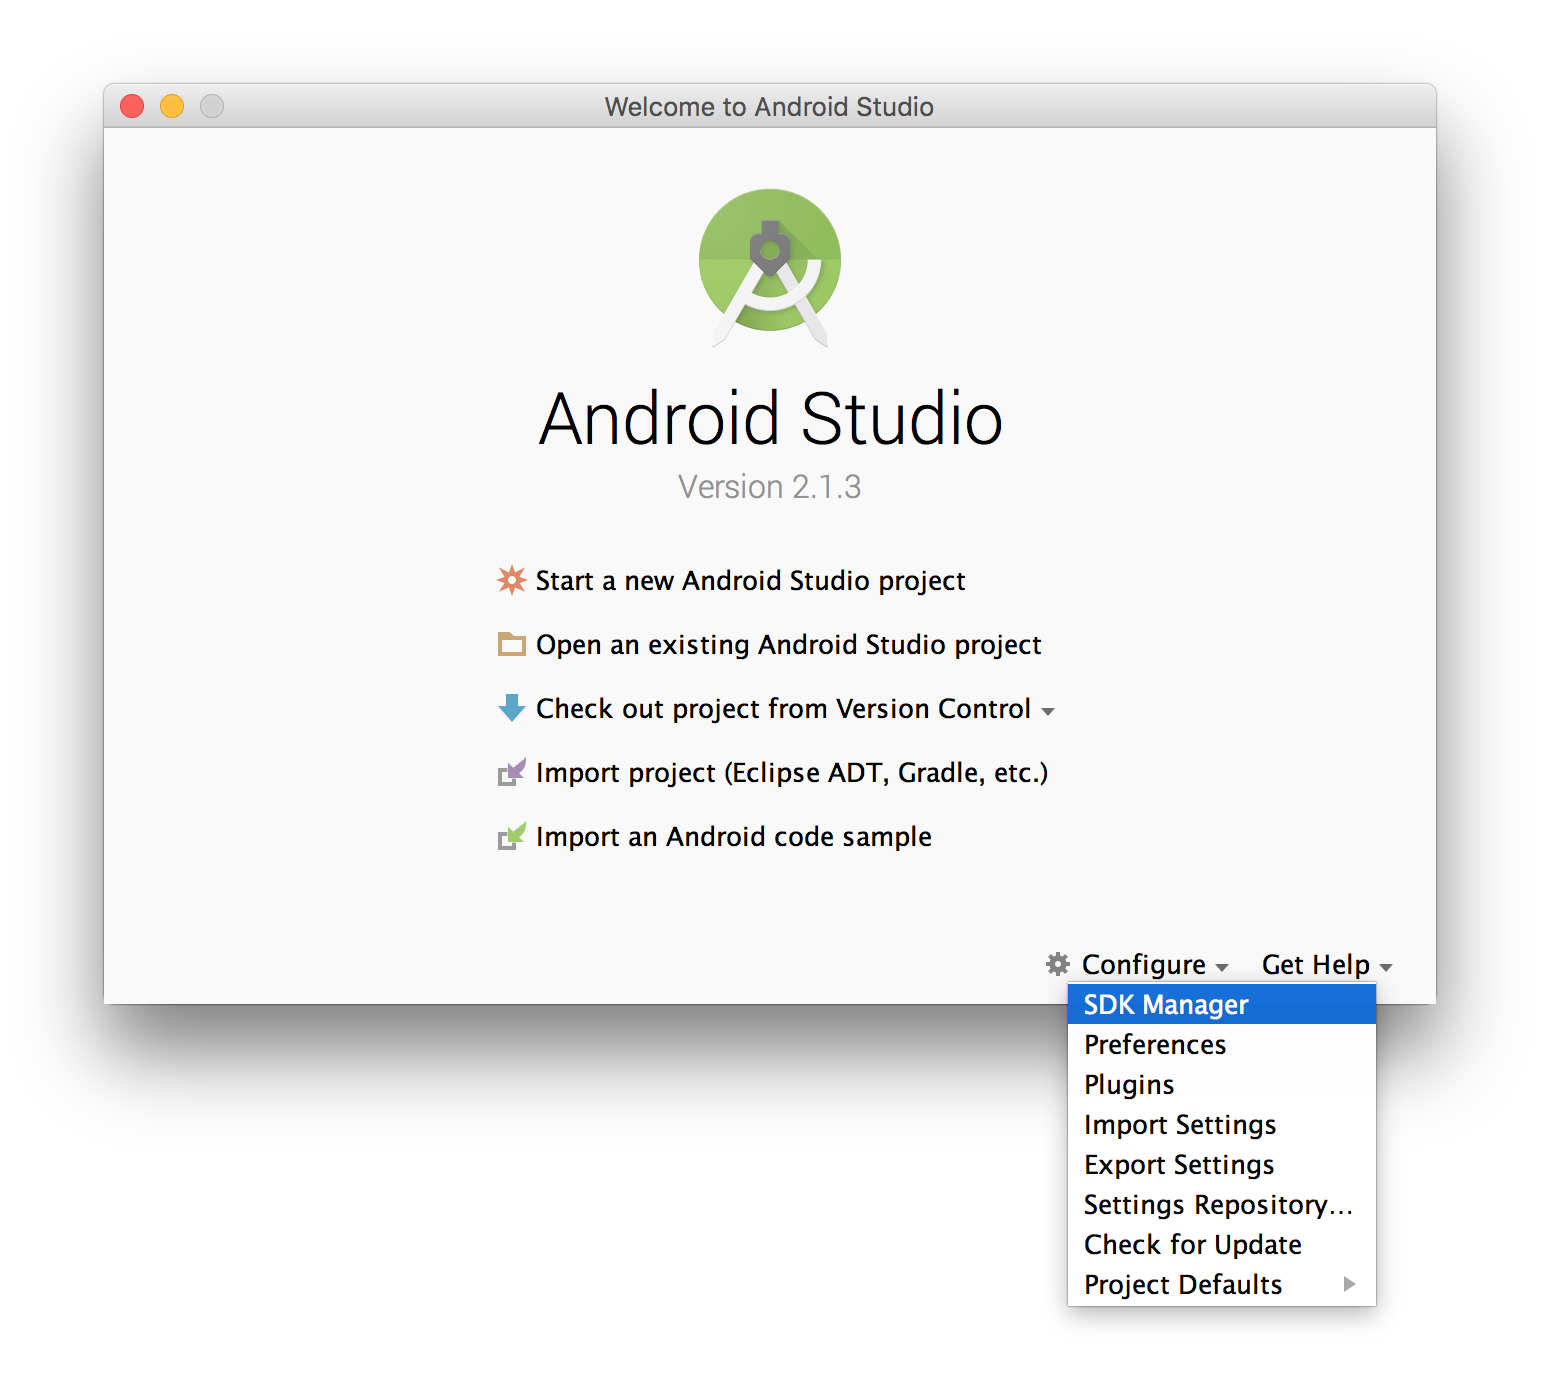
After you downloaded and installed Android Studio, launch it, click Configure, and select SDK Manager.
Check Android 6.0 checkbox, click Ok and follow installation process.
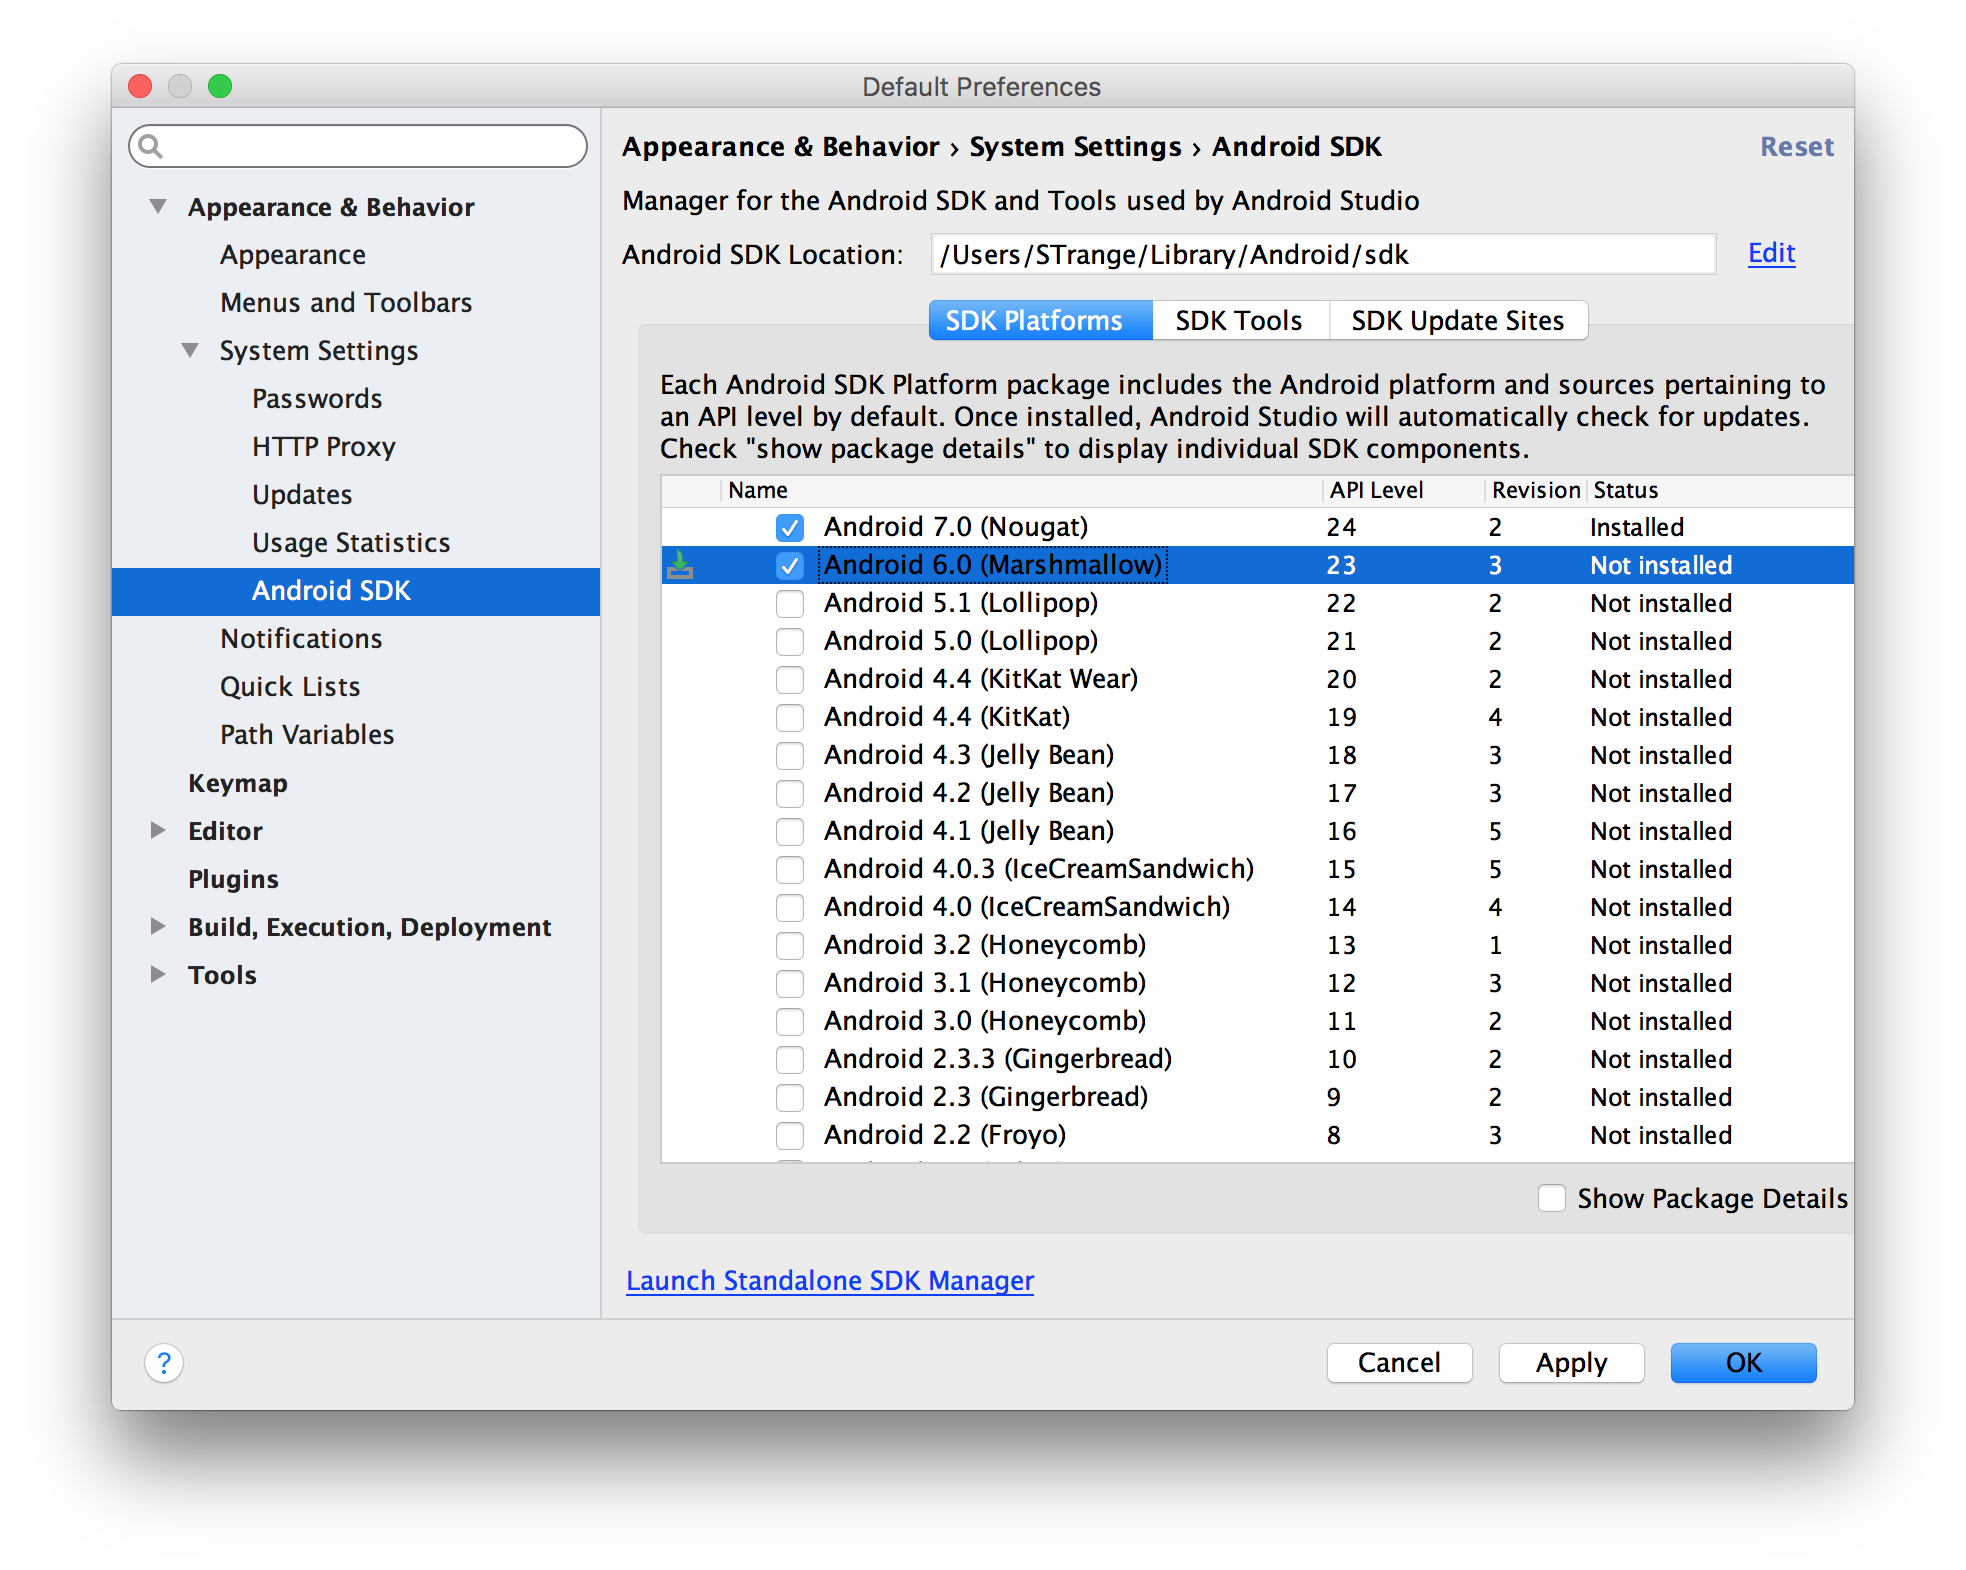
After you’re done launch Android Studio again, click Configure, and select SDK Manager and click Launch Standalone SDK Manager.
Find Android SDK Build-tools 23.0.1, check it, click Install and follow installation process.

Edit Terminal Environment Settings
Run this in terminal to open your shell environment settings file .bash_profile
open -a TextEdit ~/.bash_profile
And add this line
export ANDROID_HOME=~/Library/Android/sdk
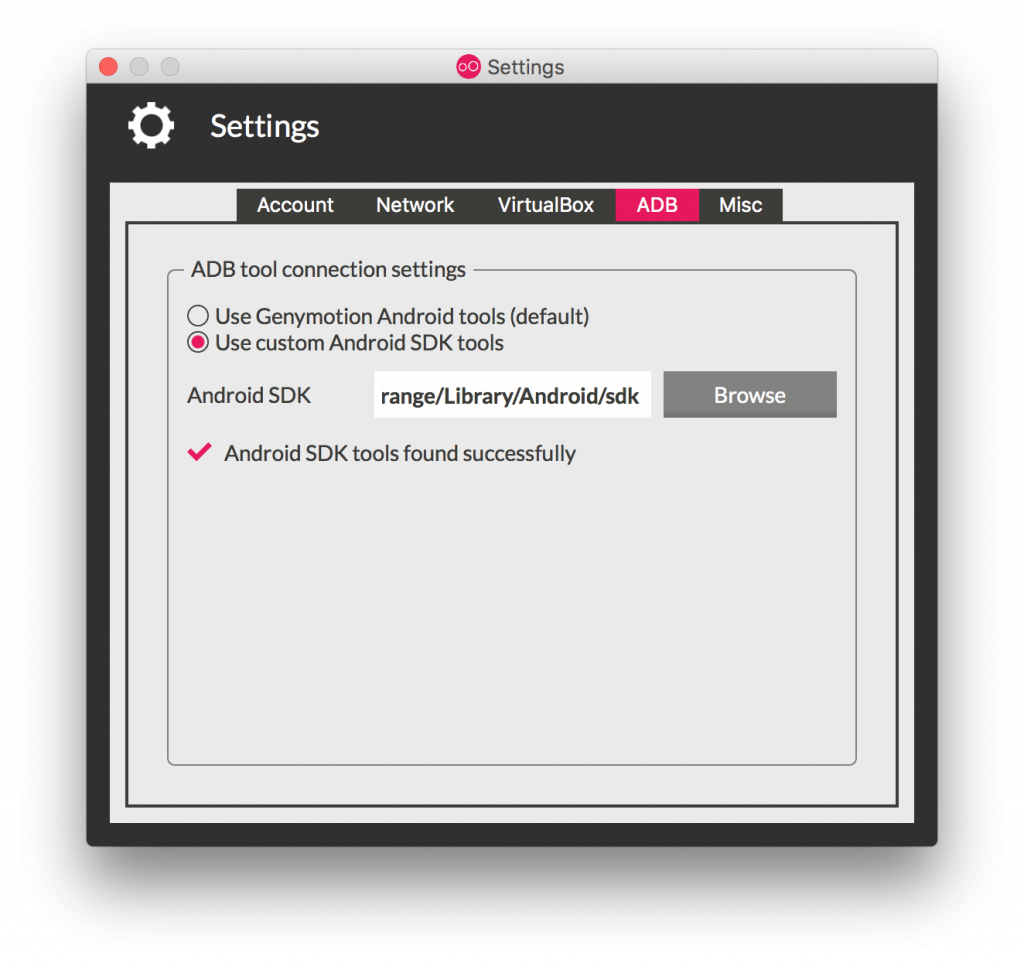
Install Genymotion
To run your Android apps you’ll need to install an Android emulator.
- Download and install VirtualBox.
- Download and install Genymotion.
- Launch it and add new virtual device (I use Google Nexus 5 – 6.0.0 – API 23).
- Click Settings, select ADB tab, choose Use custom Android SDK tools, and change Android SDK location to
/Users/<YOUR-USERNAME>/Library/Android/sdkto use the same SDK you just installed with Android Studio.
Now you can double click a virtual device you just added to run Android apps.
Install Text Editor
This step is optional, since you can use text editor built into your OS, but I highly recommend you to get one of these text editors, specifically designed for people like you who builds apps
Install React Native
Launch Terminal App by clicking magnifying glass icon on top right corner of your desktop, typing in Terminal and hitting Return.
You can make Terminal App stay in the Dock to make it easier to launch it next time. Just do two finger click on Terminal App icon in the Dock and choose Options > Keep in Dock.
Copy and paste these commands into Terminal App window and hit Return.
/usr/bin/ruby -e "$(curl -fsSL https://raw.githubusercontent.com/Homebrew/install/master/install)";
brew install node;
npm install -g react-native-cli;
These commands would install Brew package manager, Node and React Native.
That’s it. Now you are ready to build your first app. Turn the page.
Step 3. Build Your First App
Open Terminal App and run these commands.
react-native init MyFirstApp;
cd MyFirstApp;
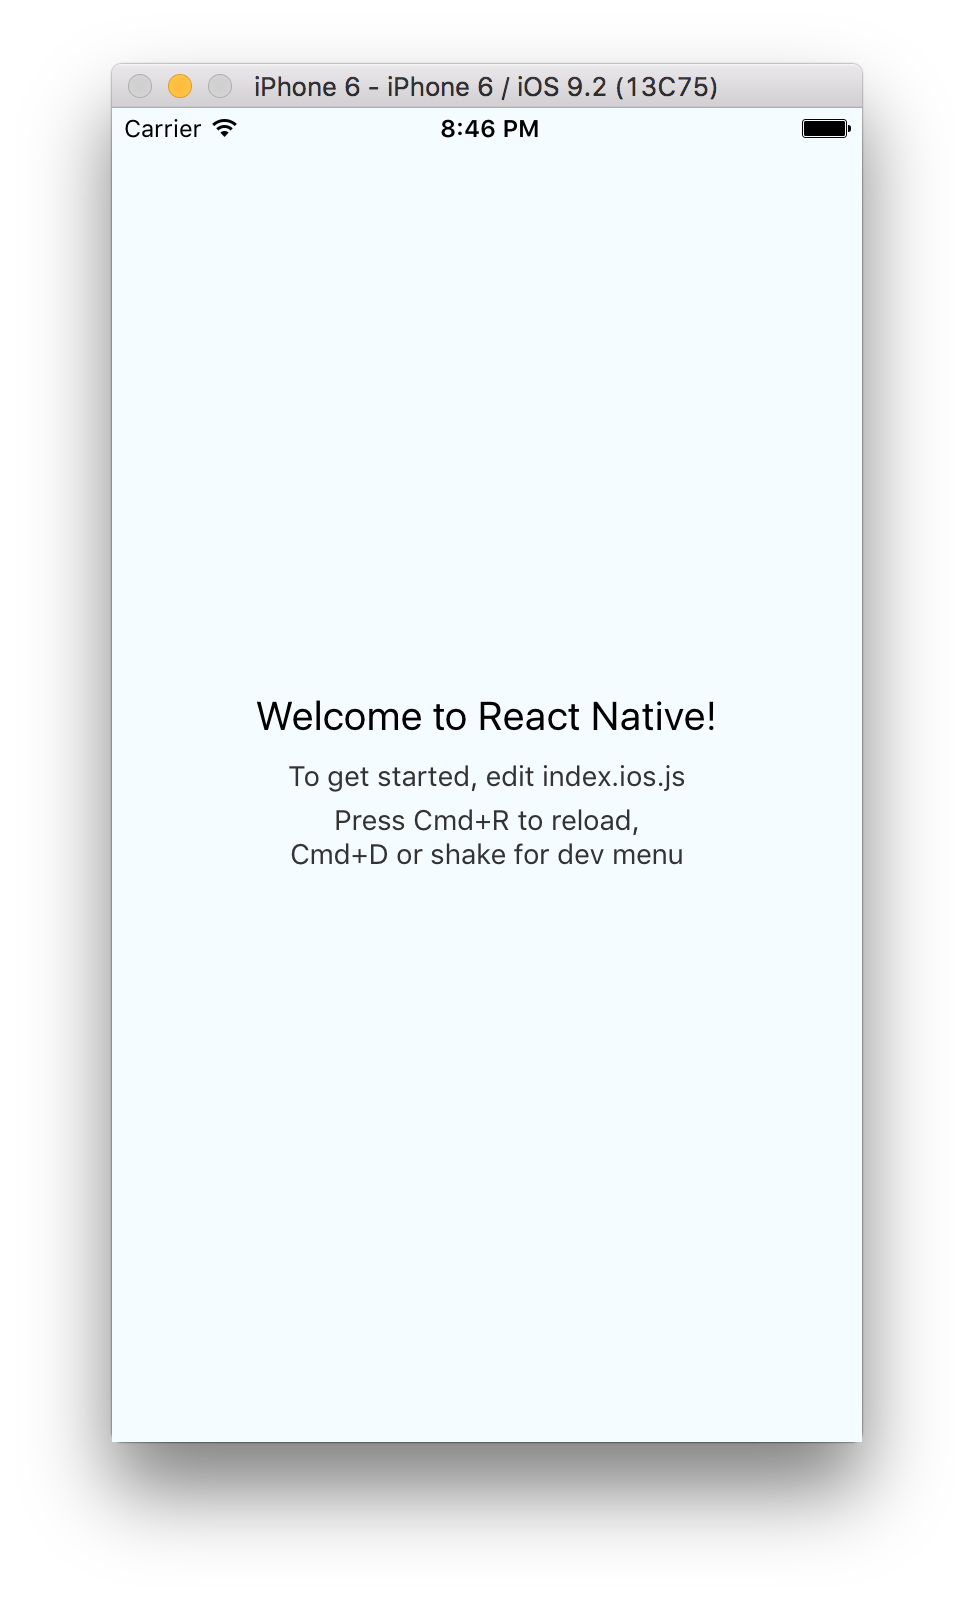
react-native run-ios;
After installation process is finished you will see your first app running in an iPhone emulator.
To run your app in Android emulator make sure emulator is still running, go back to terminal and run
react-native run-android
Congratulations!
That’s huge. You’ve just built your first mobile app with React Native that works on both platforms. Stay tuned and you will learn how to build amazing apps rationally, using just one language for both platforms iOS and Android.


Pingback: Build a List of Pets for Adoption App with React Native – Part 1 | Rational App Development()
Pingback: React Native List App Complete How-To Guide | Rational App Development()
Pingback: Complete Guide to Mobile App Onboarding with React Native | Rational App Development()
Pingback: Universal Tab Bar in React Native | Rational App Development()
Pingback: React Native Cheat Sheet | Rational App Development()
Pingback: Santa’s Map App With React Native | Rational App Development()