Table of contents
What We Will Be Building
We’re going to build an app that users can log into with their Facebook or Google account. Actually, we’re going to build two things:
- Node.js backend. It’s going to handle user authentication via Facebook and Google OAuth and redirect the user back to the mobile app using a special URL that will look like
OAuthLogin://login?user=... - React Native mobile app. It’s going to show login buttons and once clicked send the user to the backend to have them log in with their Facebook or Google accounts.
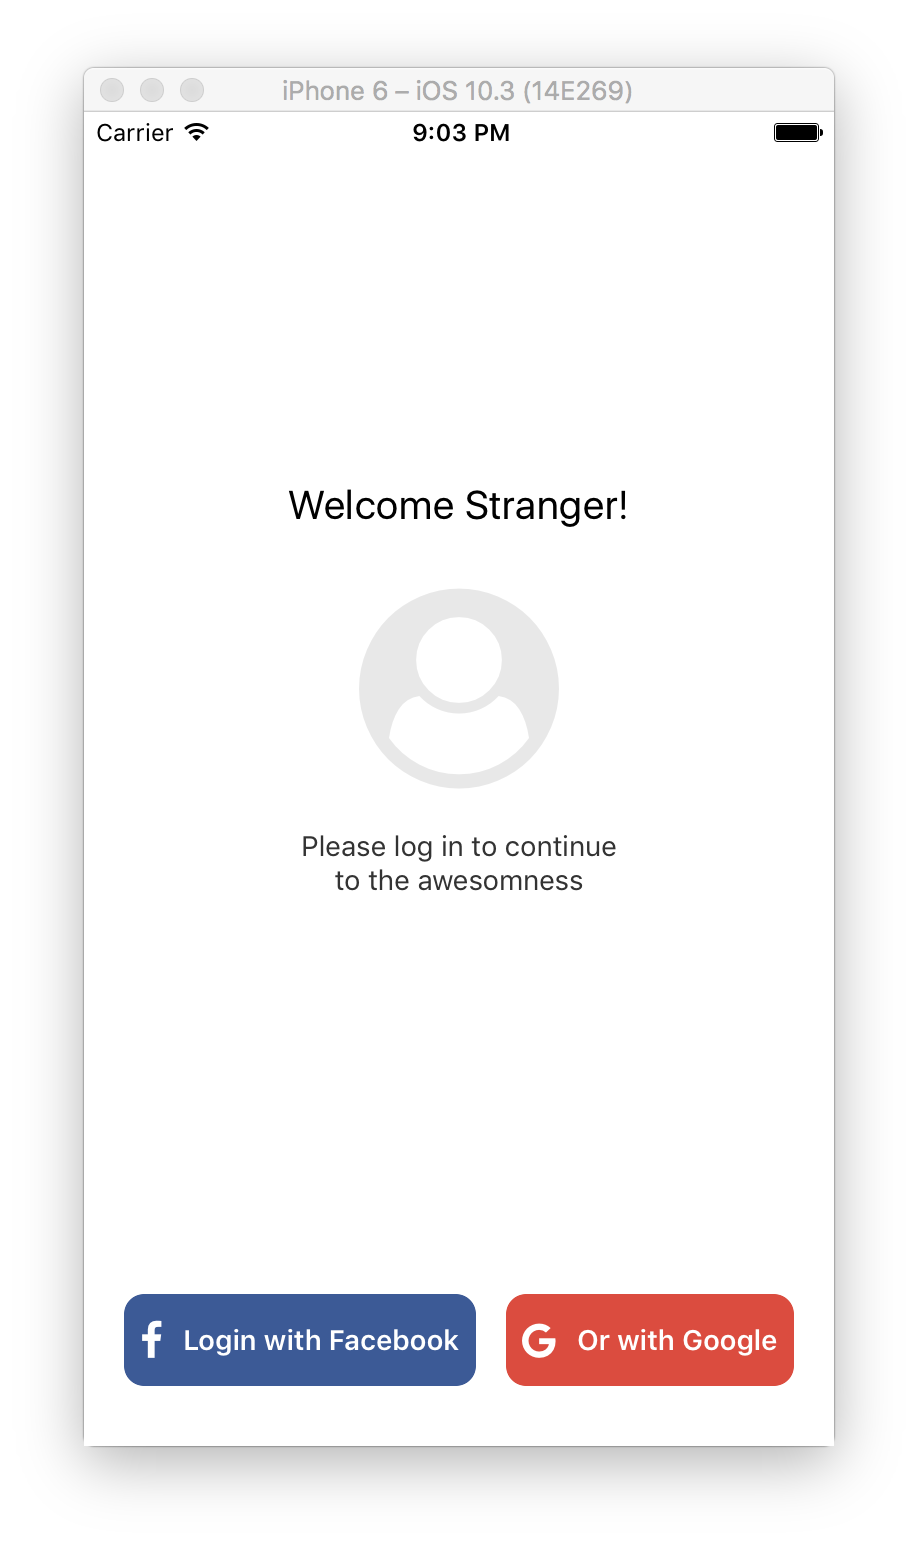
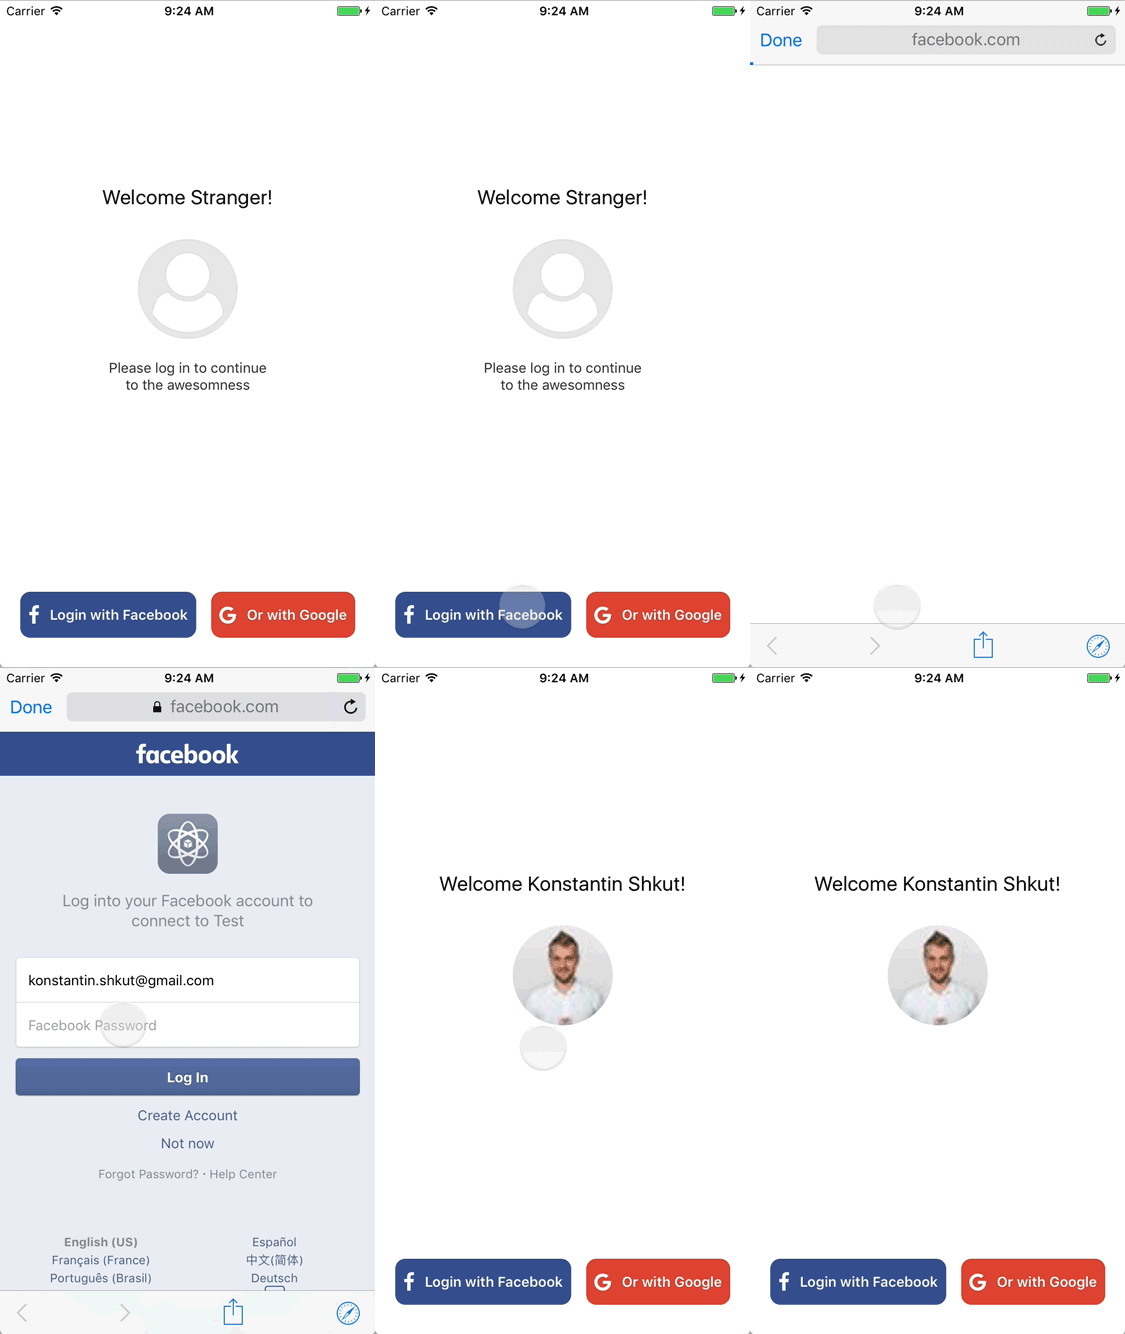
That’s how it’s going to look like.
For your reference, the final code for the app we’re building can be found in this GitHub repo.
Facebook and Google Apps
First of all, let’s set up Facebook and Google apps that will allow us to use their OAuth mechanism to log users in and to get their profile info, such as name, avatar, etc.
We’ll be using
localhostas our backend hostname for development. If you’re planning on running the app on Android Simulator with Genymotion, you should use10.0.3.2IP address instead. And for production, you should be using your actual domain name that you’ll be running the backend on.
Setting Up Facebook App
- Go to https://developers.facebook.com/.
- Click My Apps and then Add a New App.

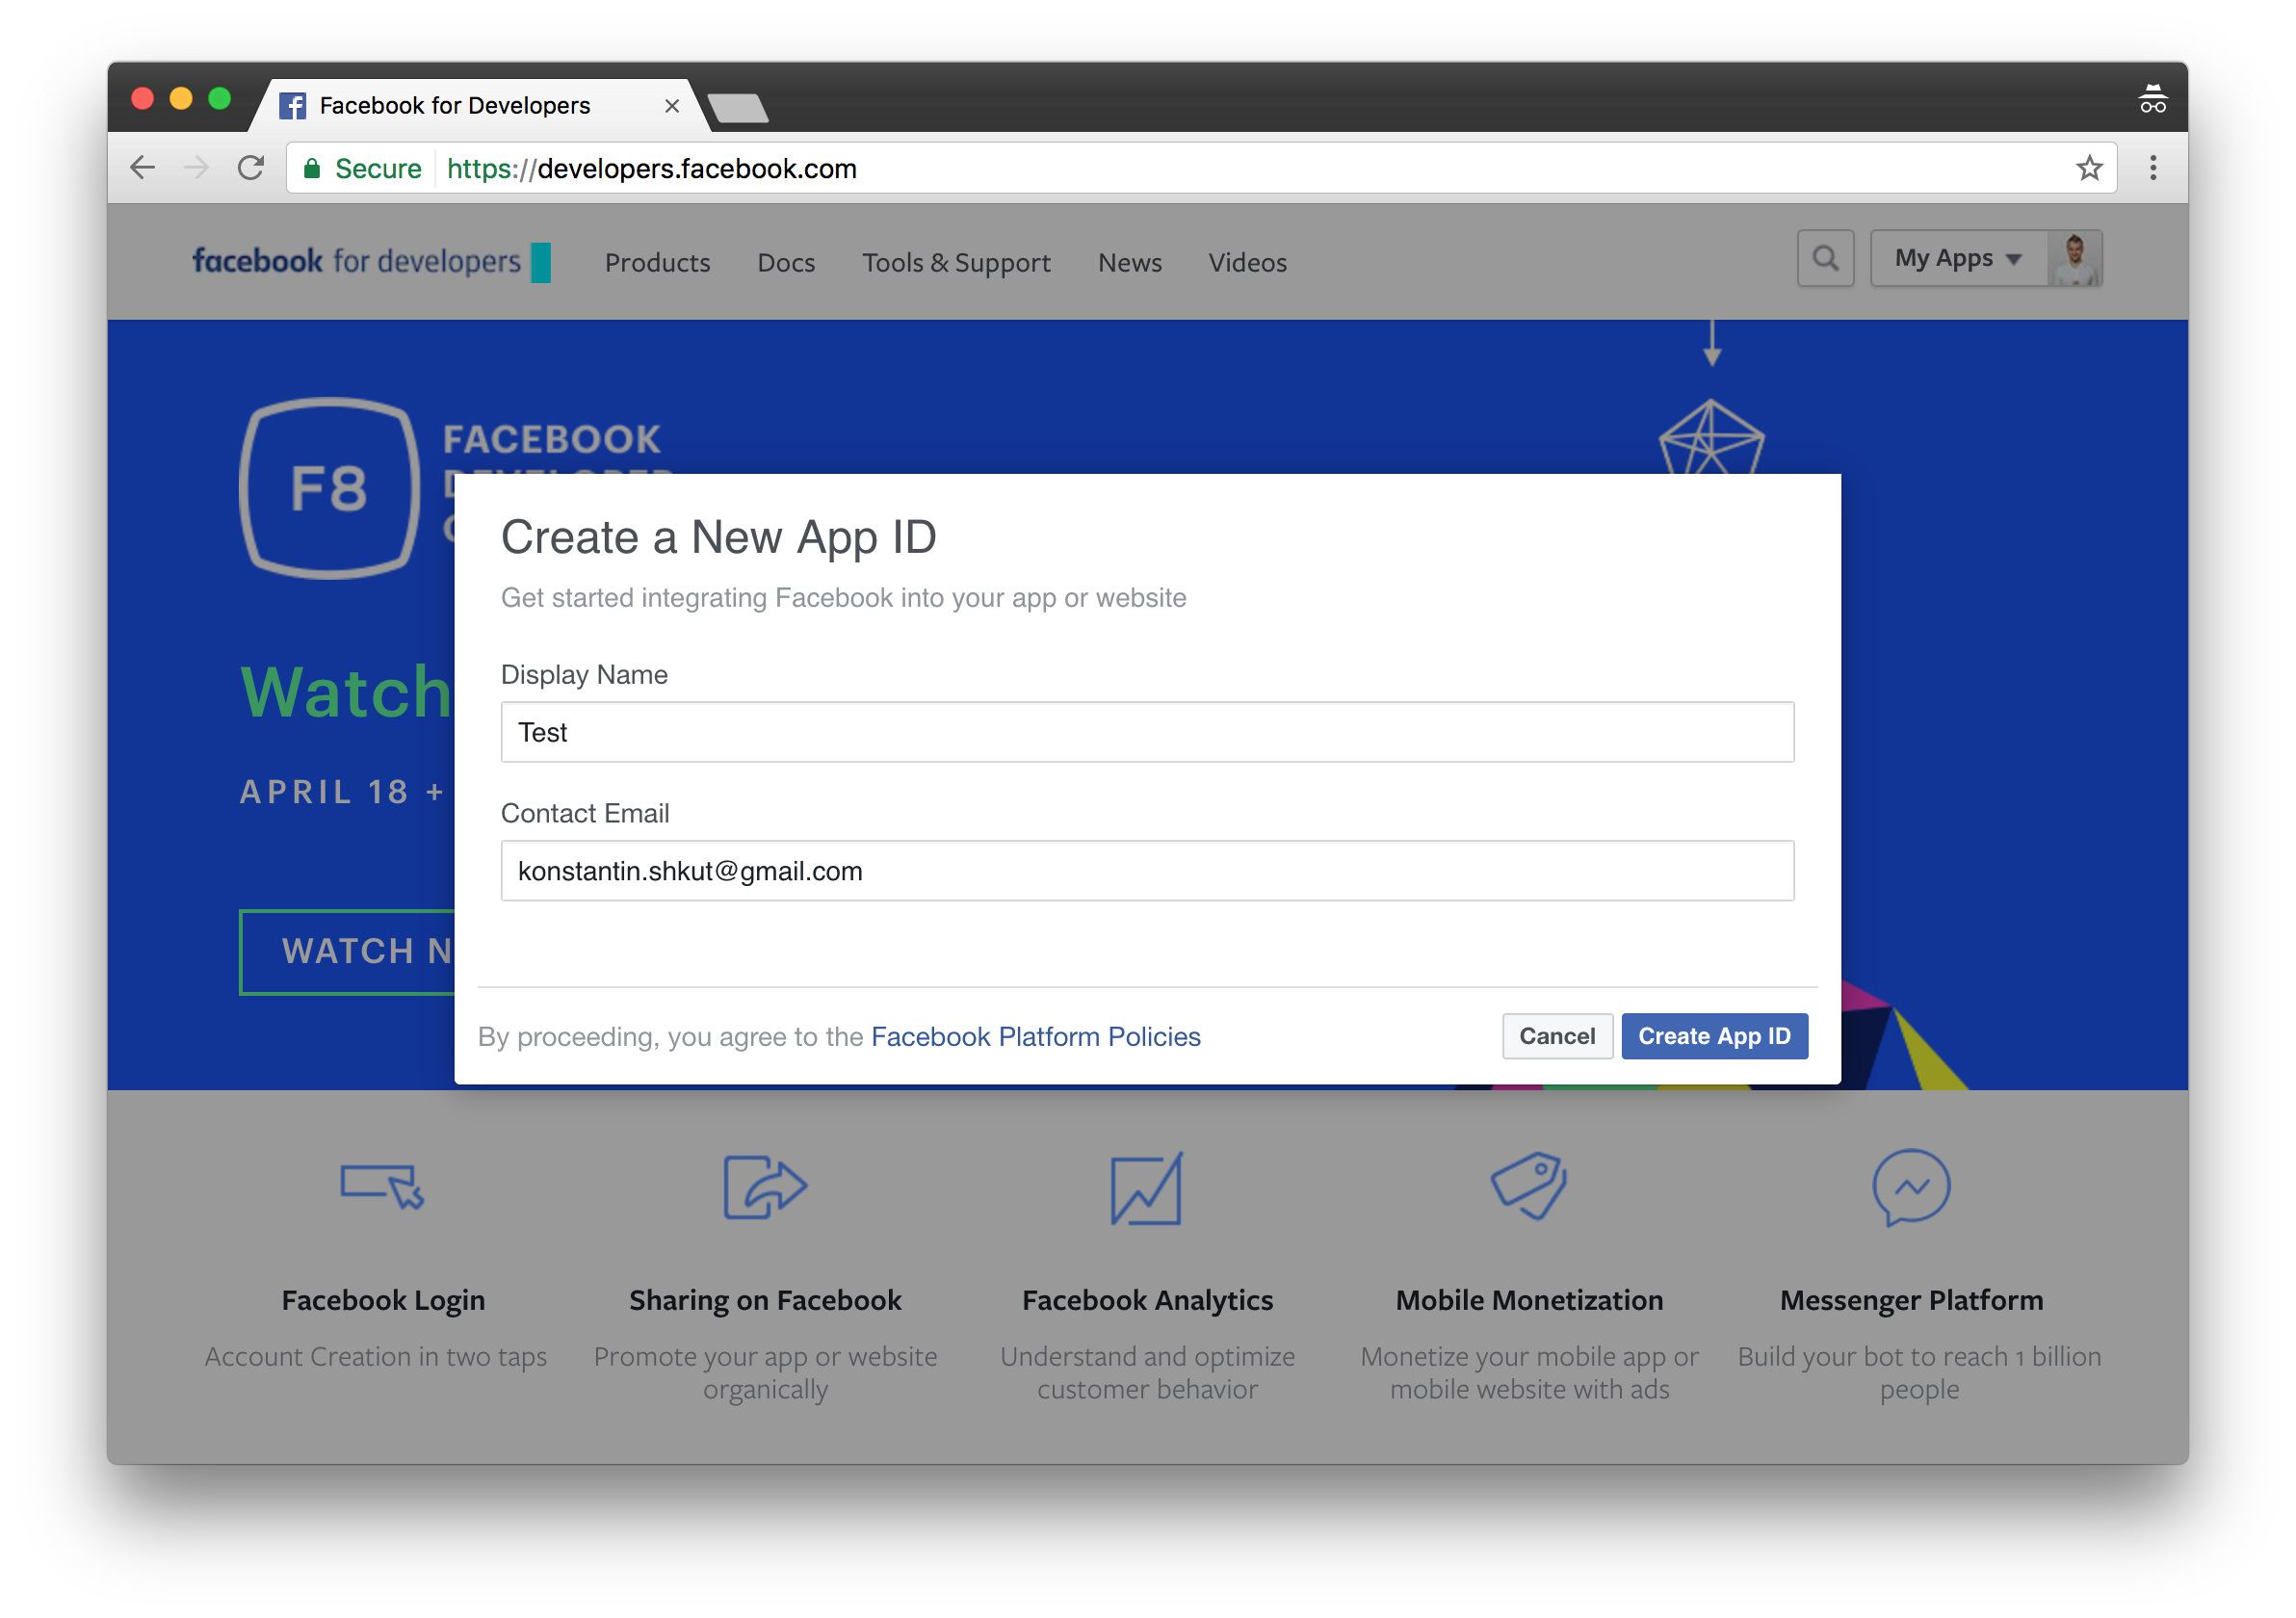
- Enter your app’s name and click Create App ID.
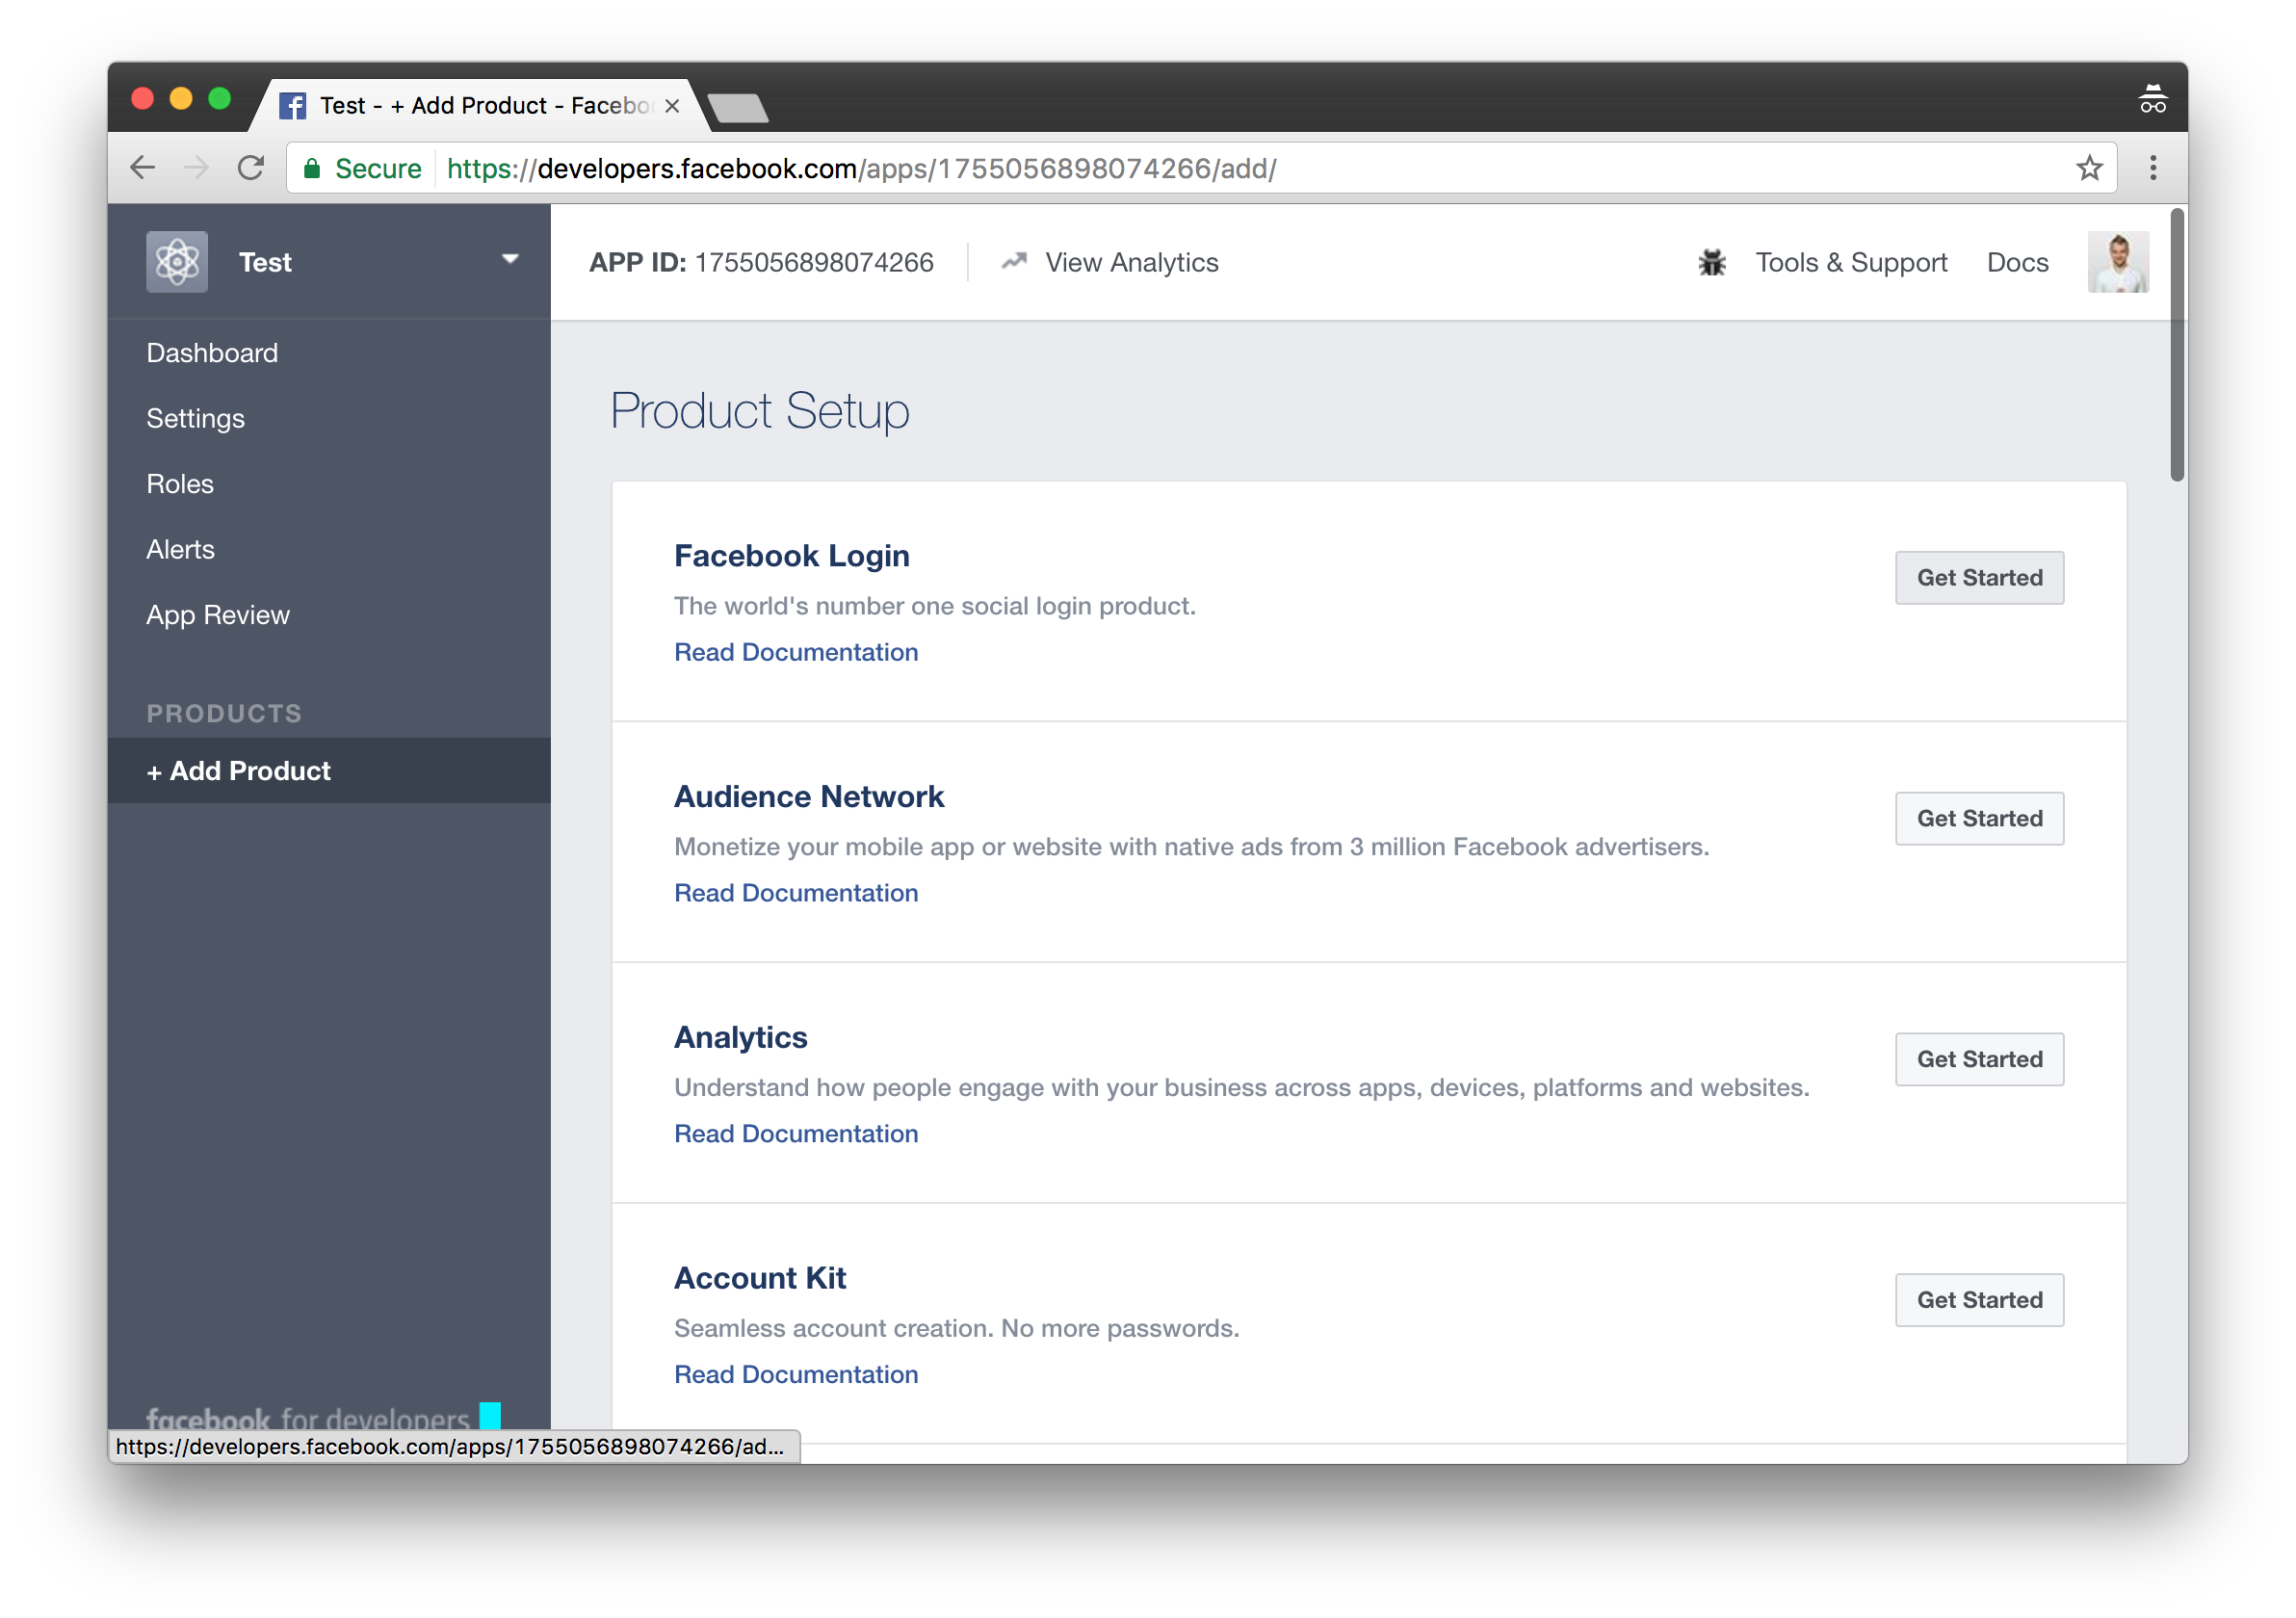
- Click Get Started on the right of Facebook Login section.
- Enter
http://localhost:3000/auth/facebook/callbackinto Valid OAuth redirect URIs field and click Save Changes.
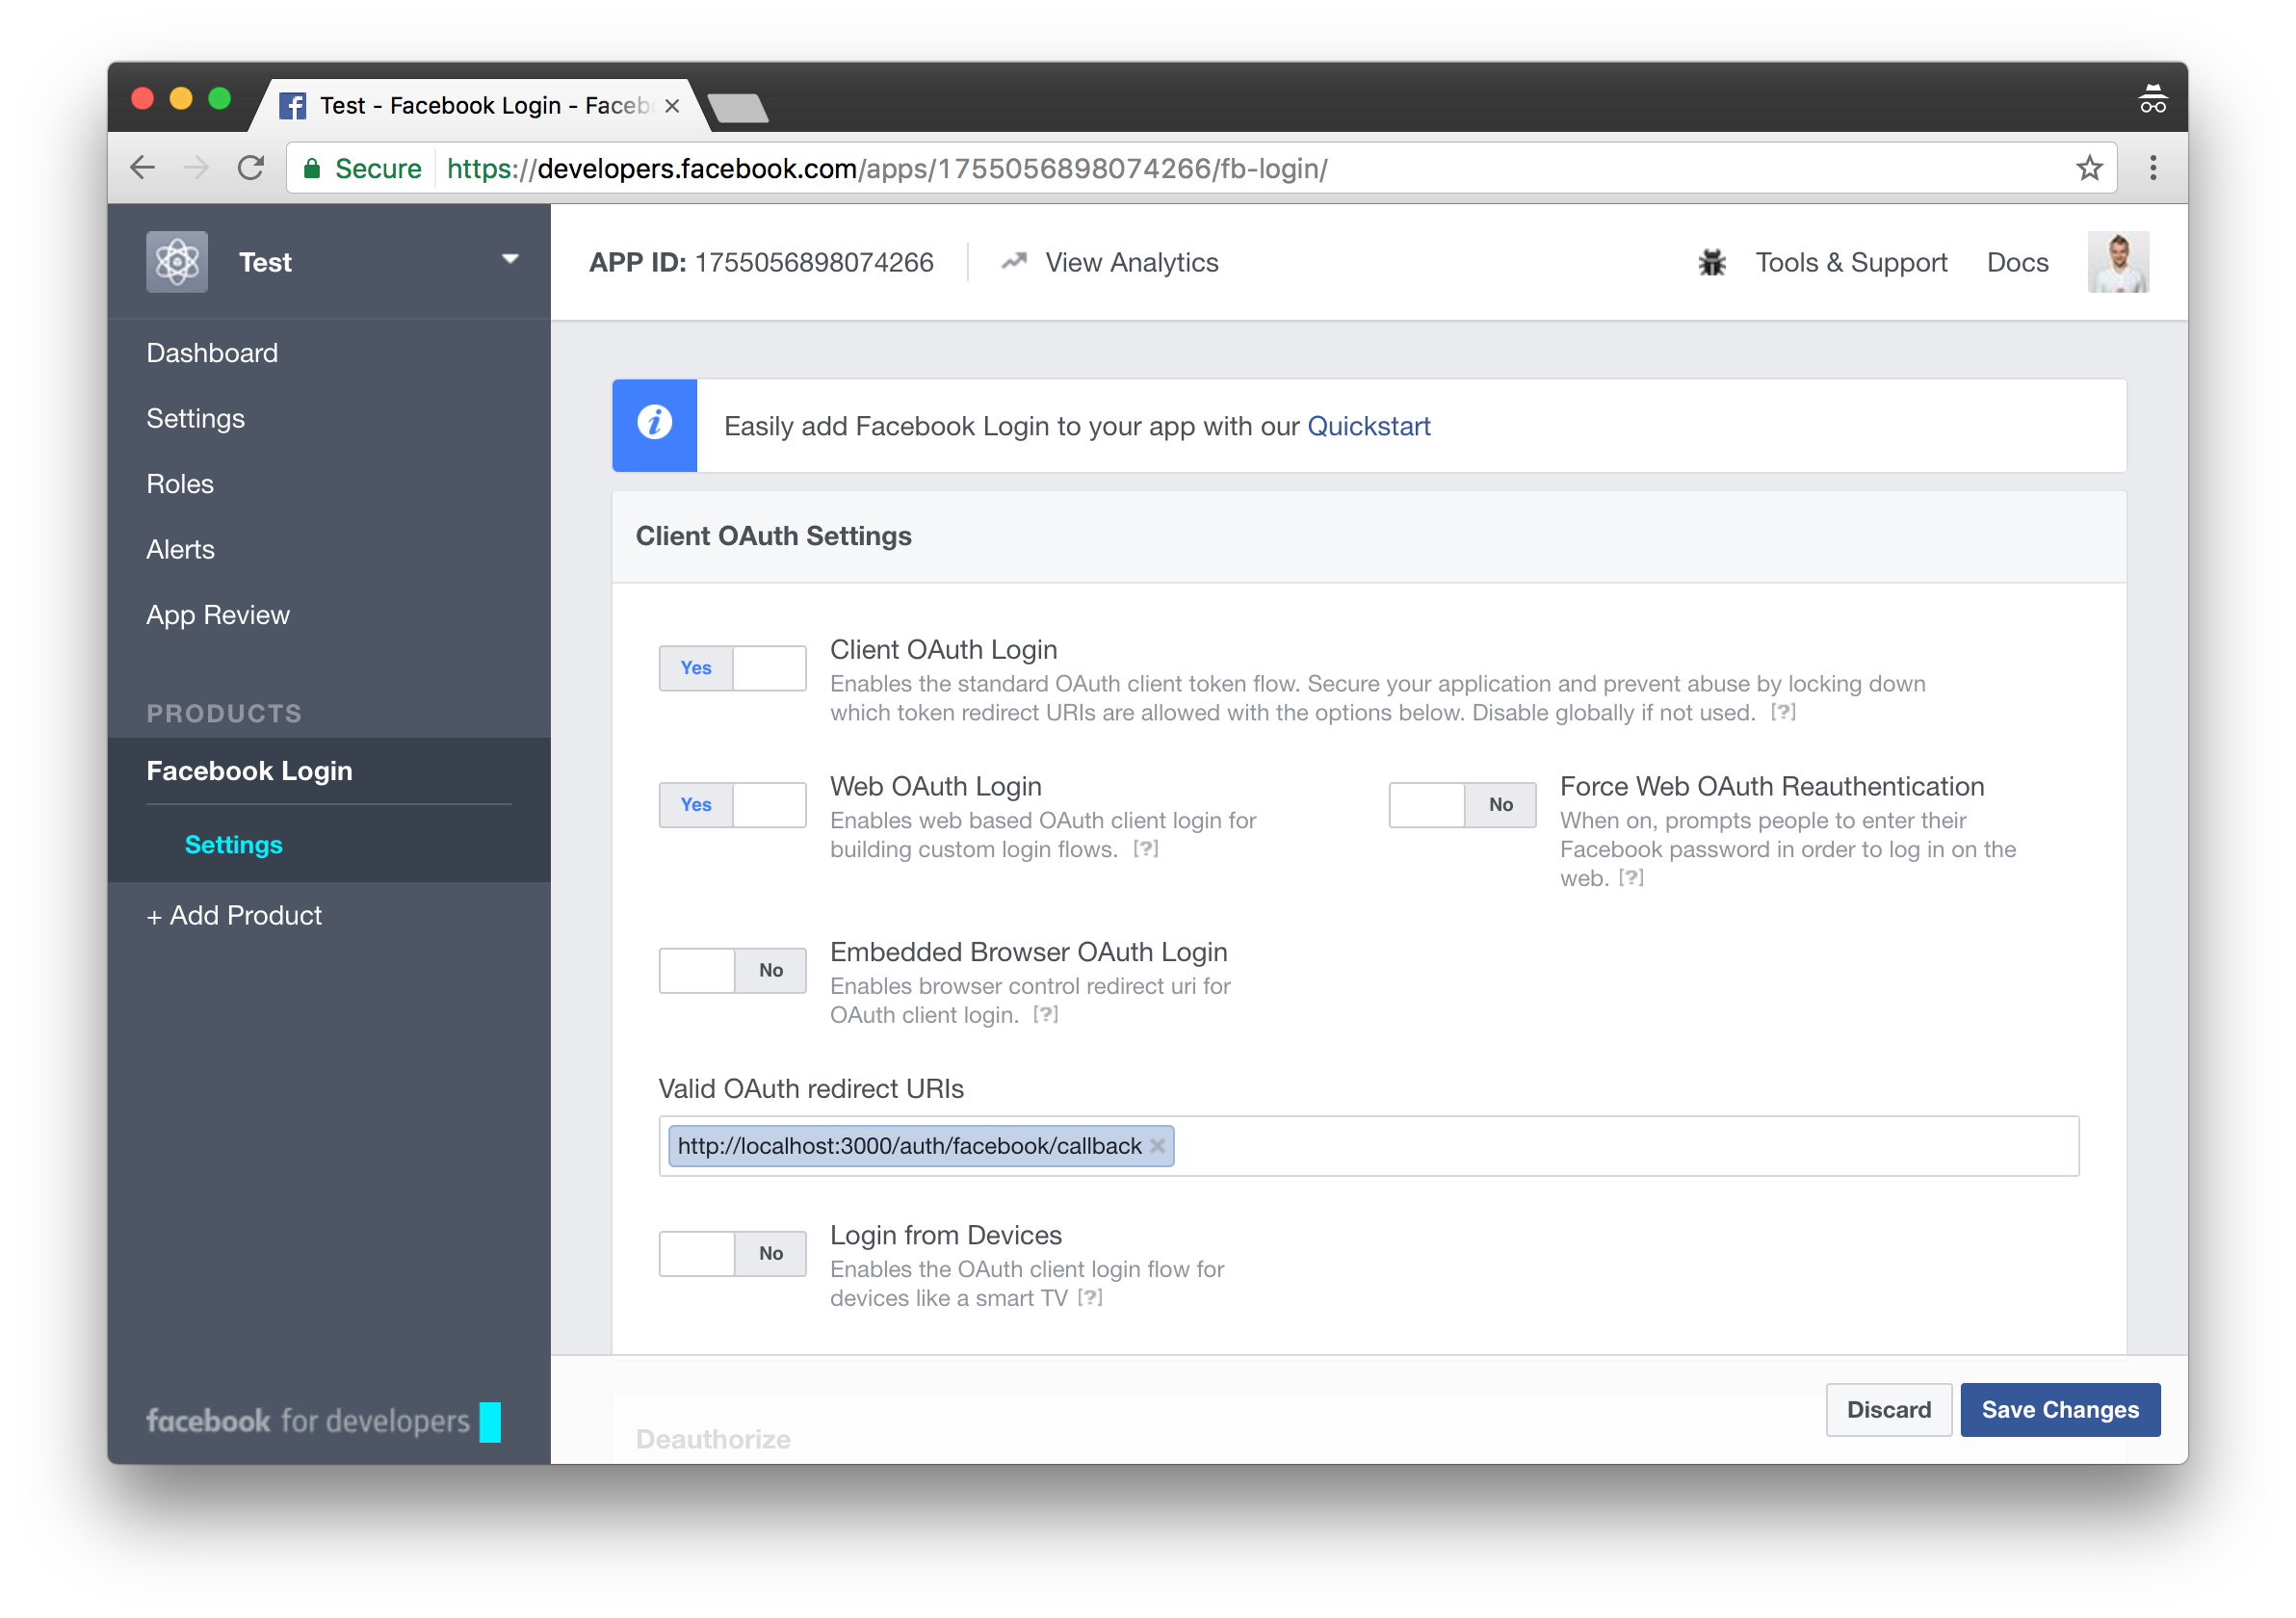
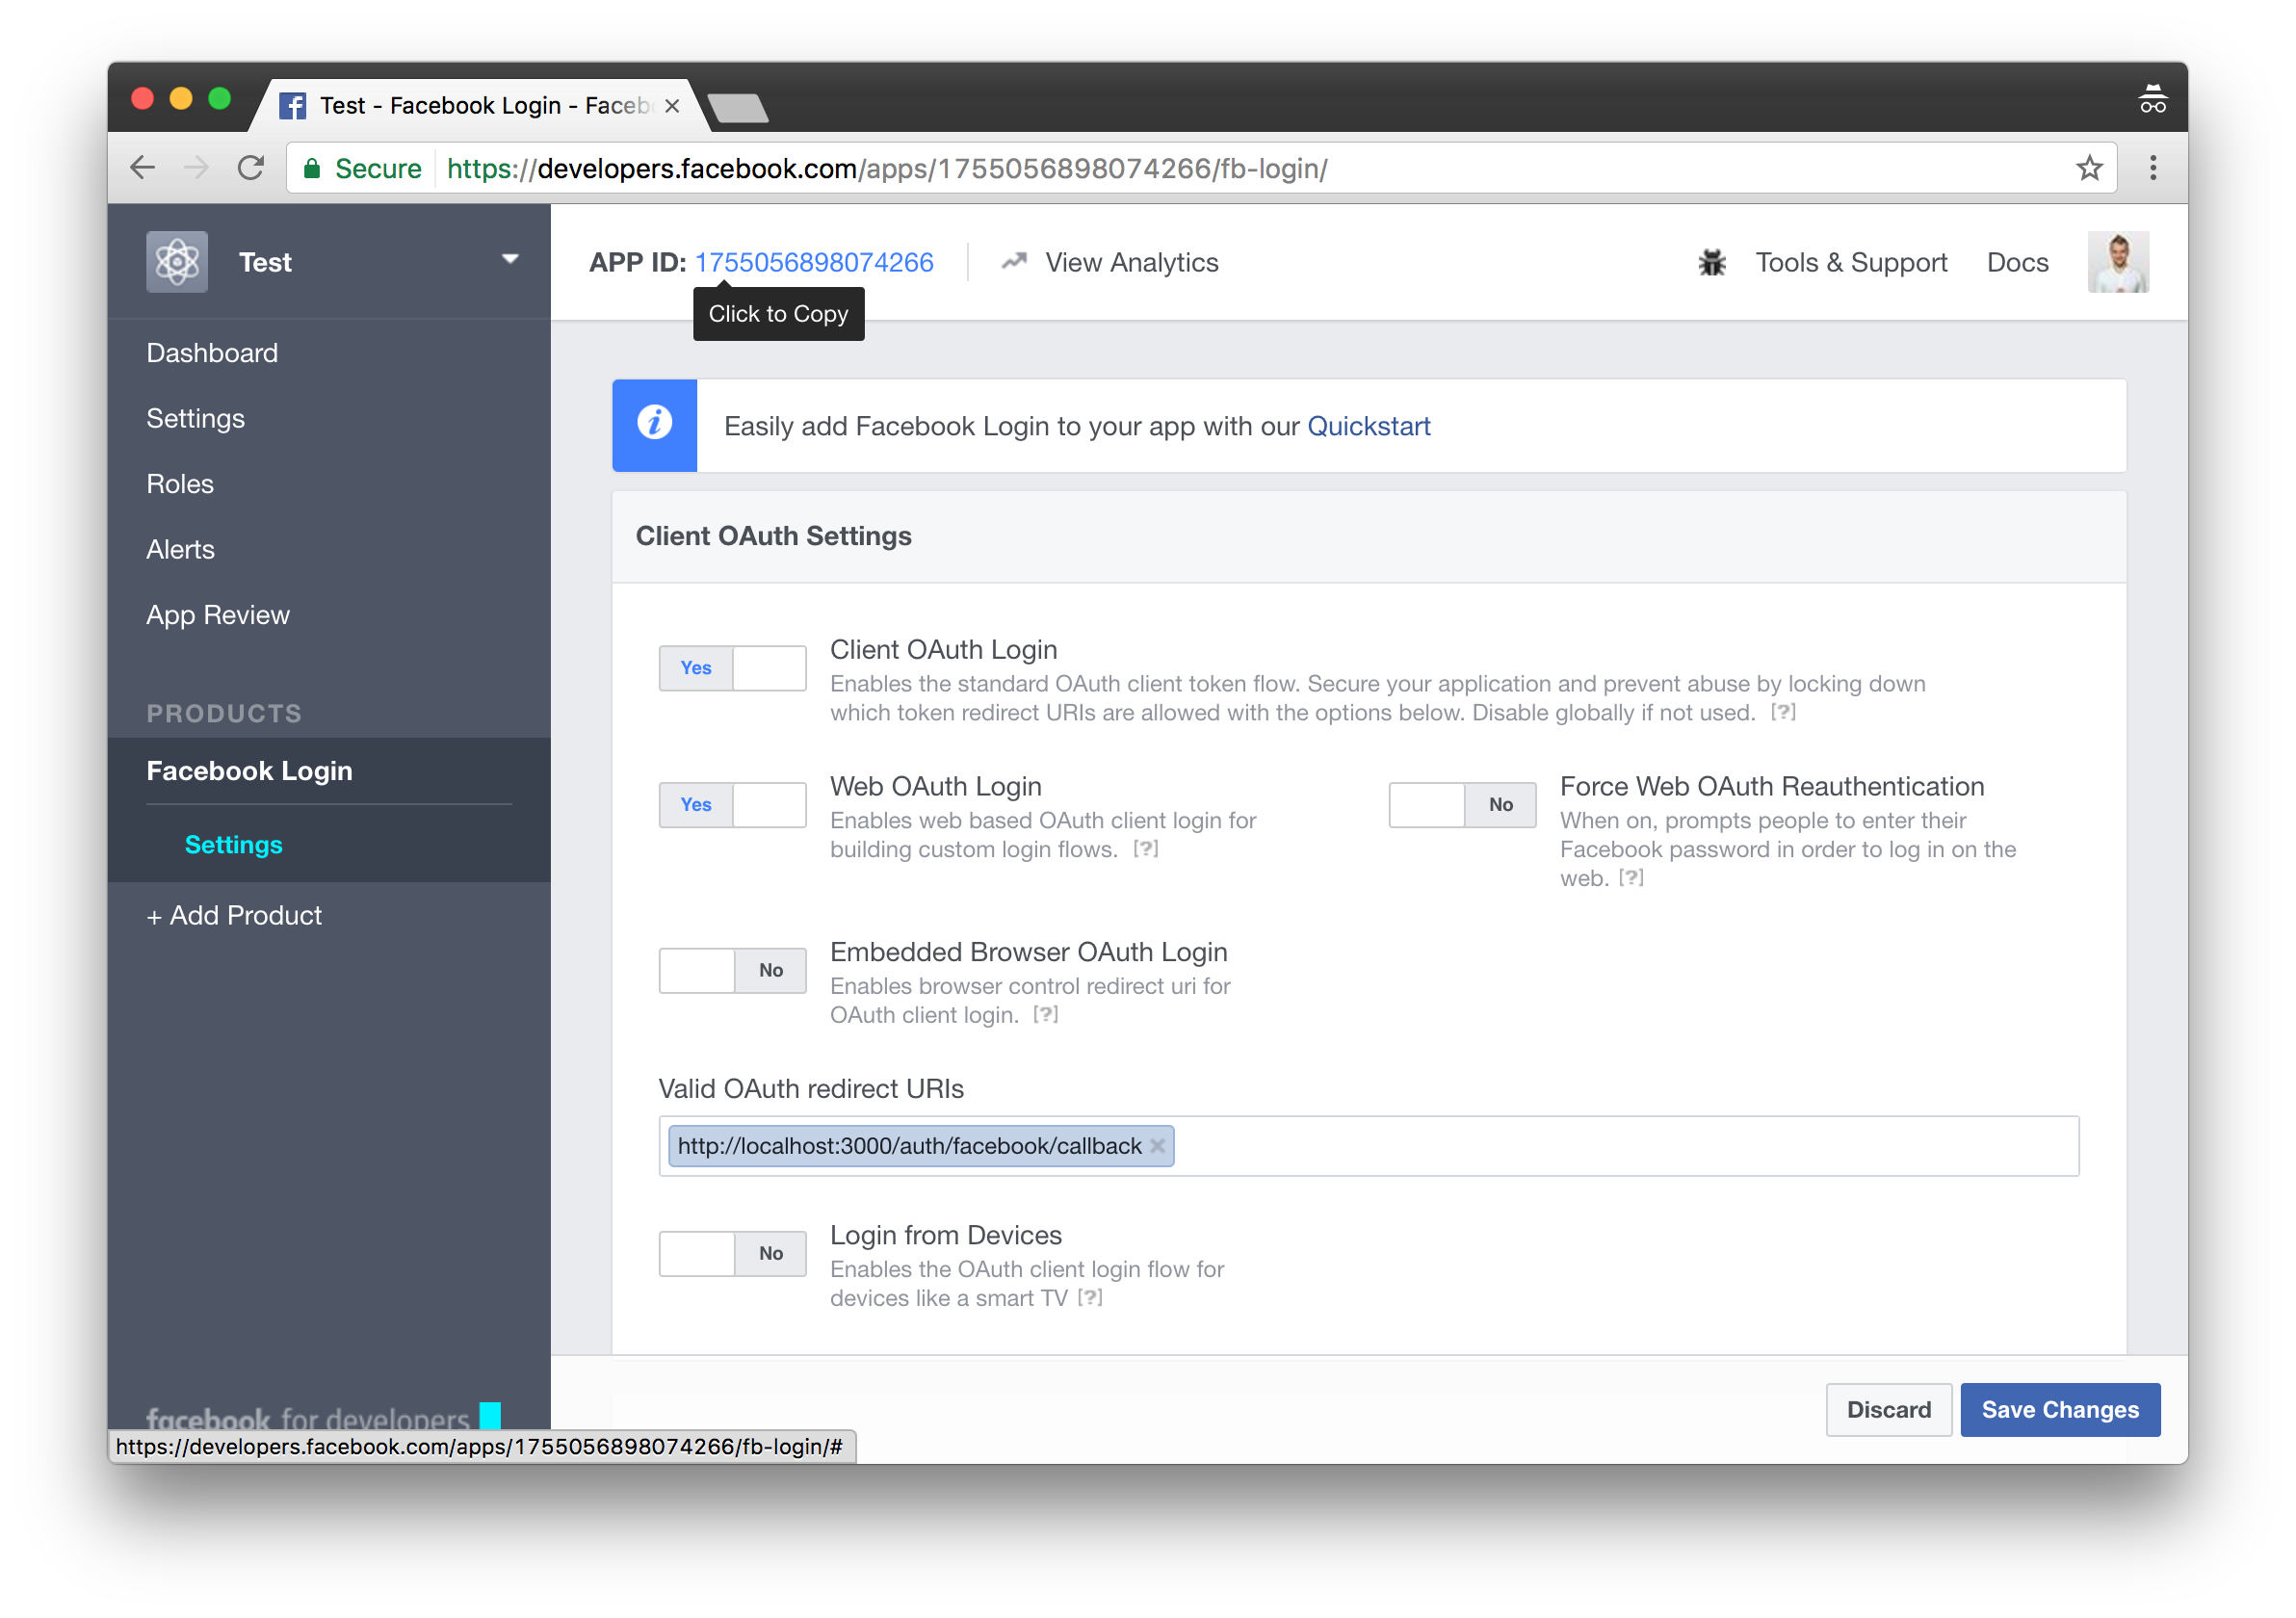
- Copy APP ID at the top of the page and paste it somewhere. We’ll need it later on.
- Click Setting in the left side menu below the Dashboard.
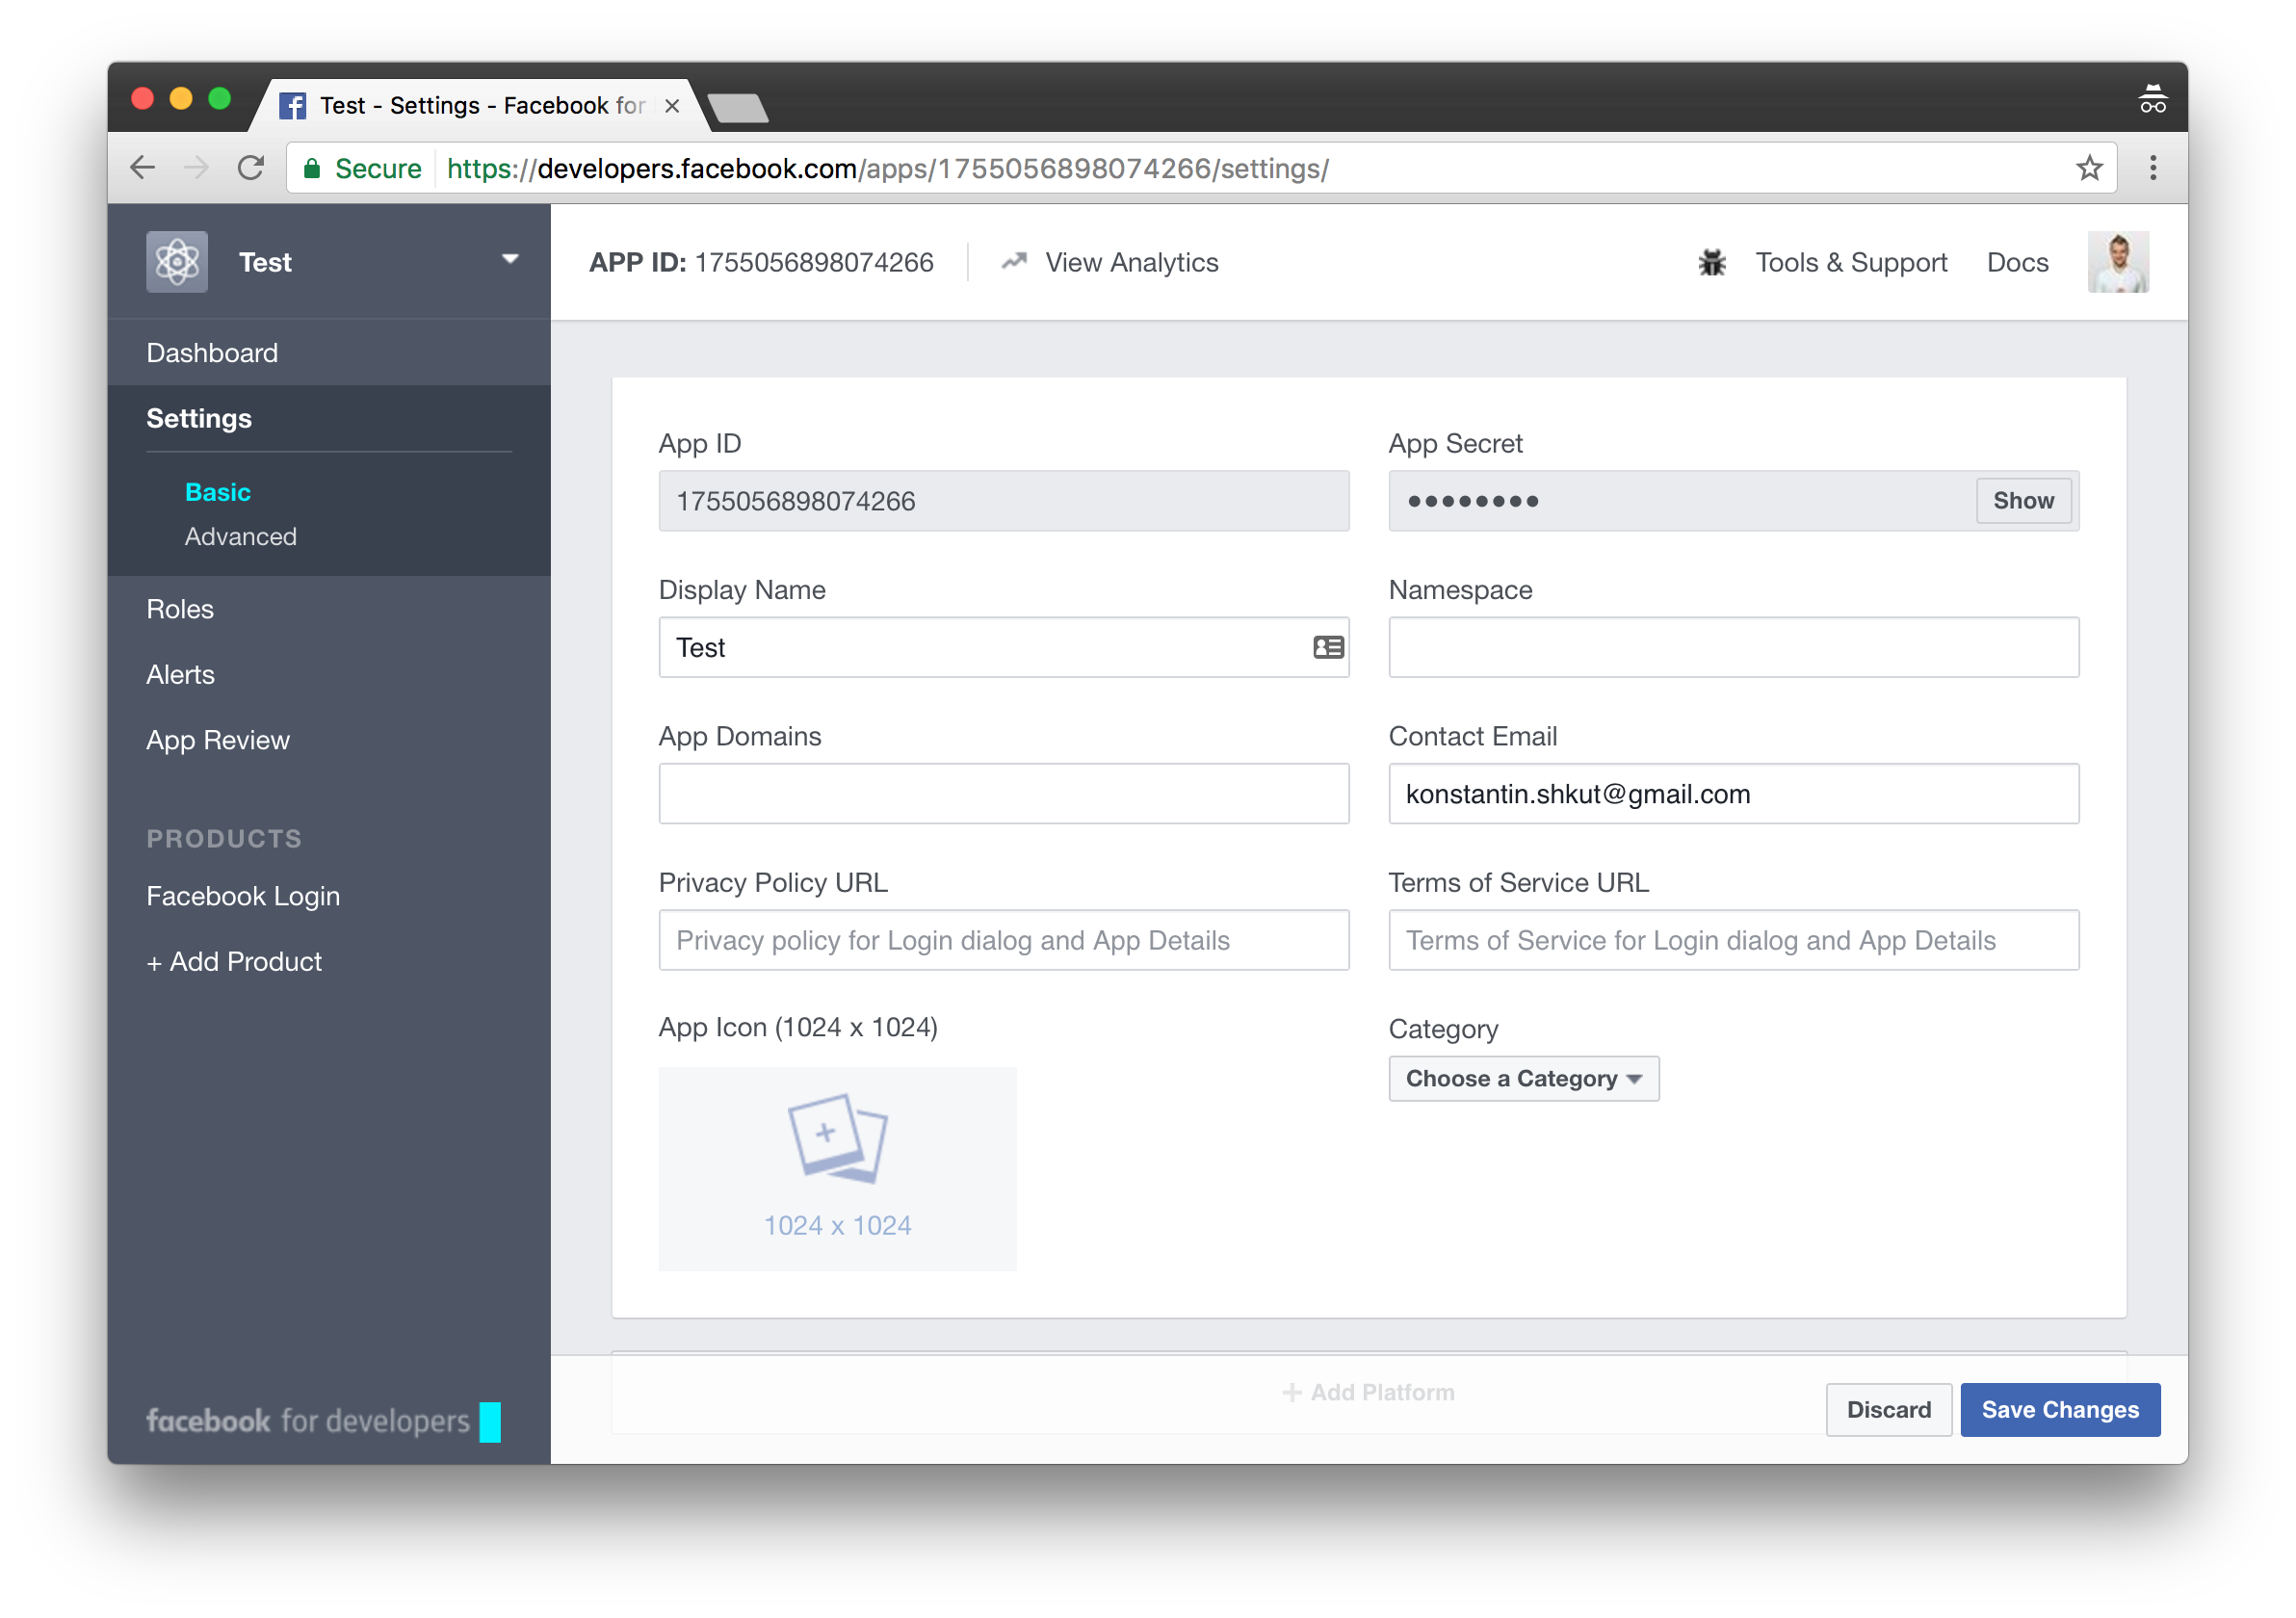
- Click Show in App Secret section and copy the secret. Again, paste it somewhere to use later on.
Setting Up Google App
- Go to https://console.developers.google.com/
- Click Select a project at the top of the page.
- Click + on the right to create a new project.

- Enter your project’s name and click Create.
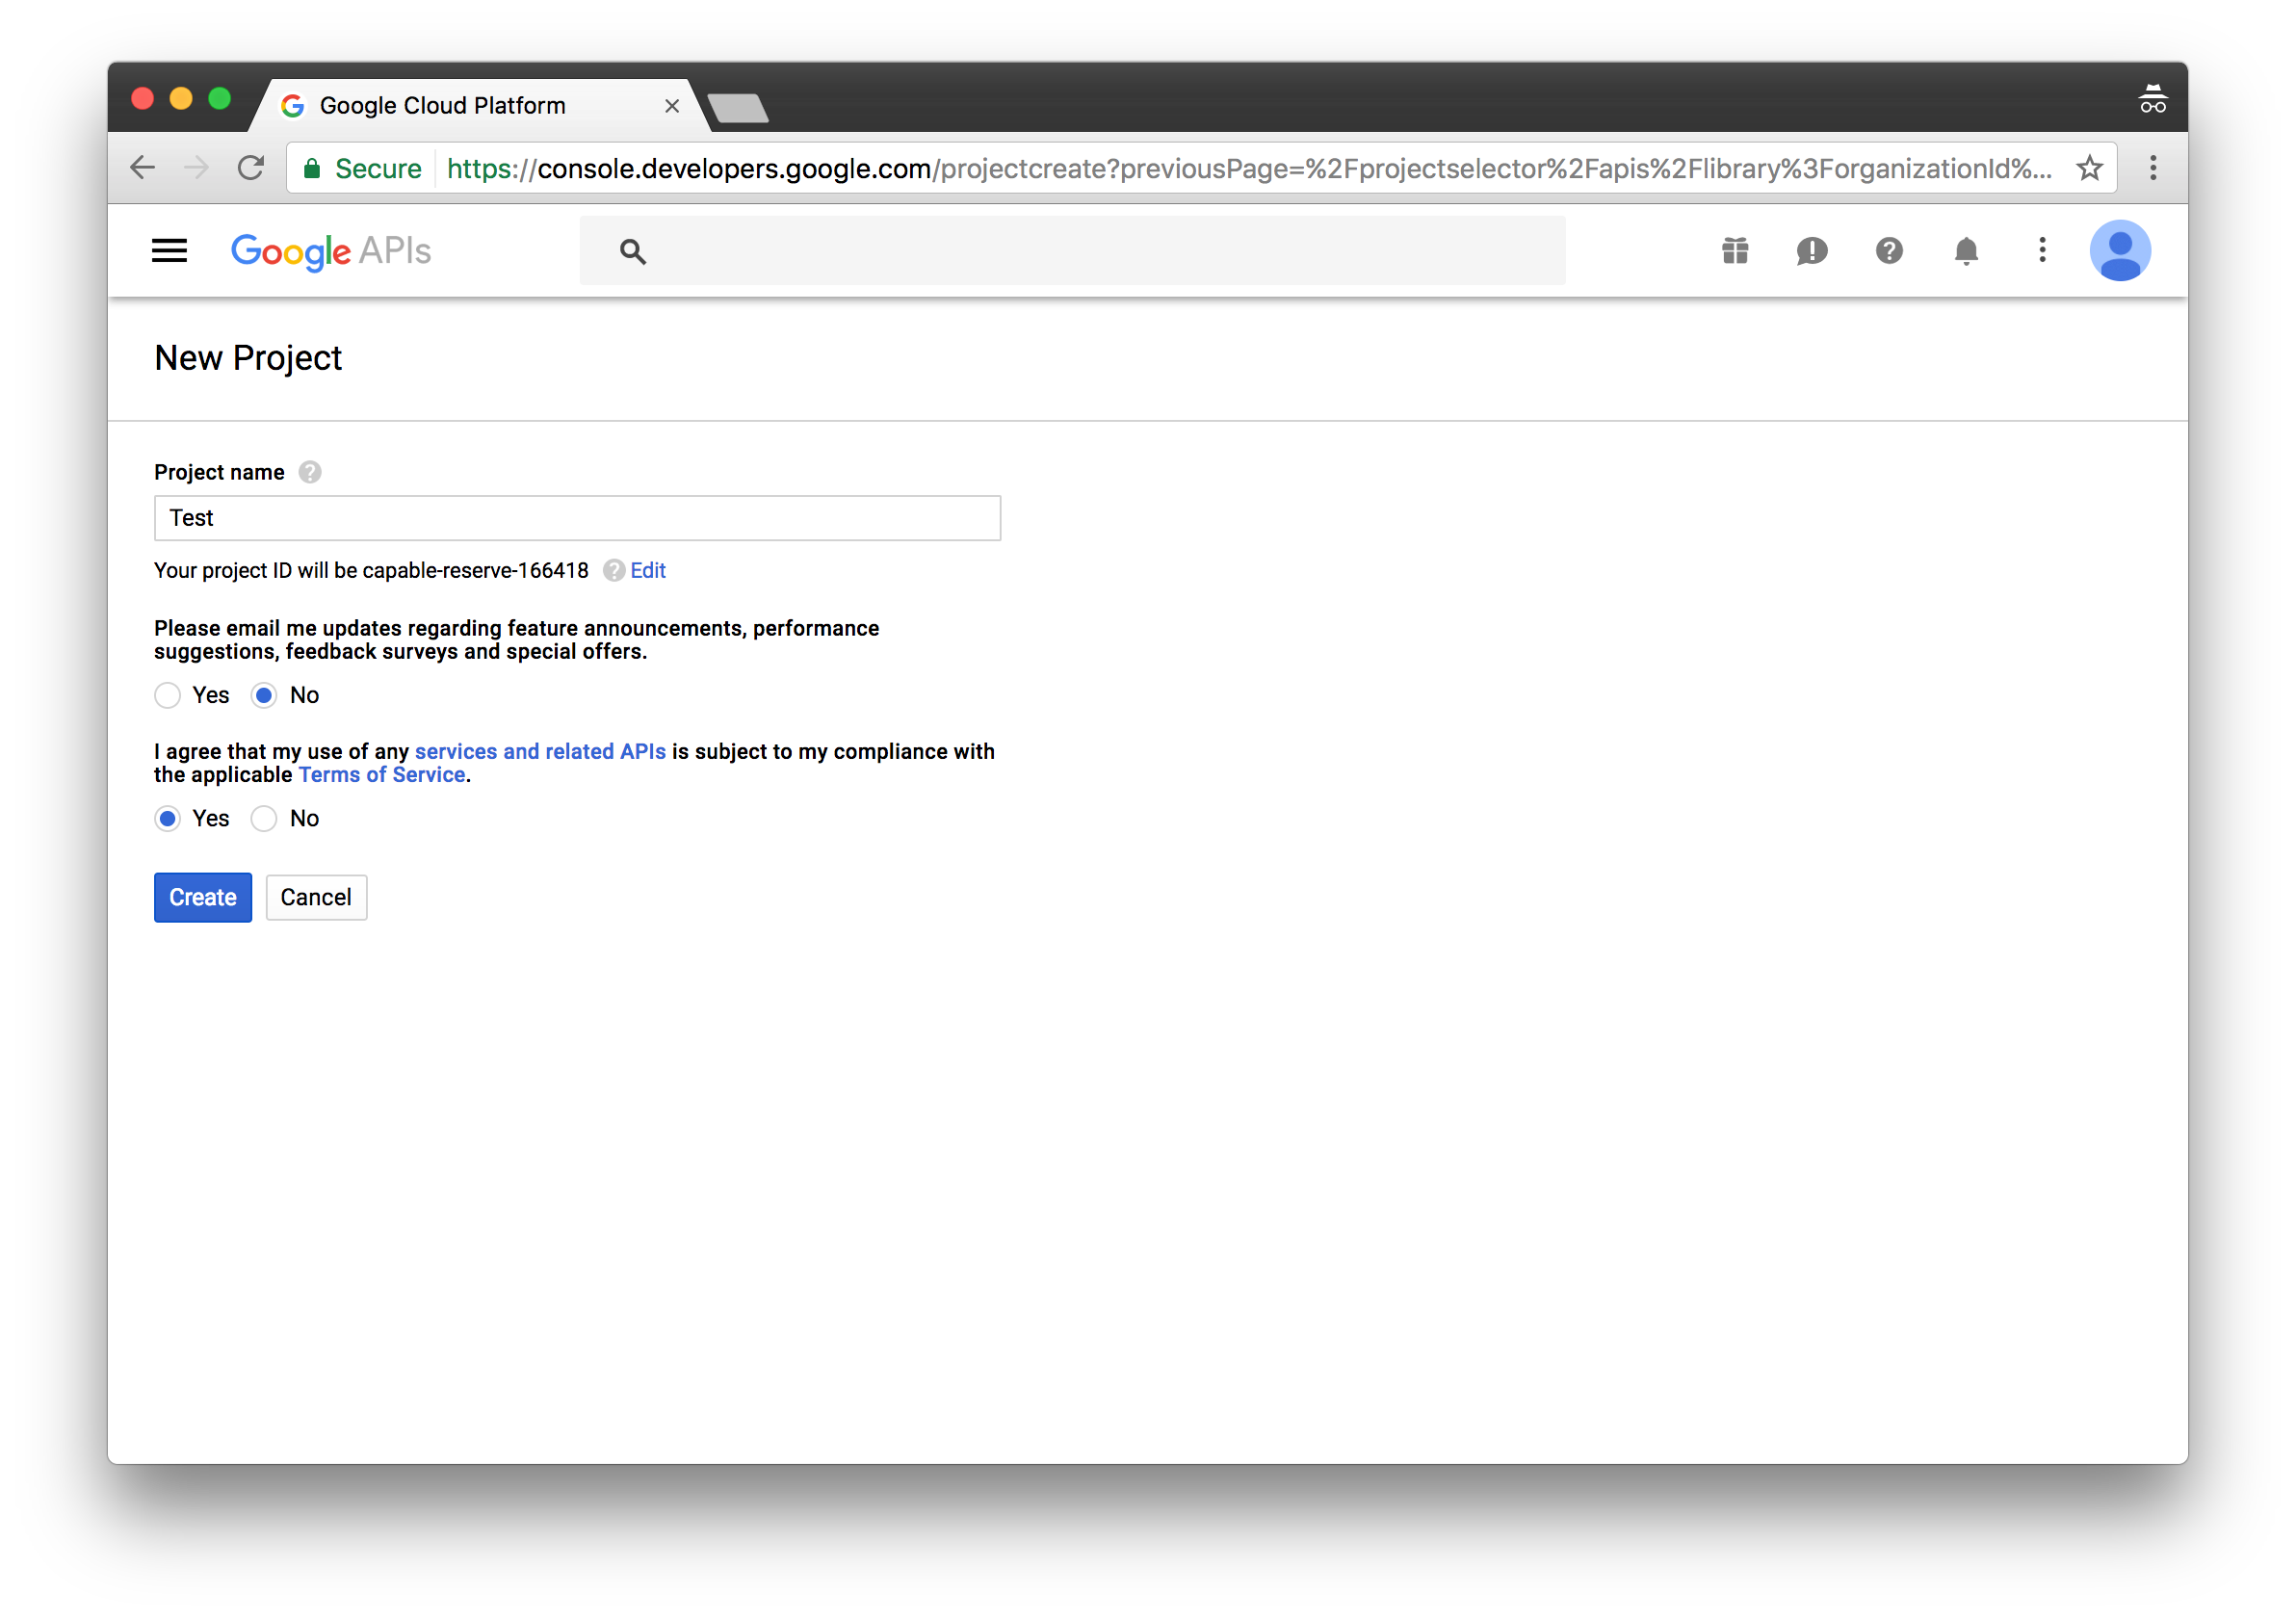
- Click Select a project at the top of the page again.
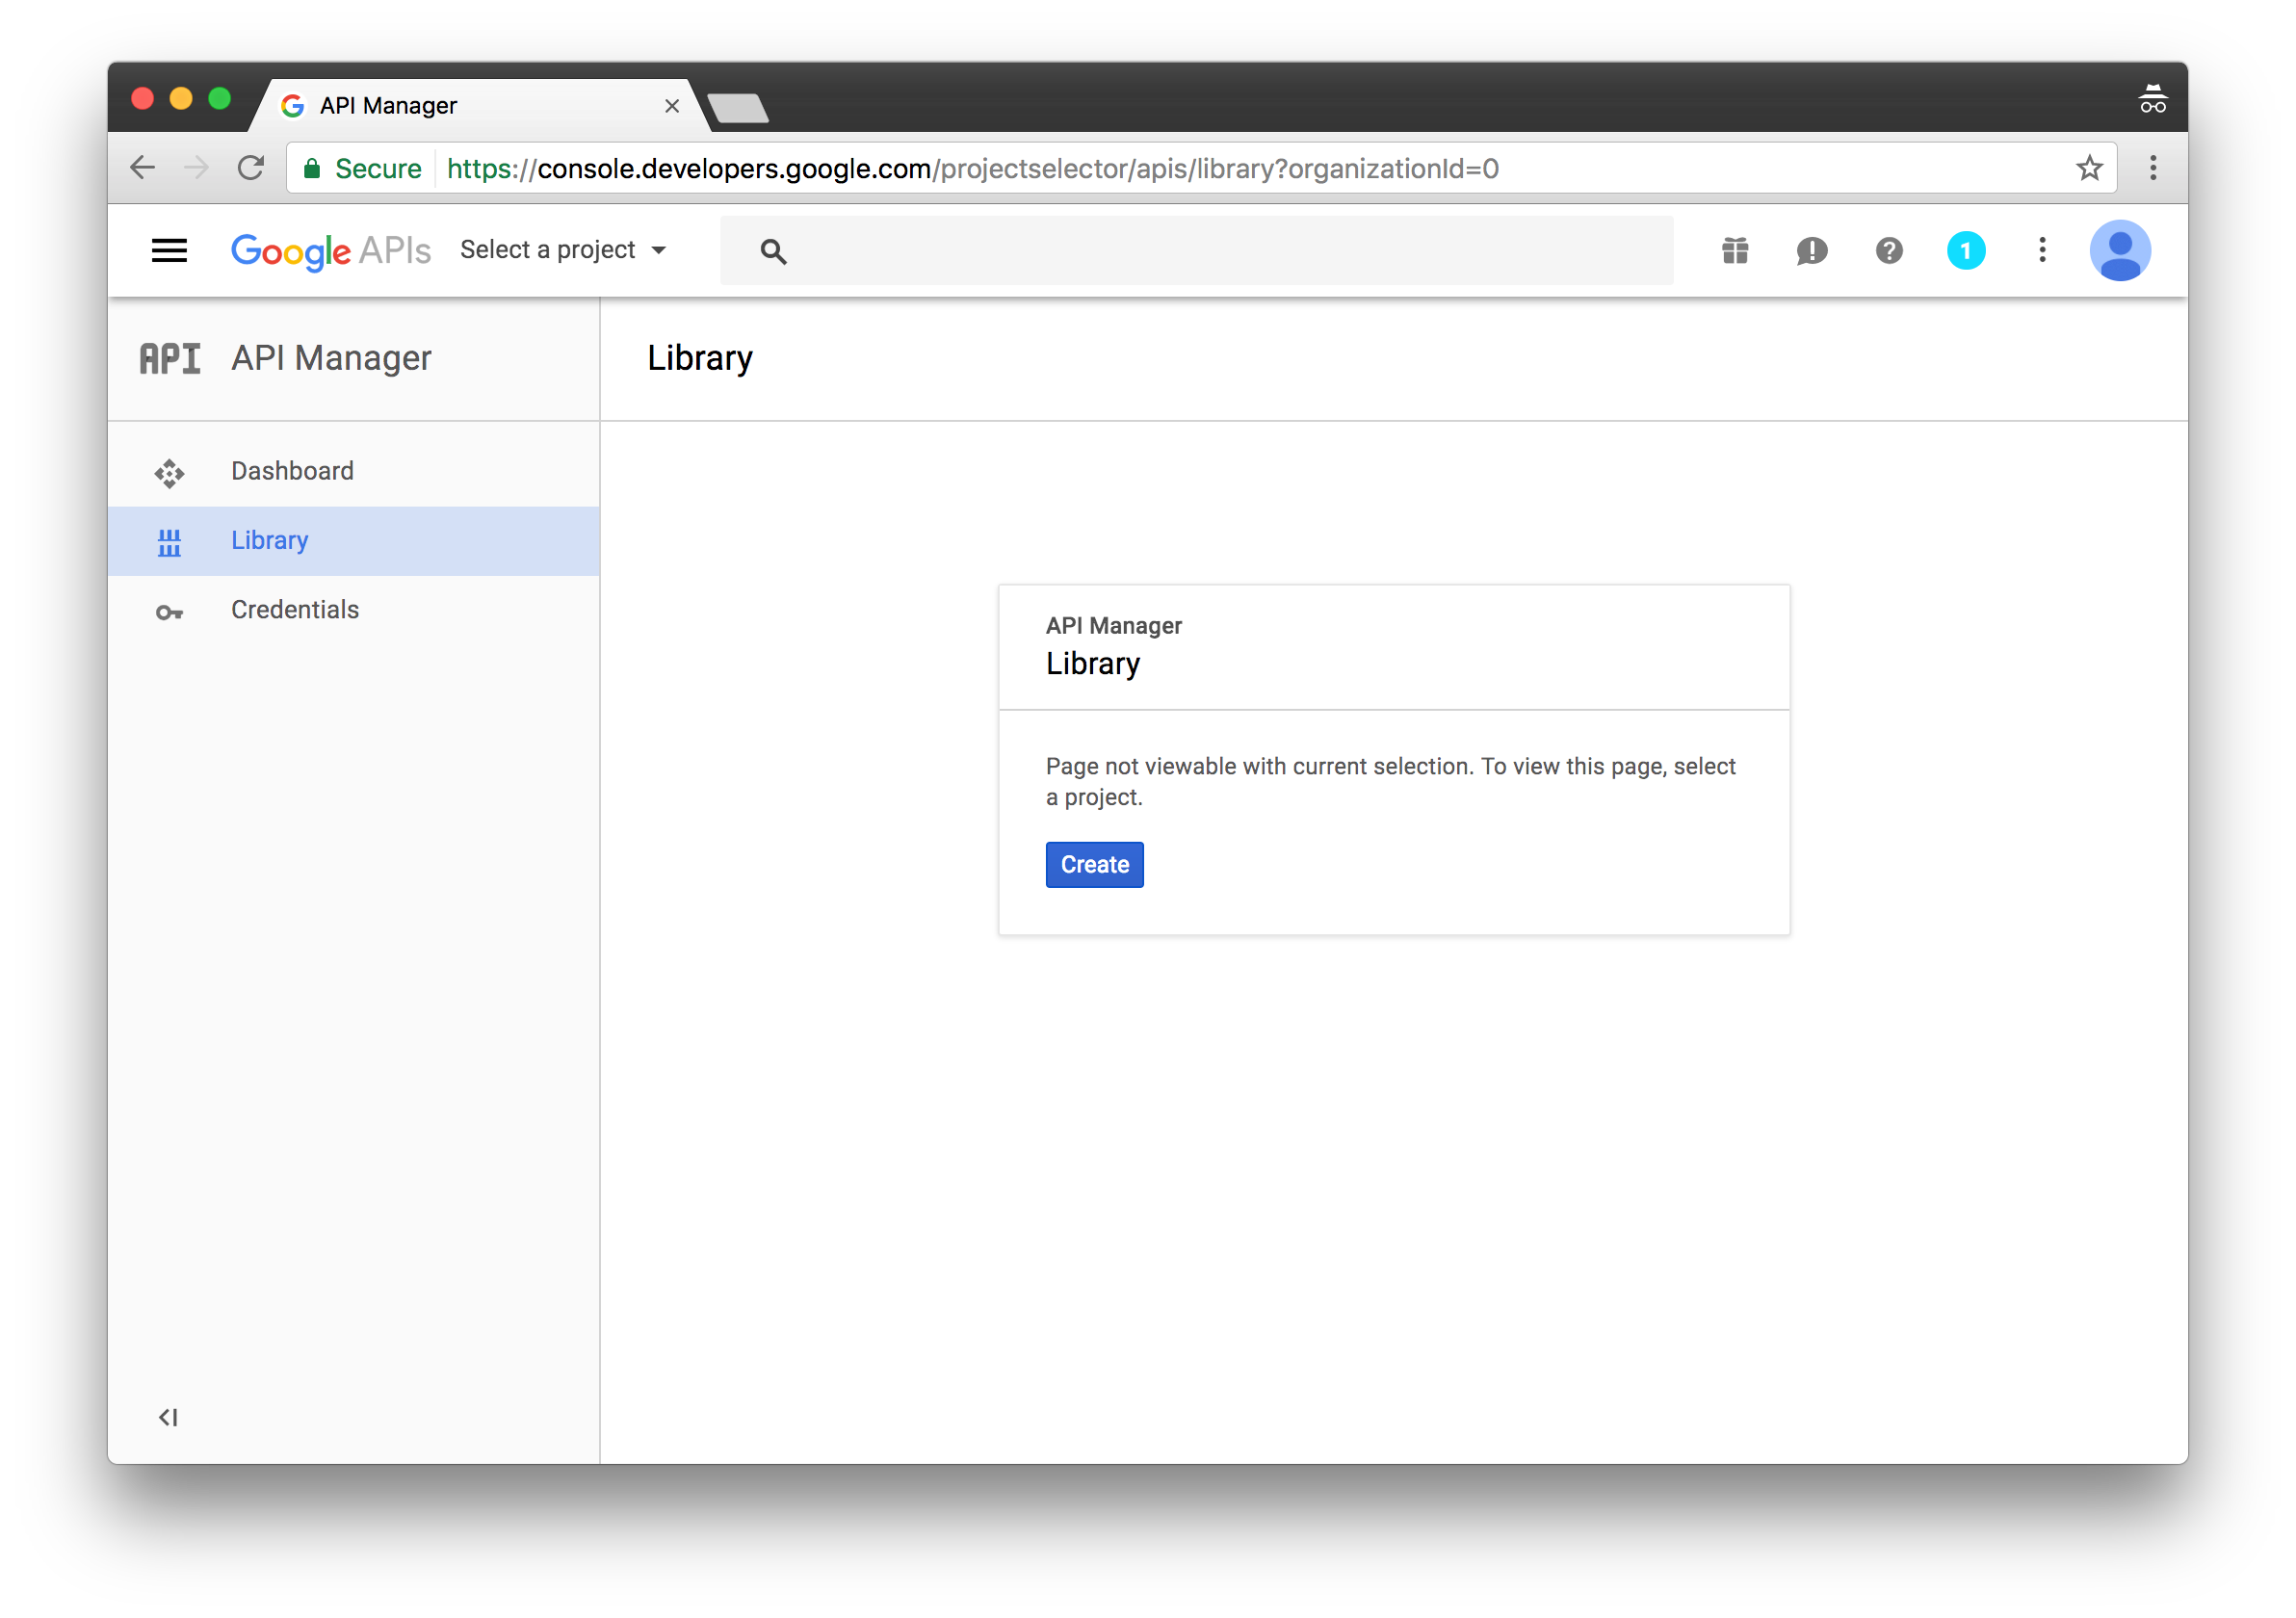
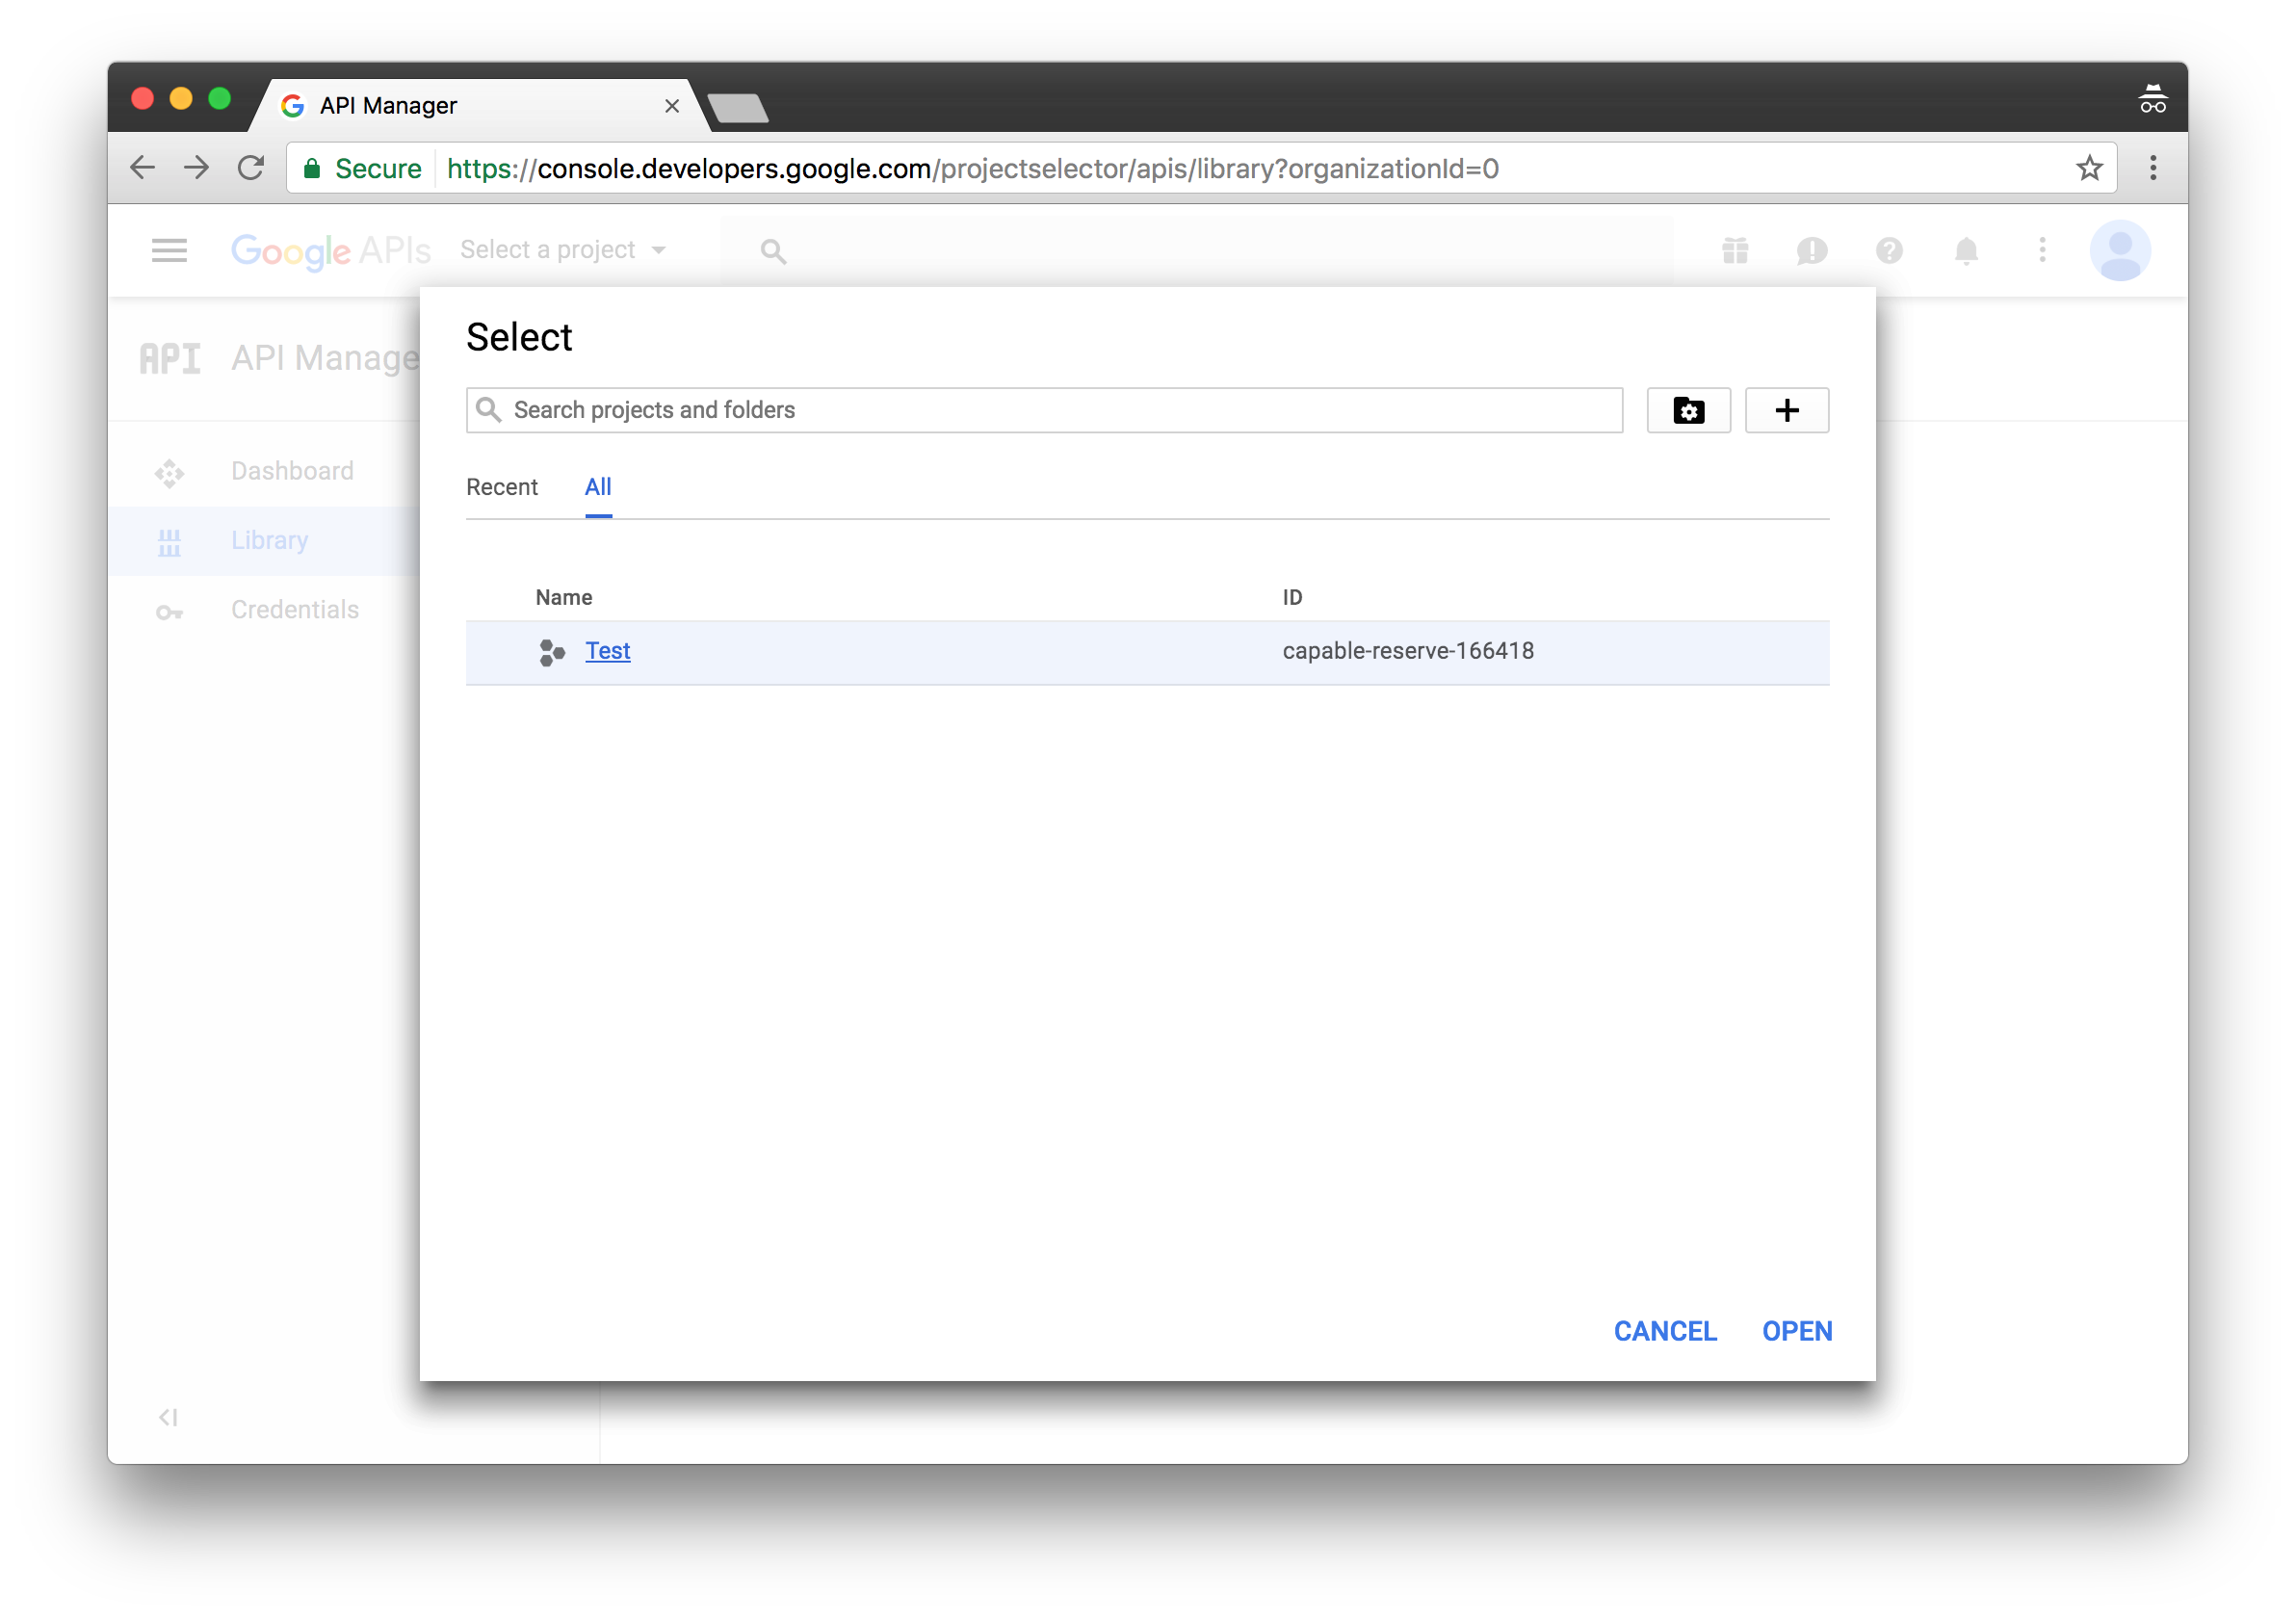
- Click on a project that you just created.
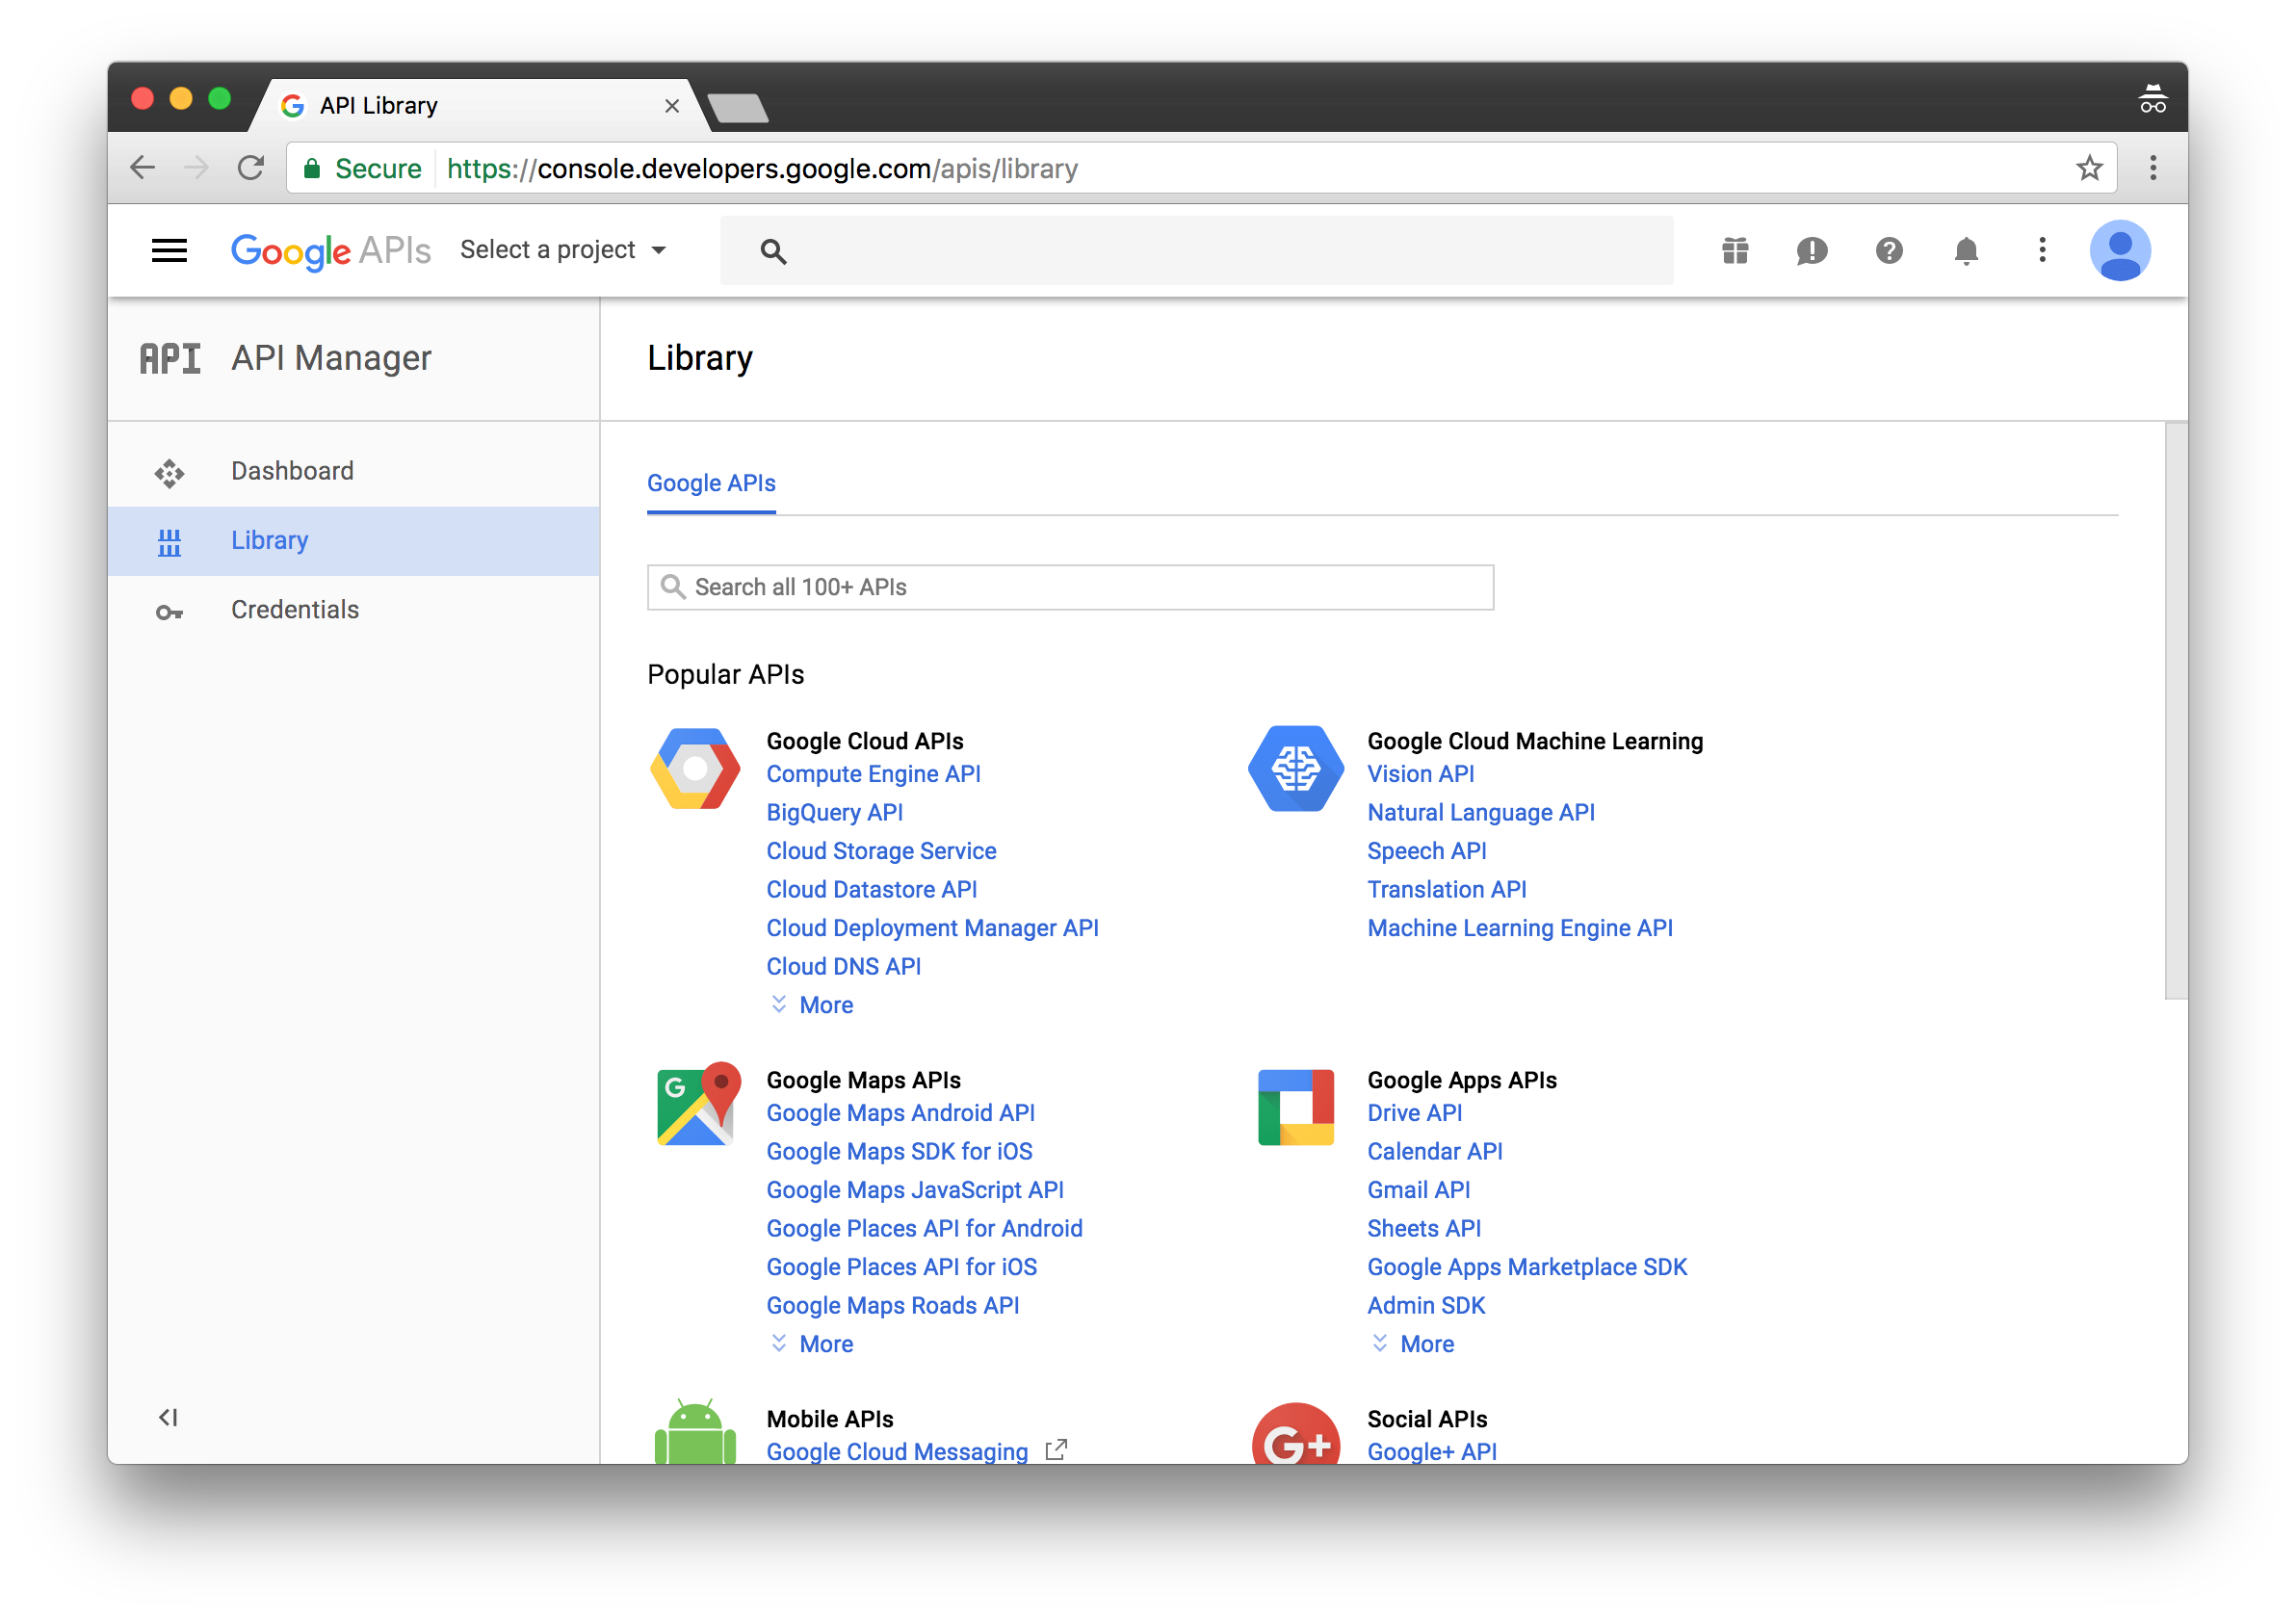
- Scroll down to Social APIs section and click on Google+ API.

- Click ENABLE button.
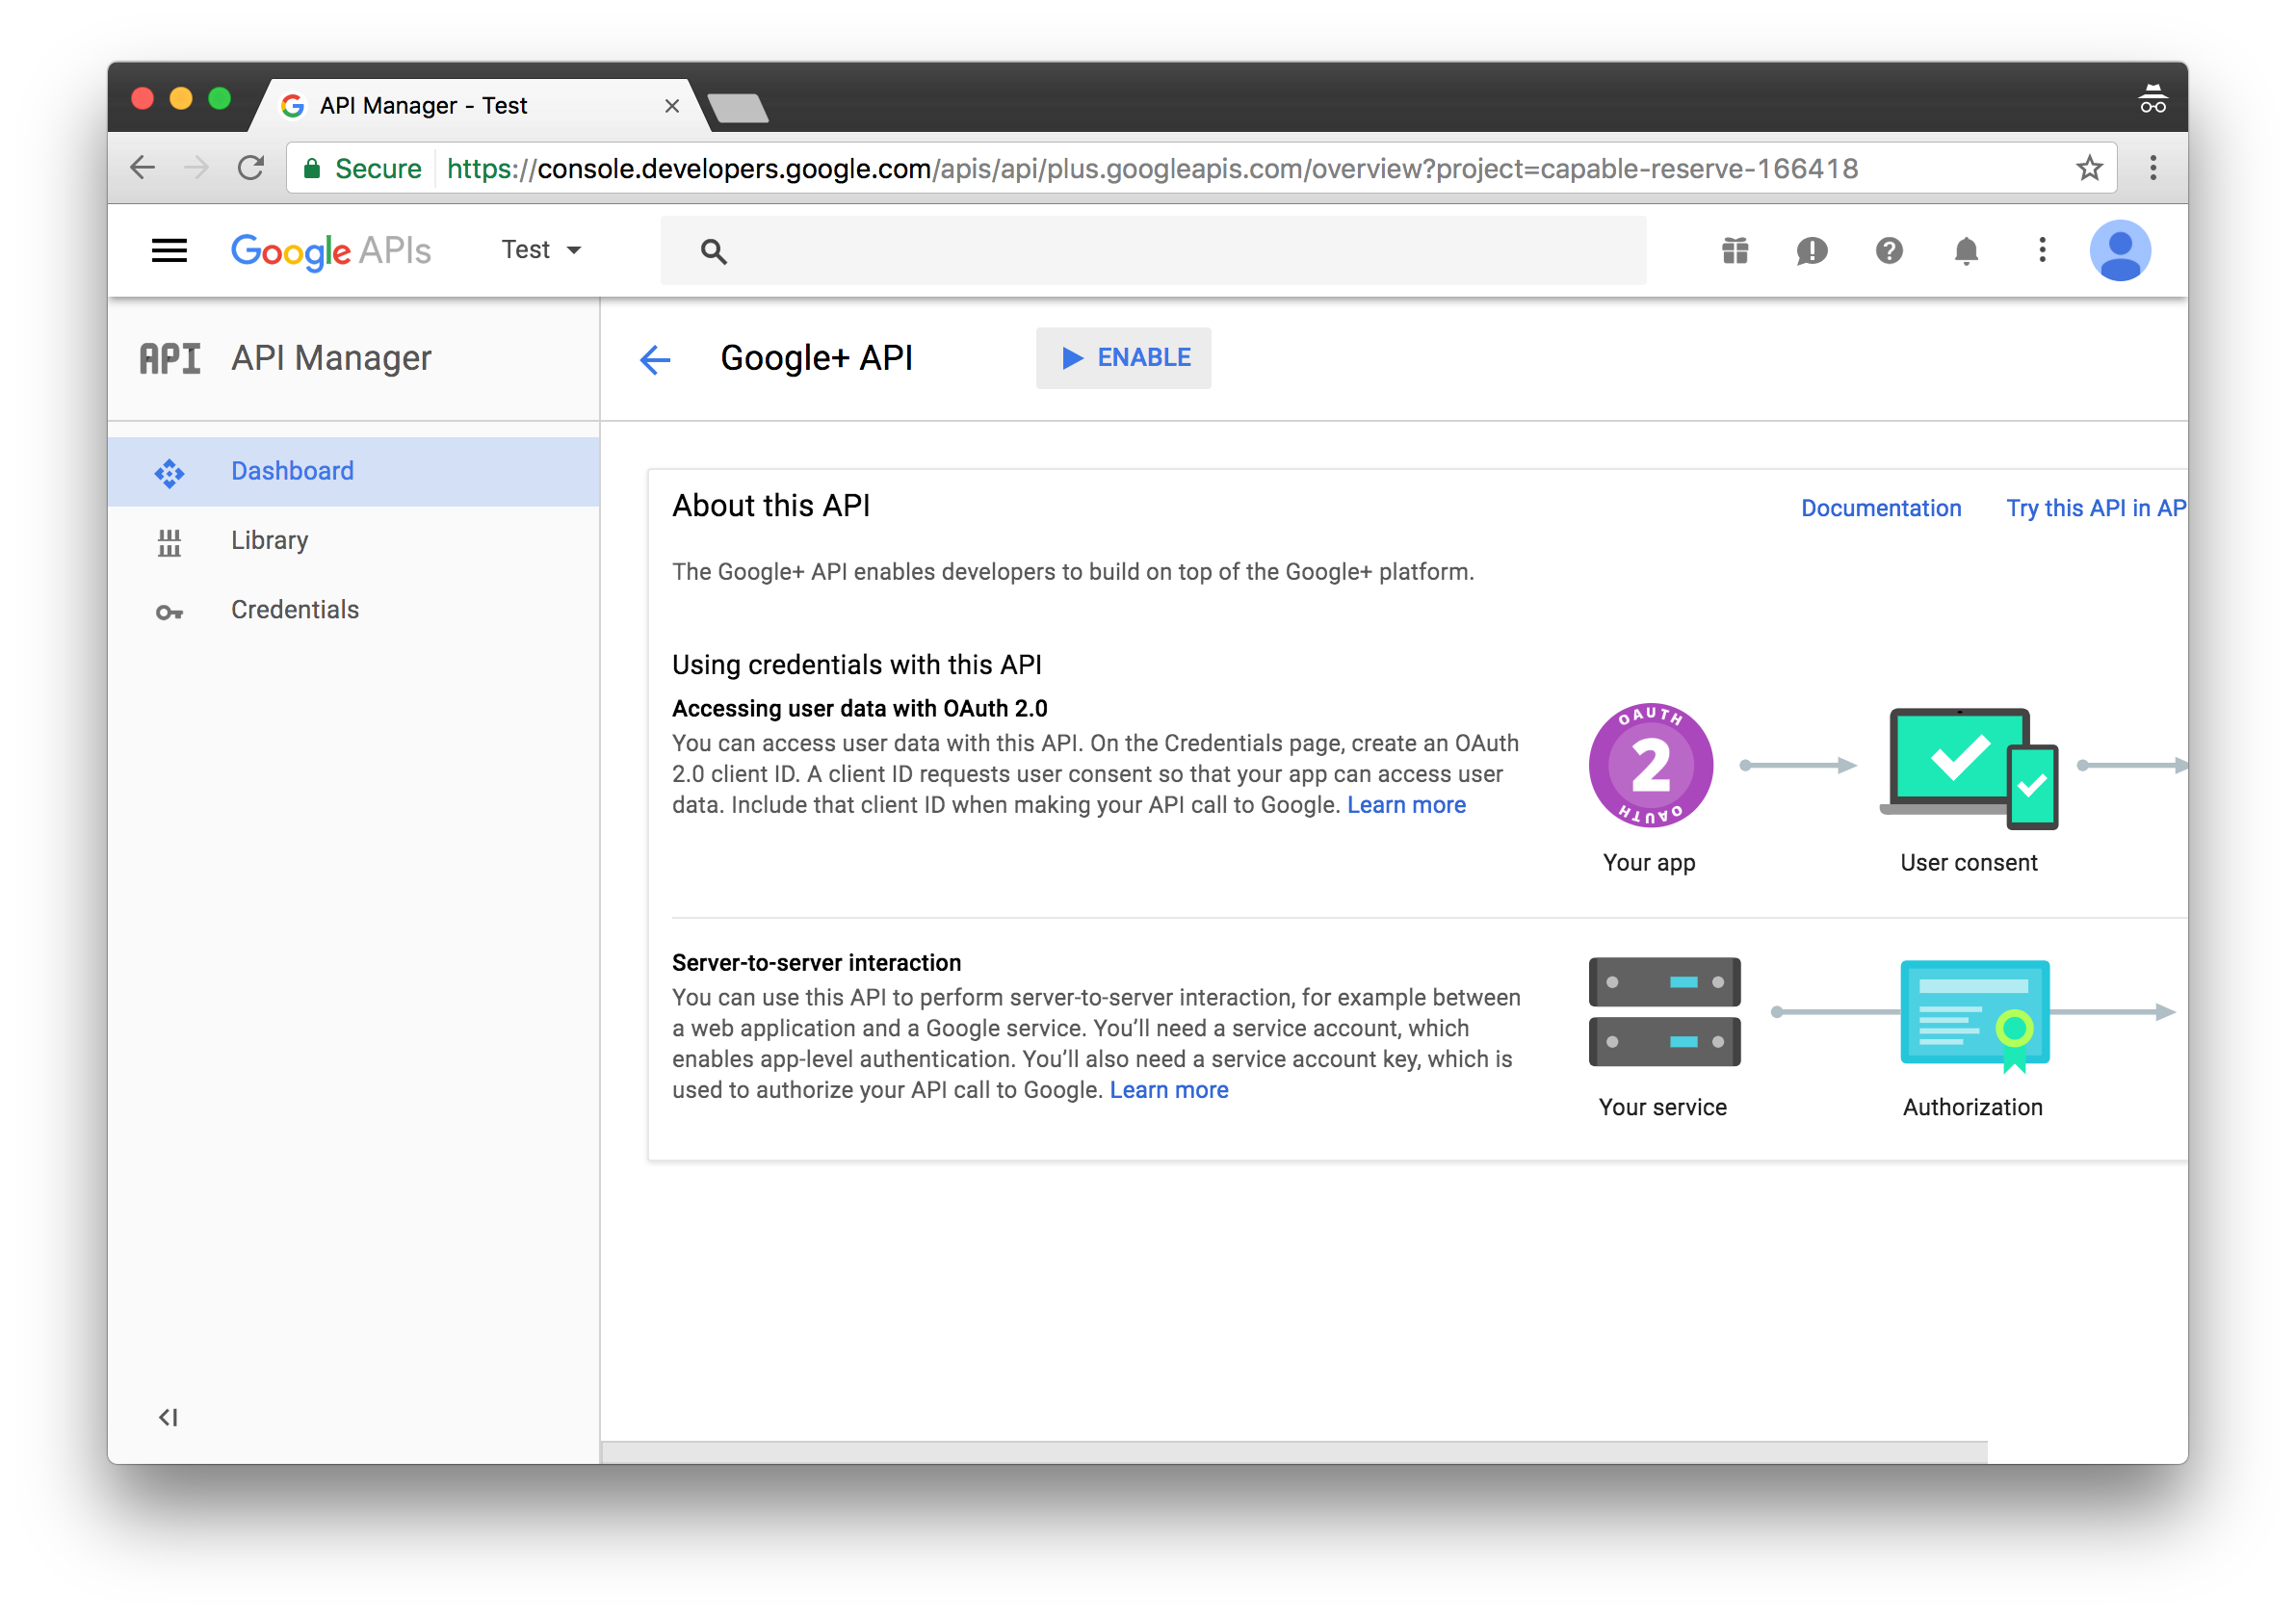
- Click Create credentials button.
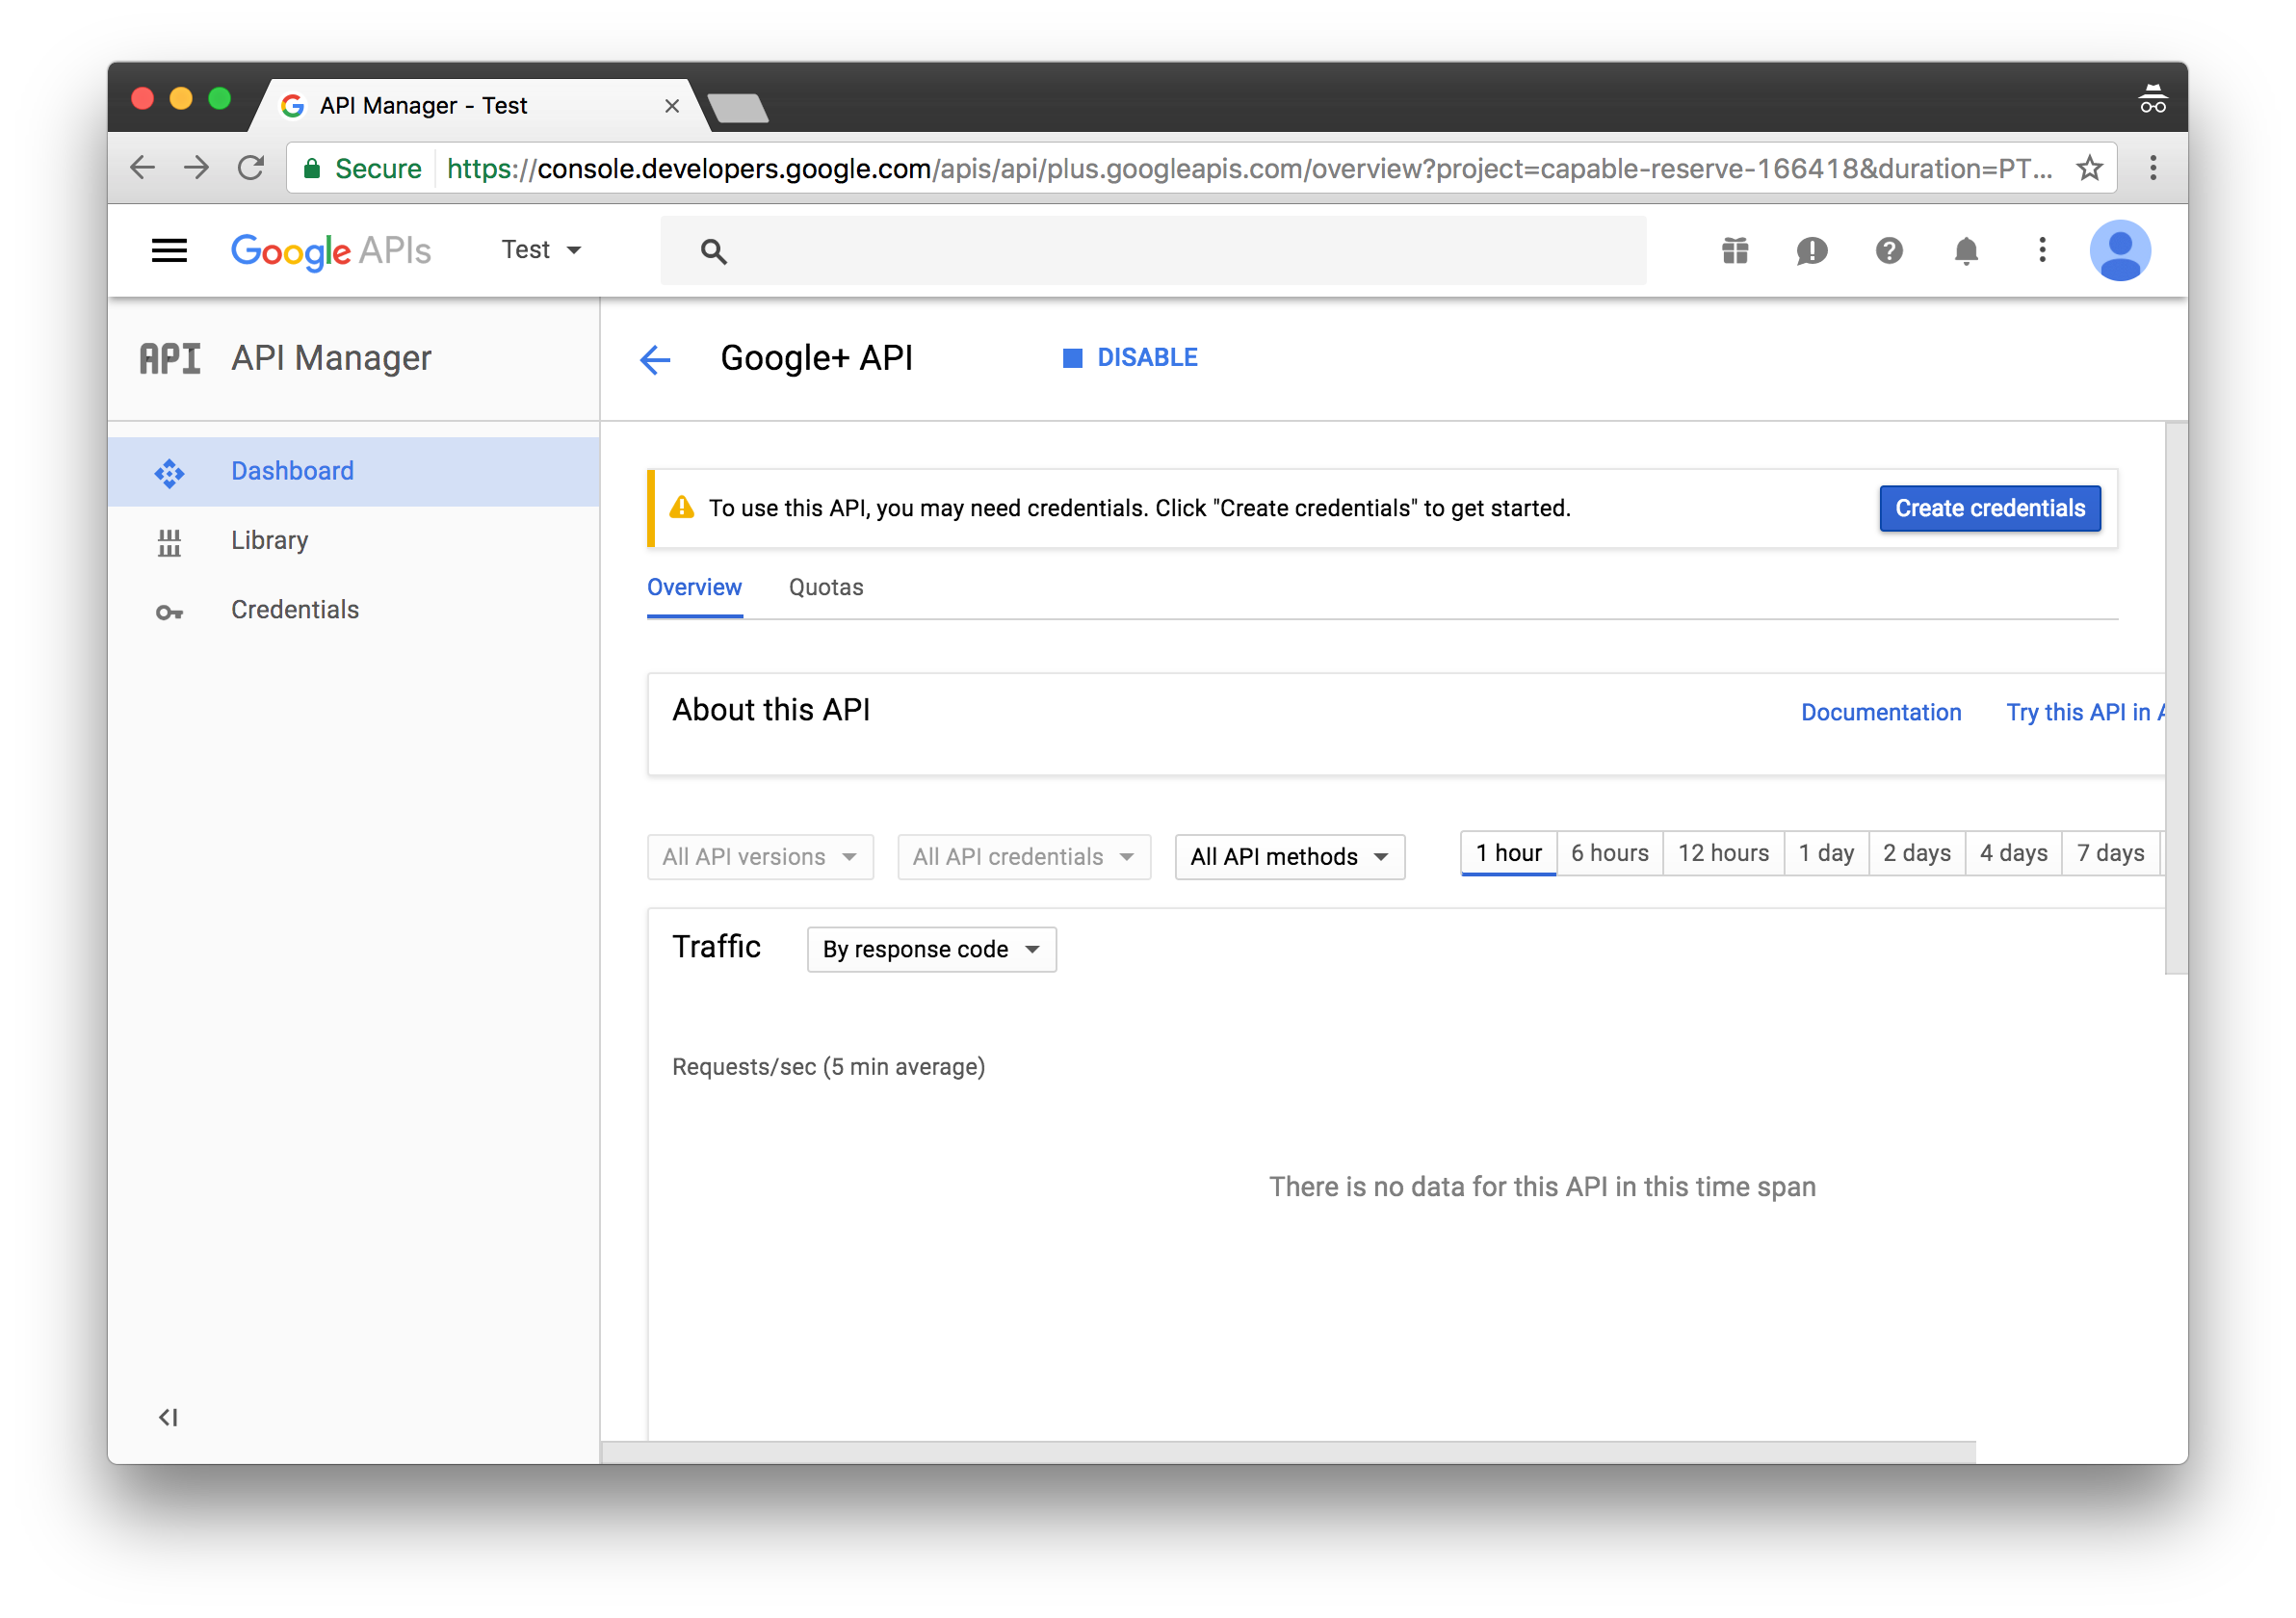
- Select Google+ API and Web server from the dropdown menus respectively and click What credentials do I need? button.
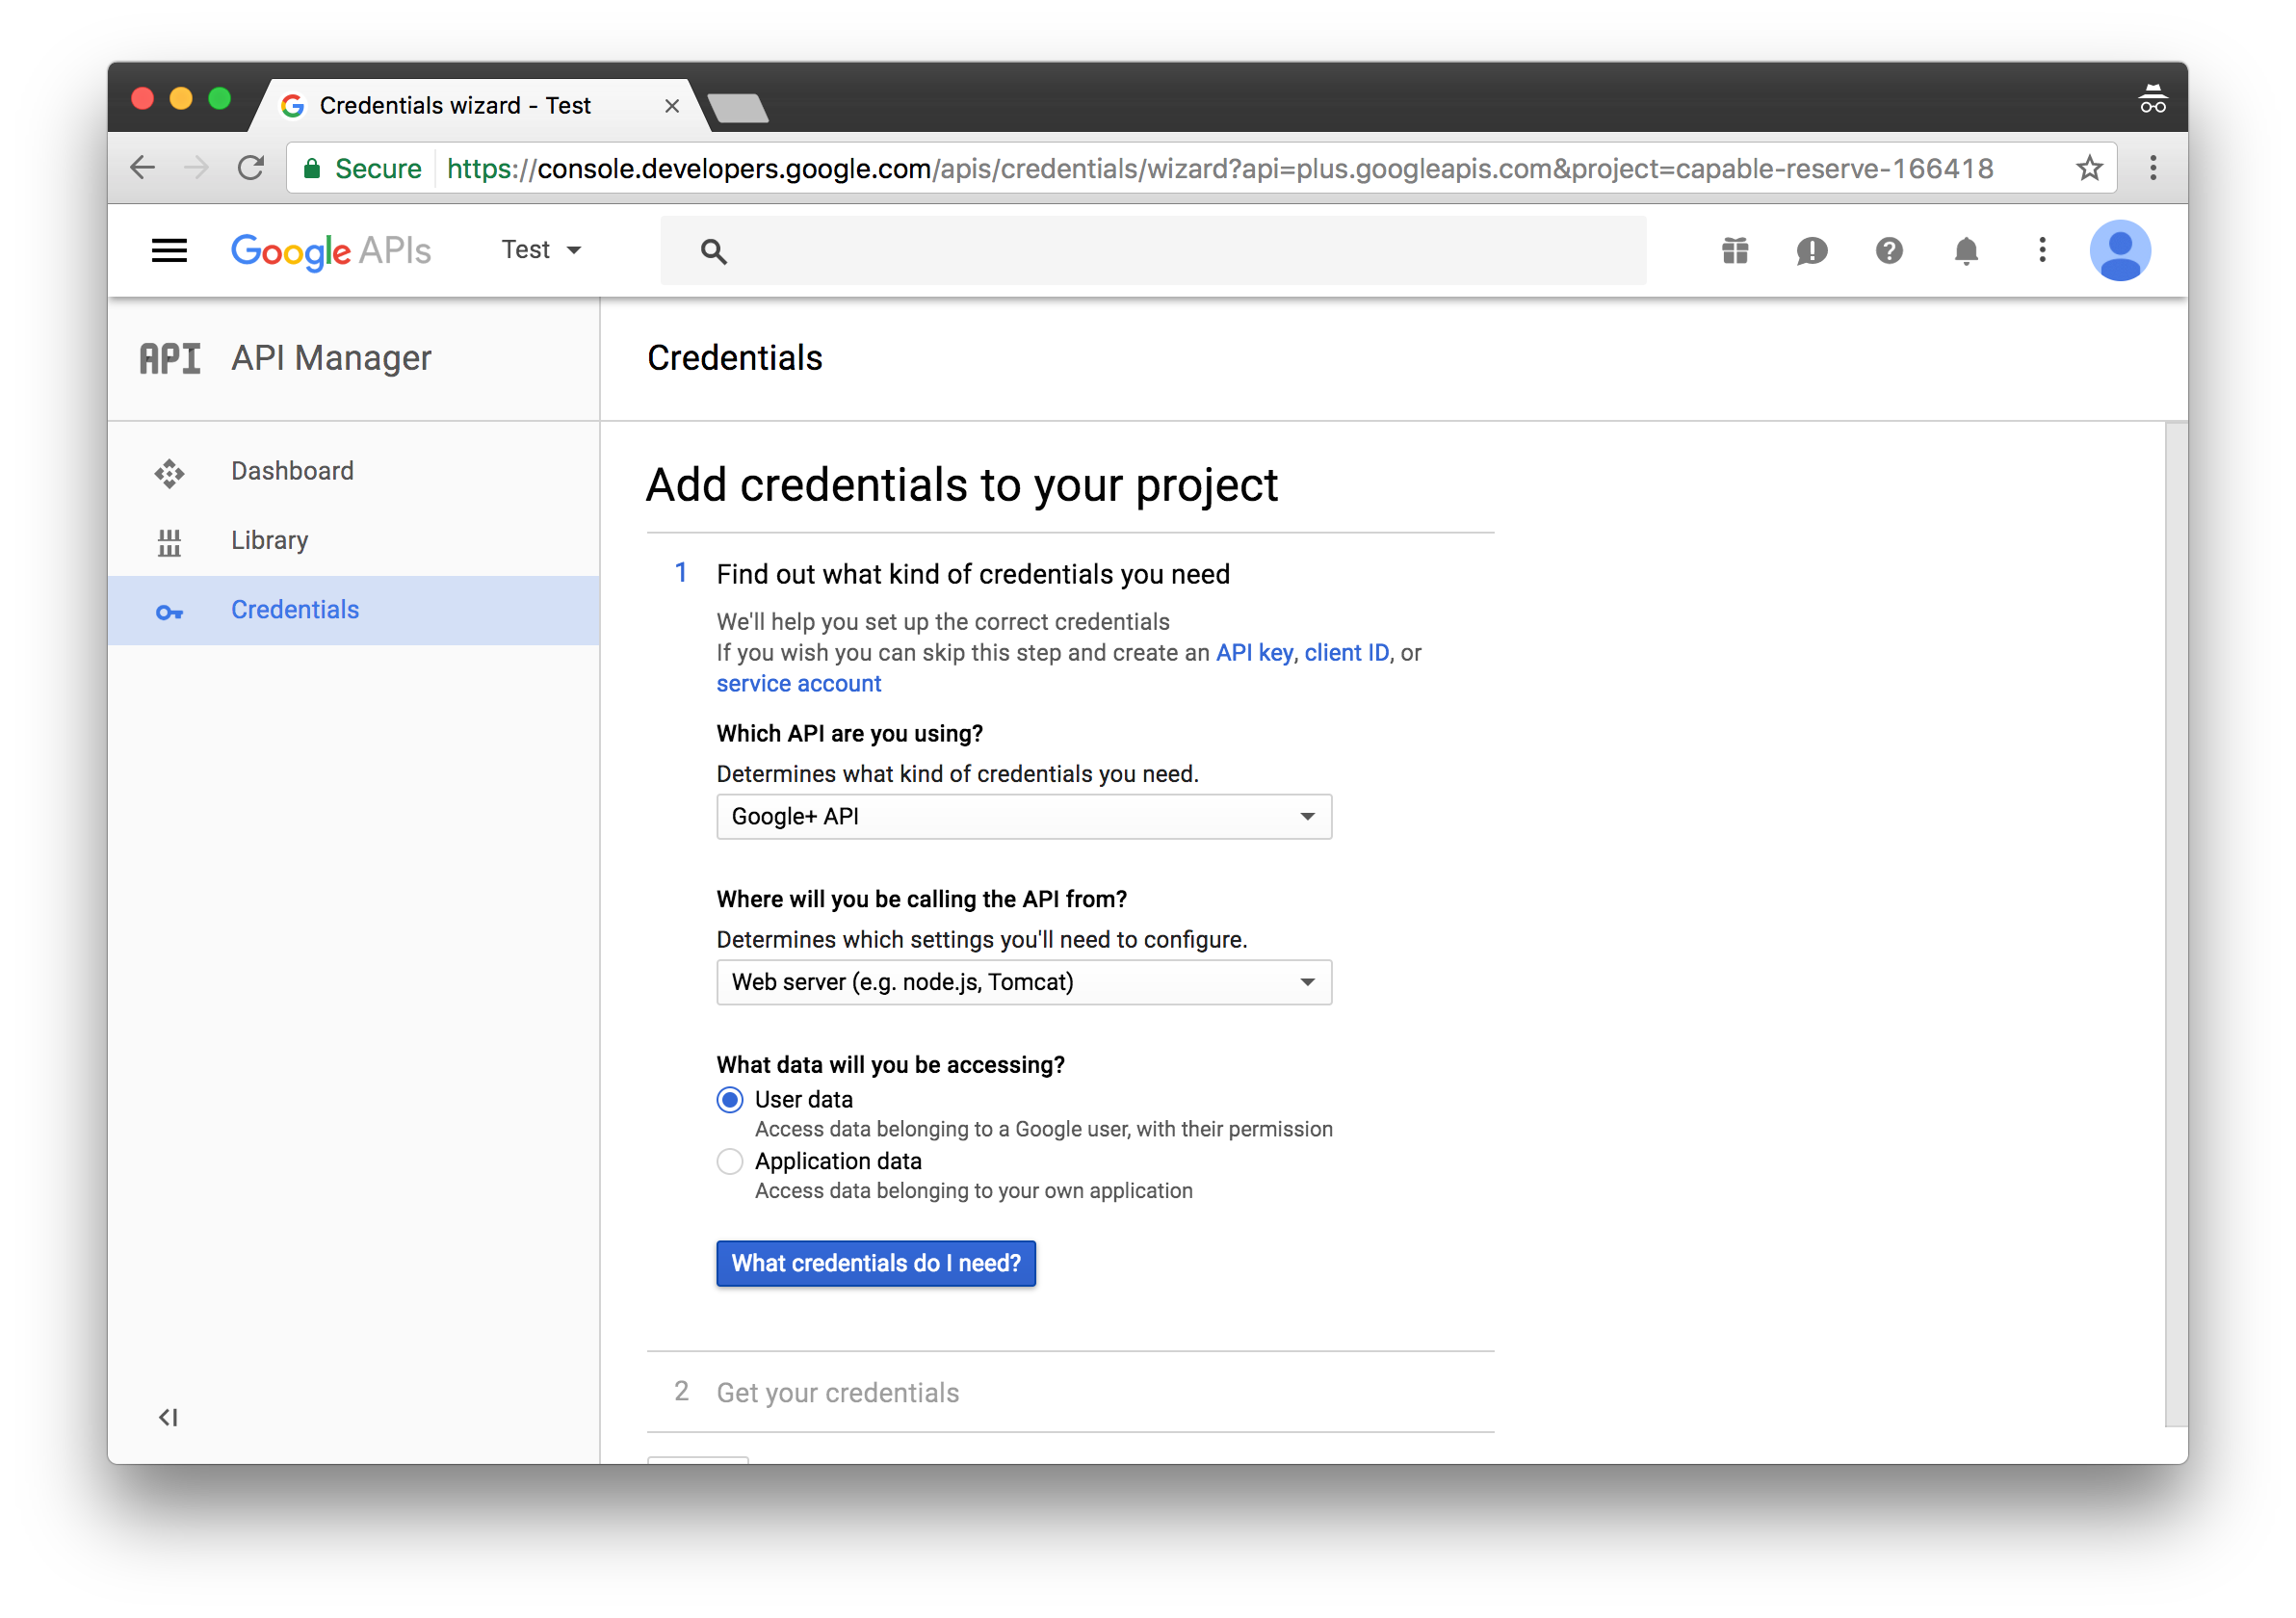
- Enter
http://localhost:3000/auth/googleinto Authorized redirect URIs field and click Create client ID button.
- Choose an email address, enter you name and click Continue.
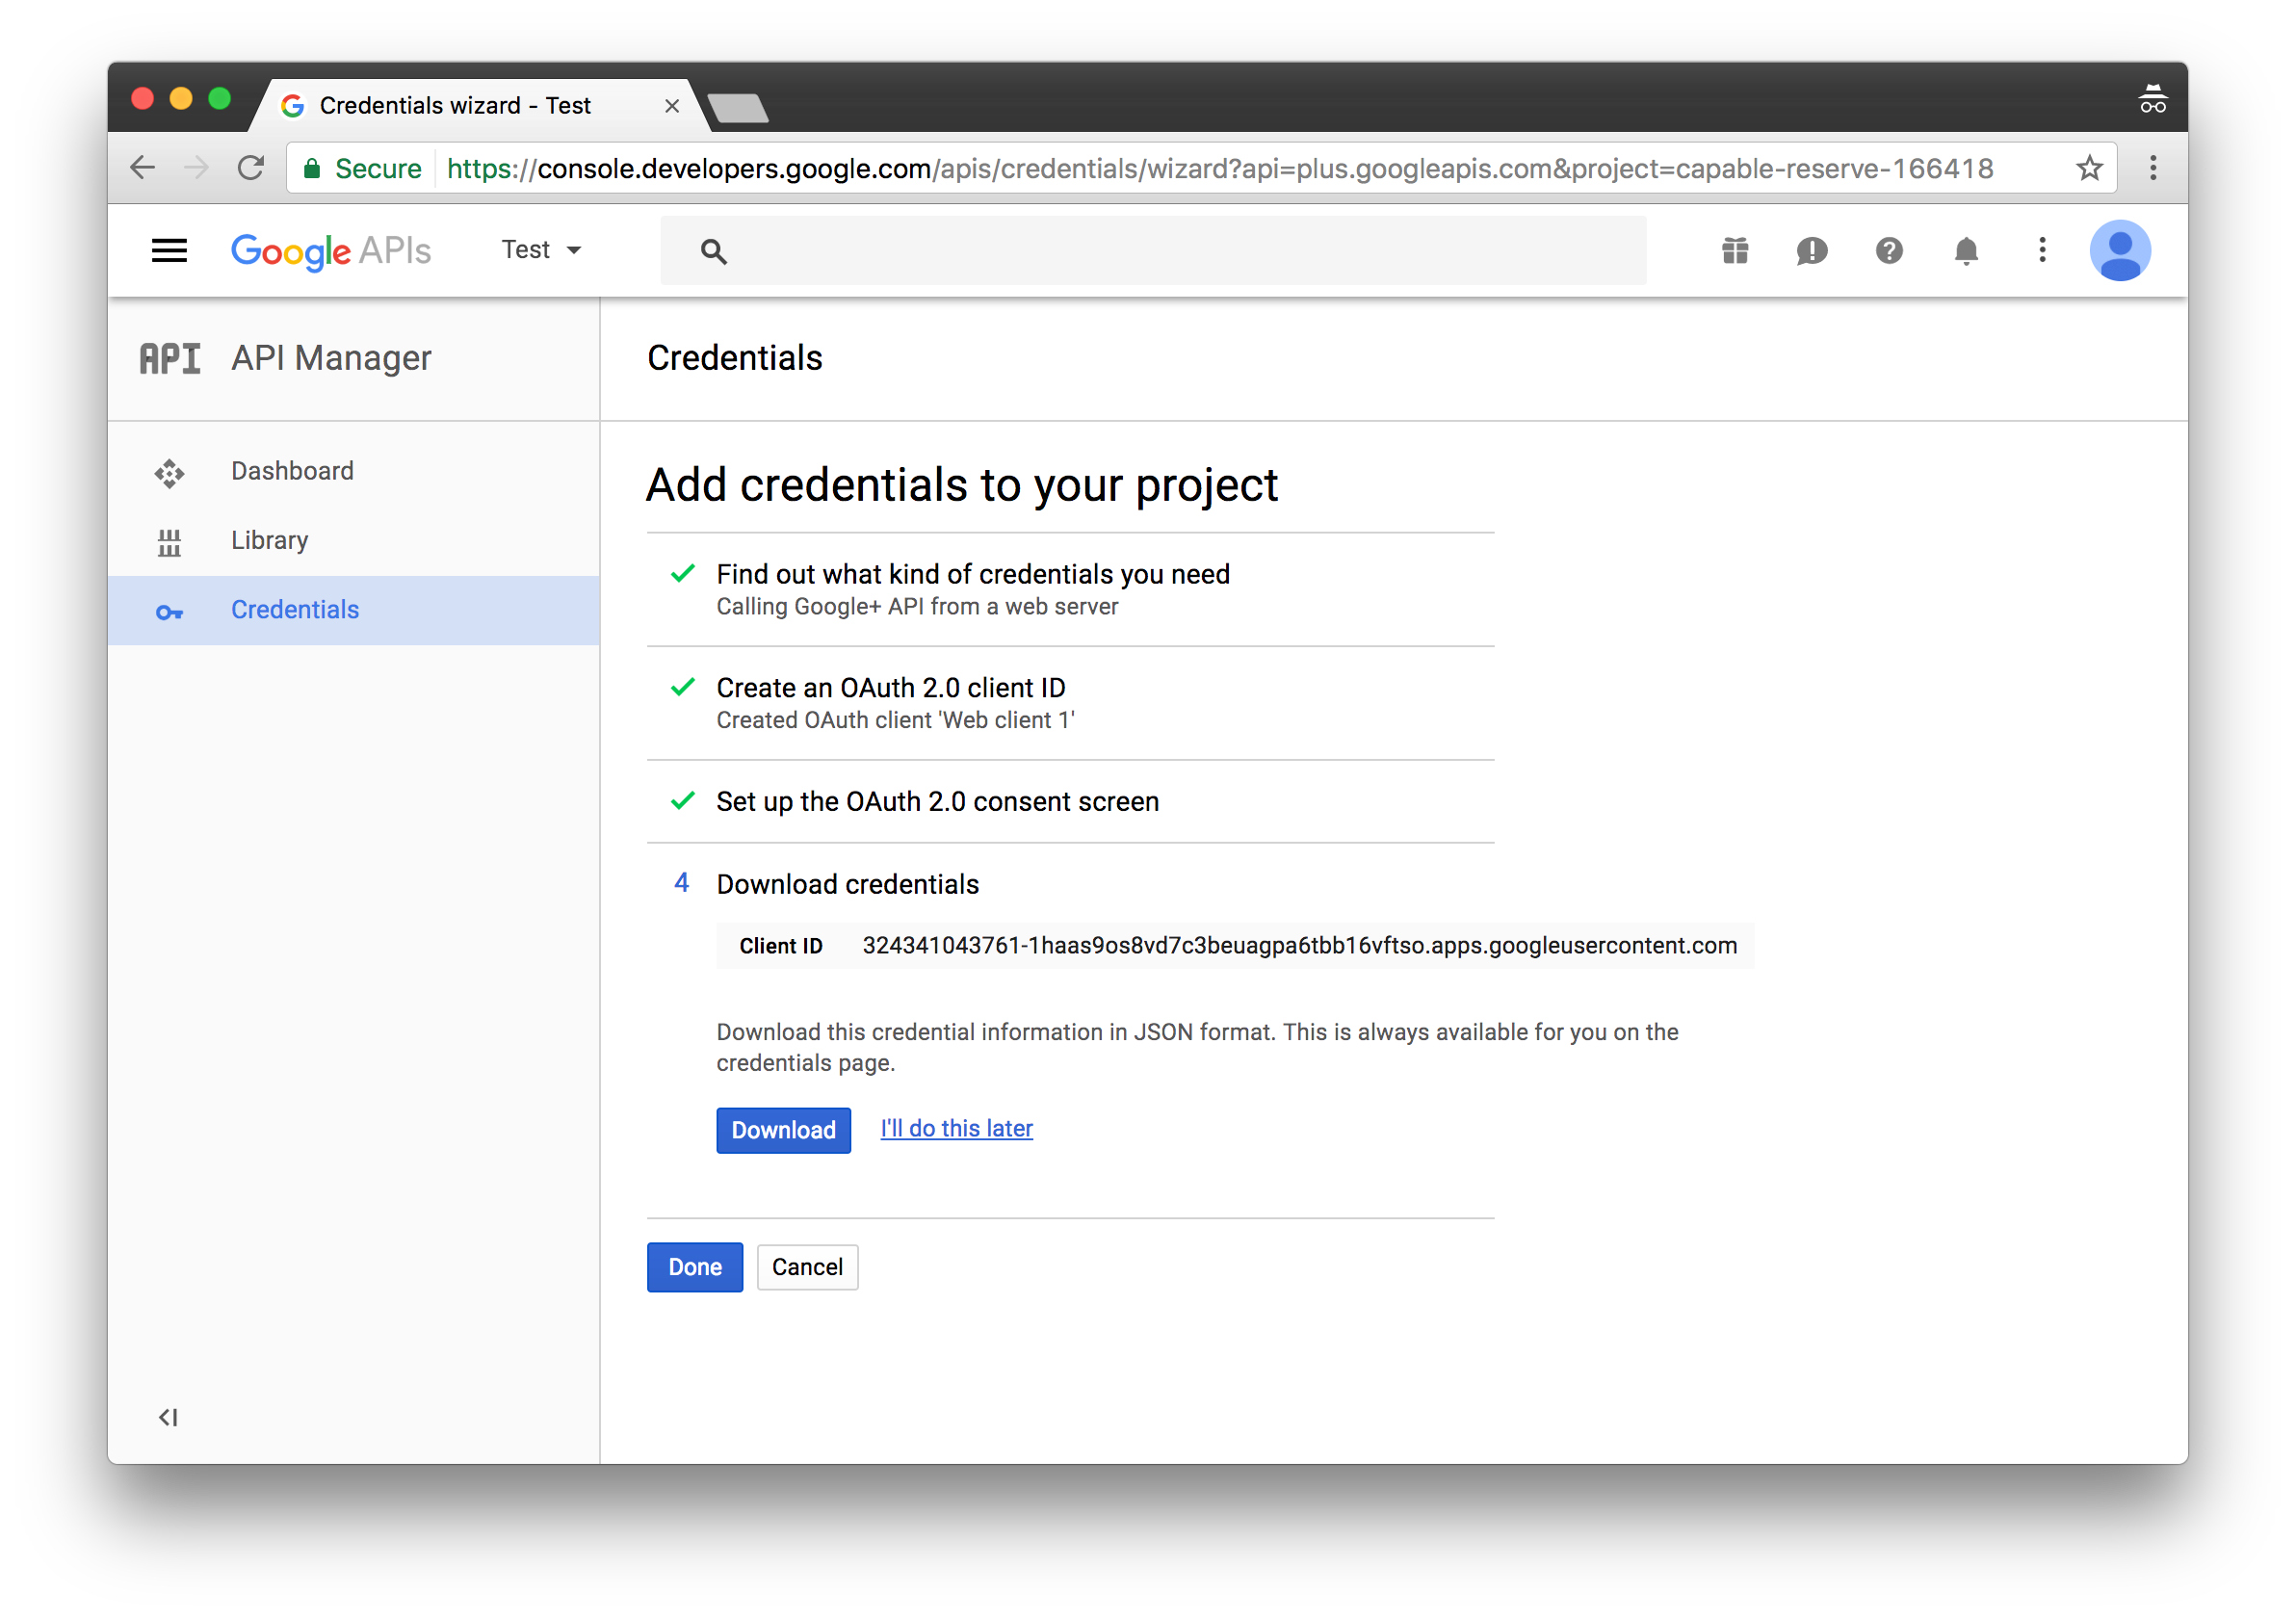
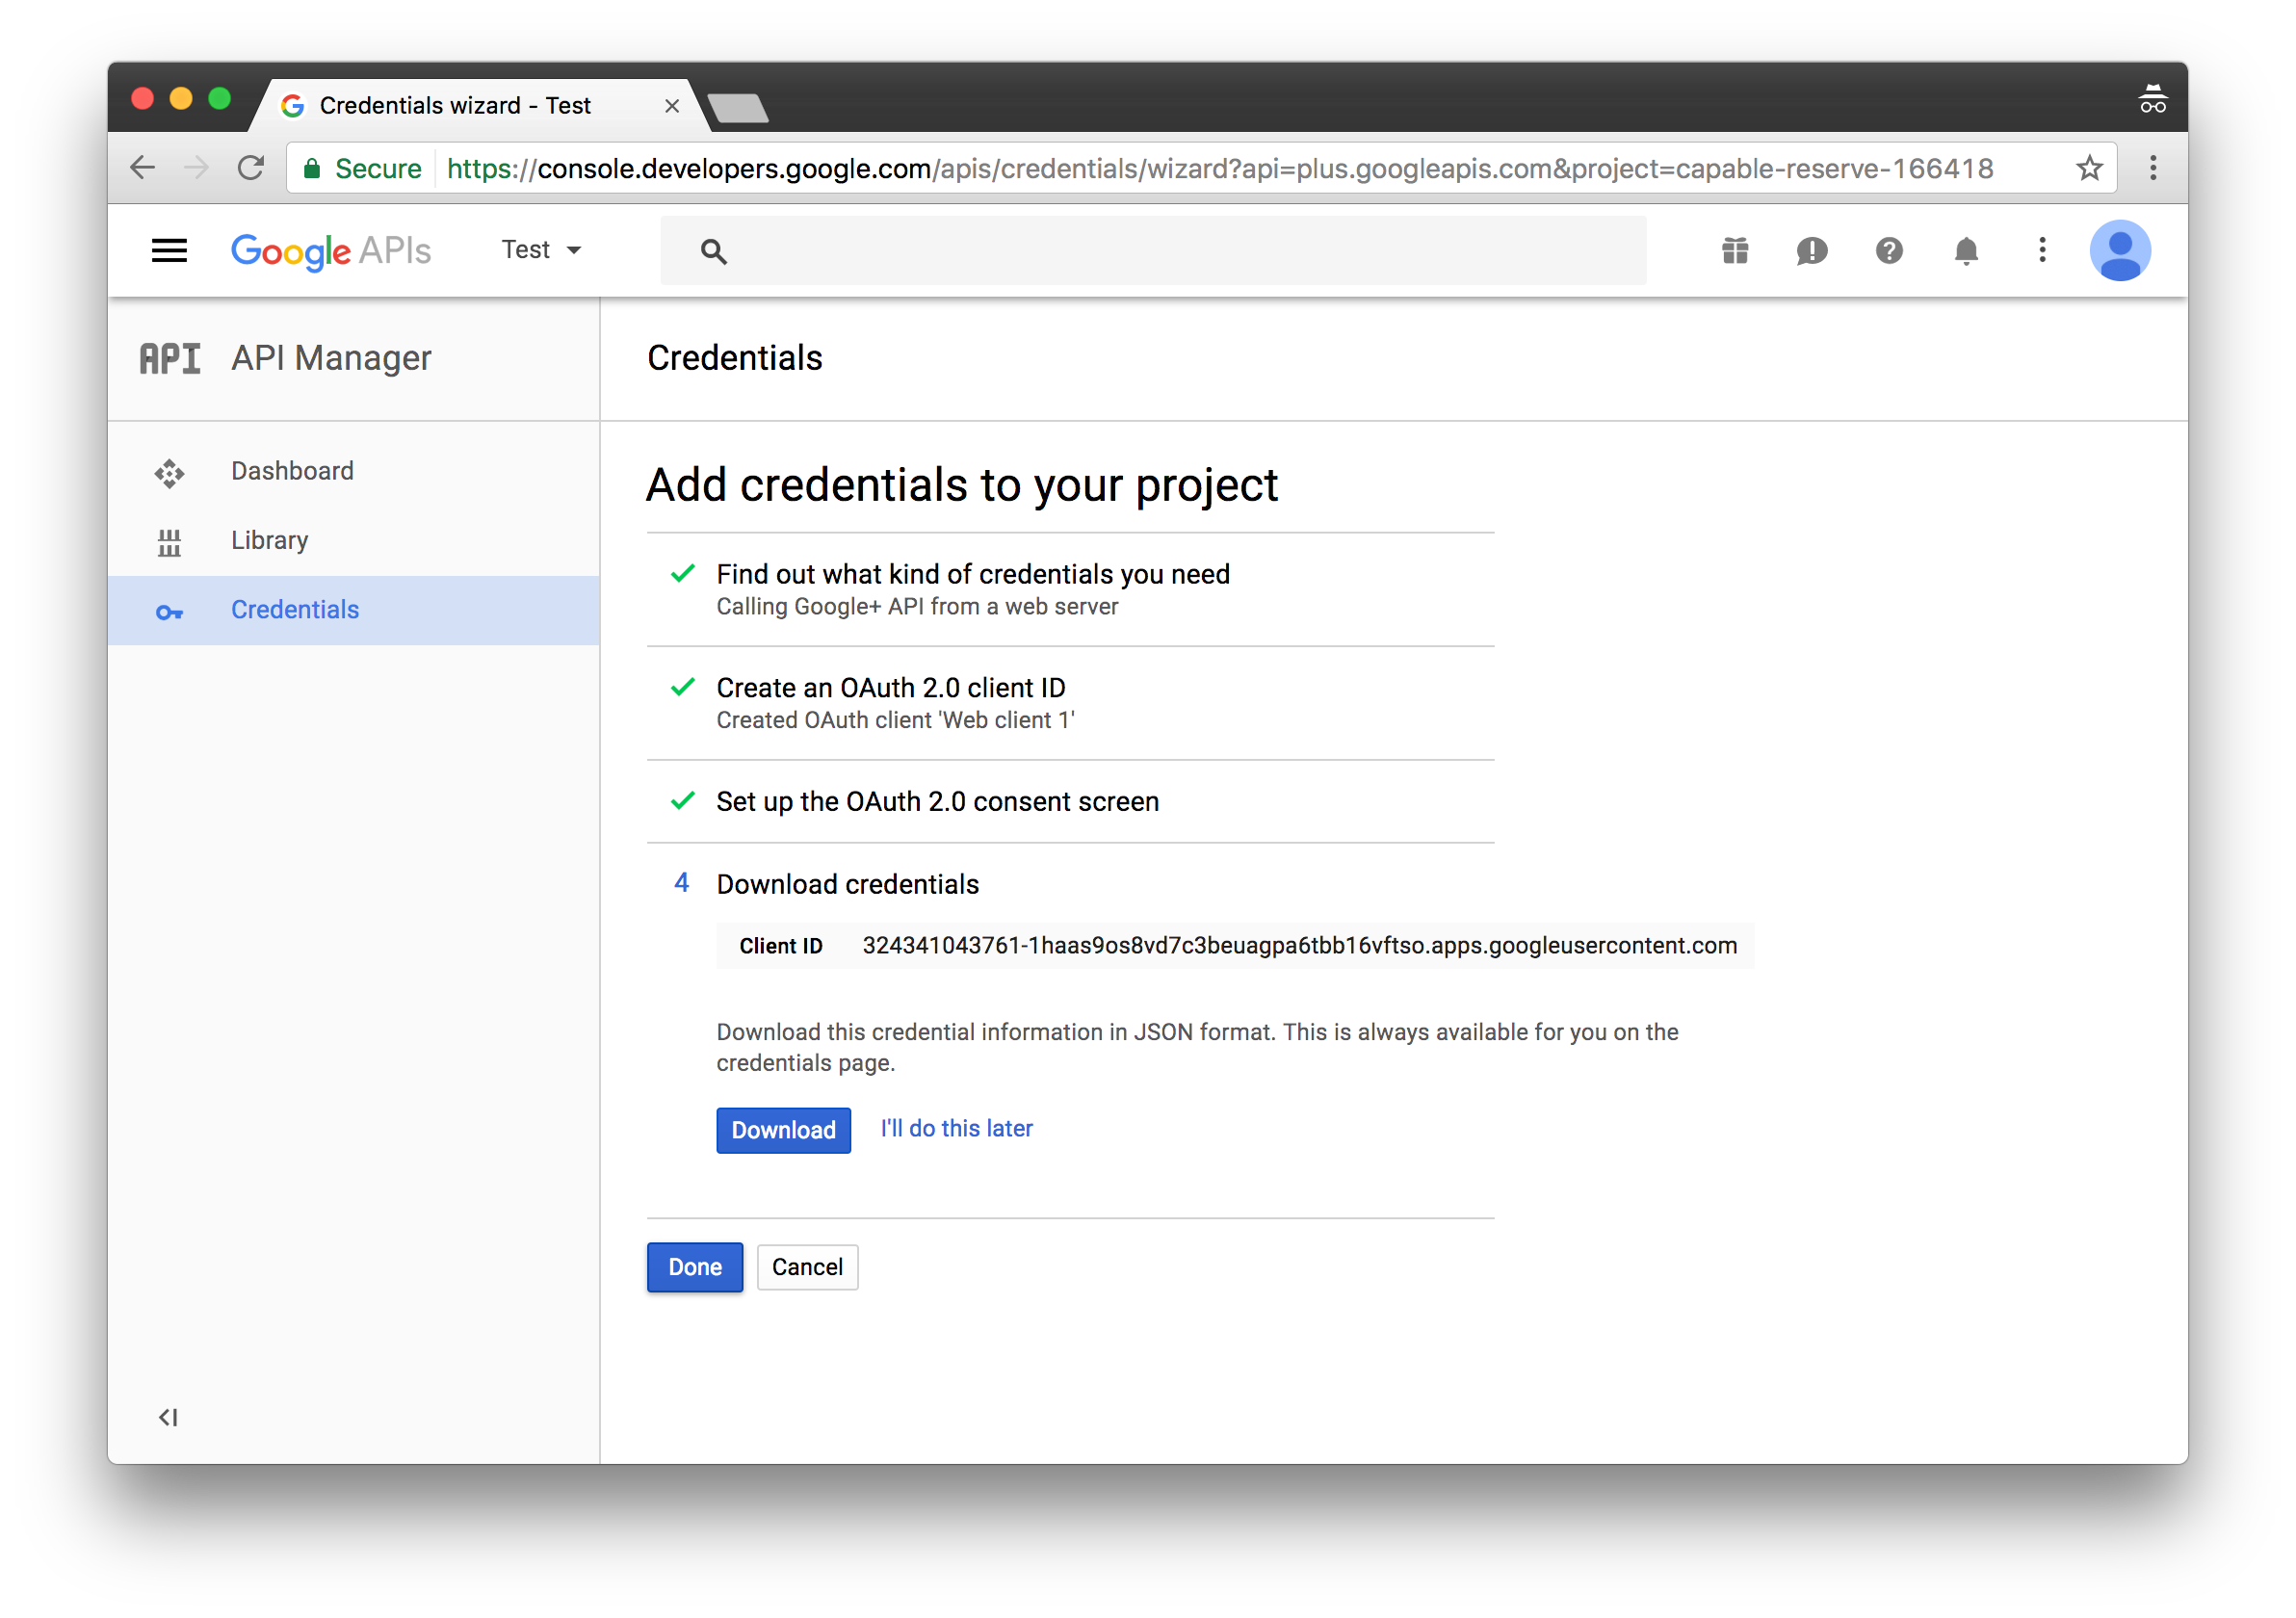
- Click Done button at the bottom.
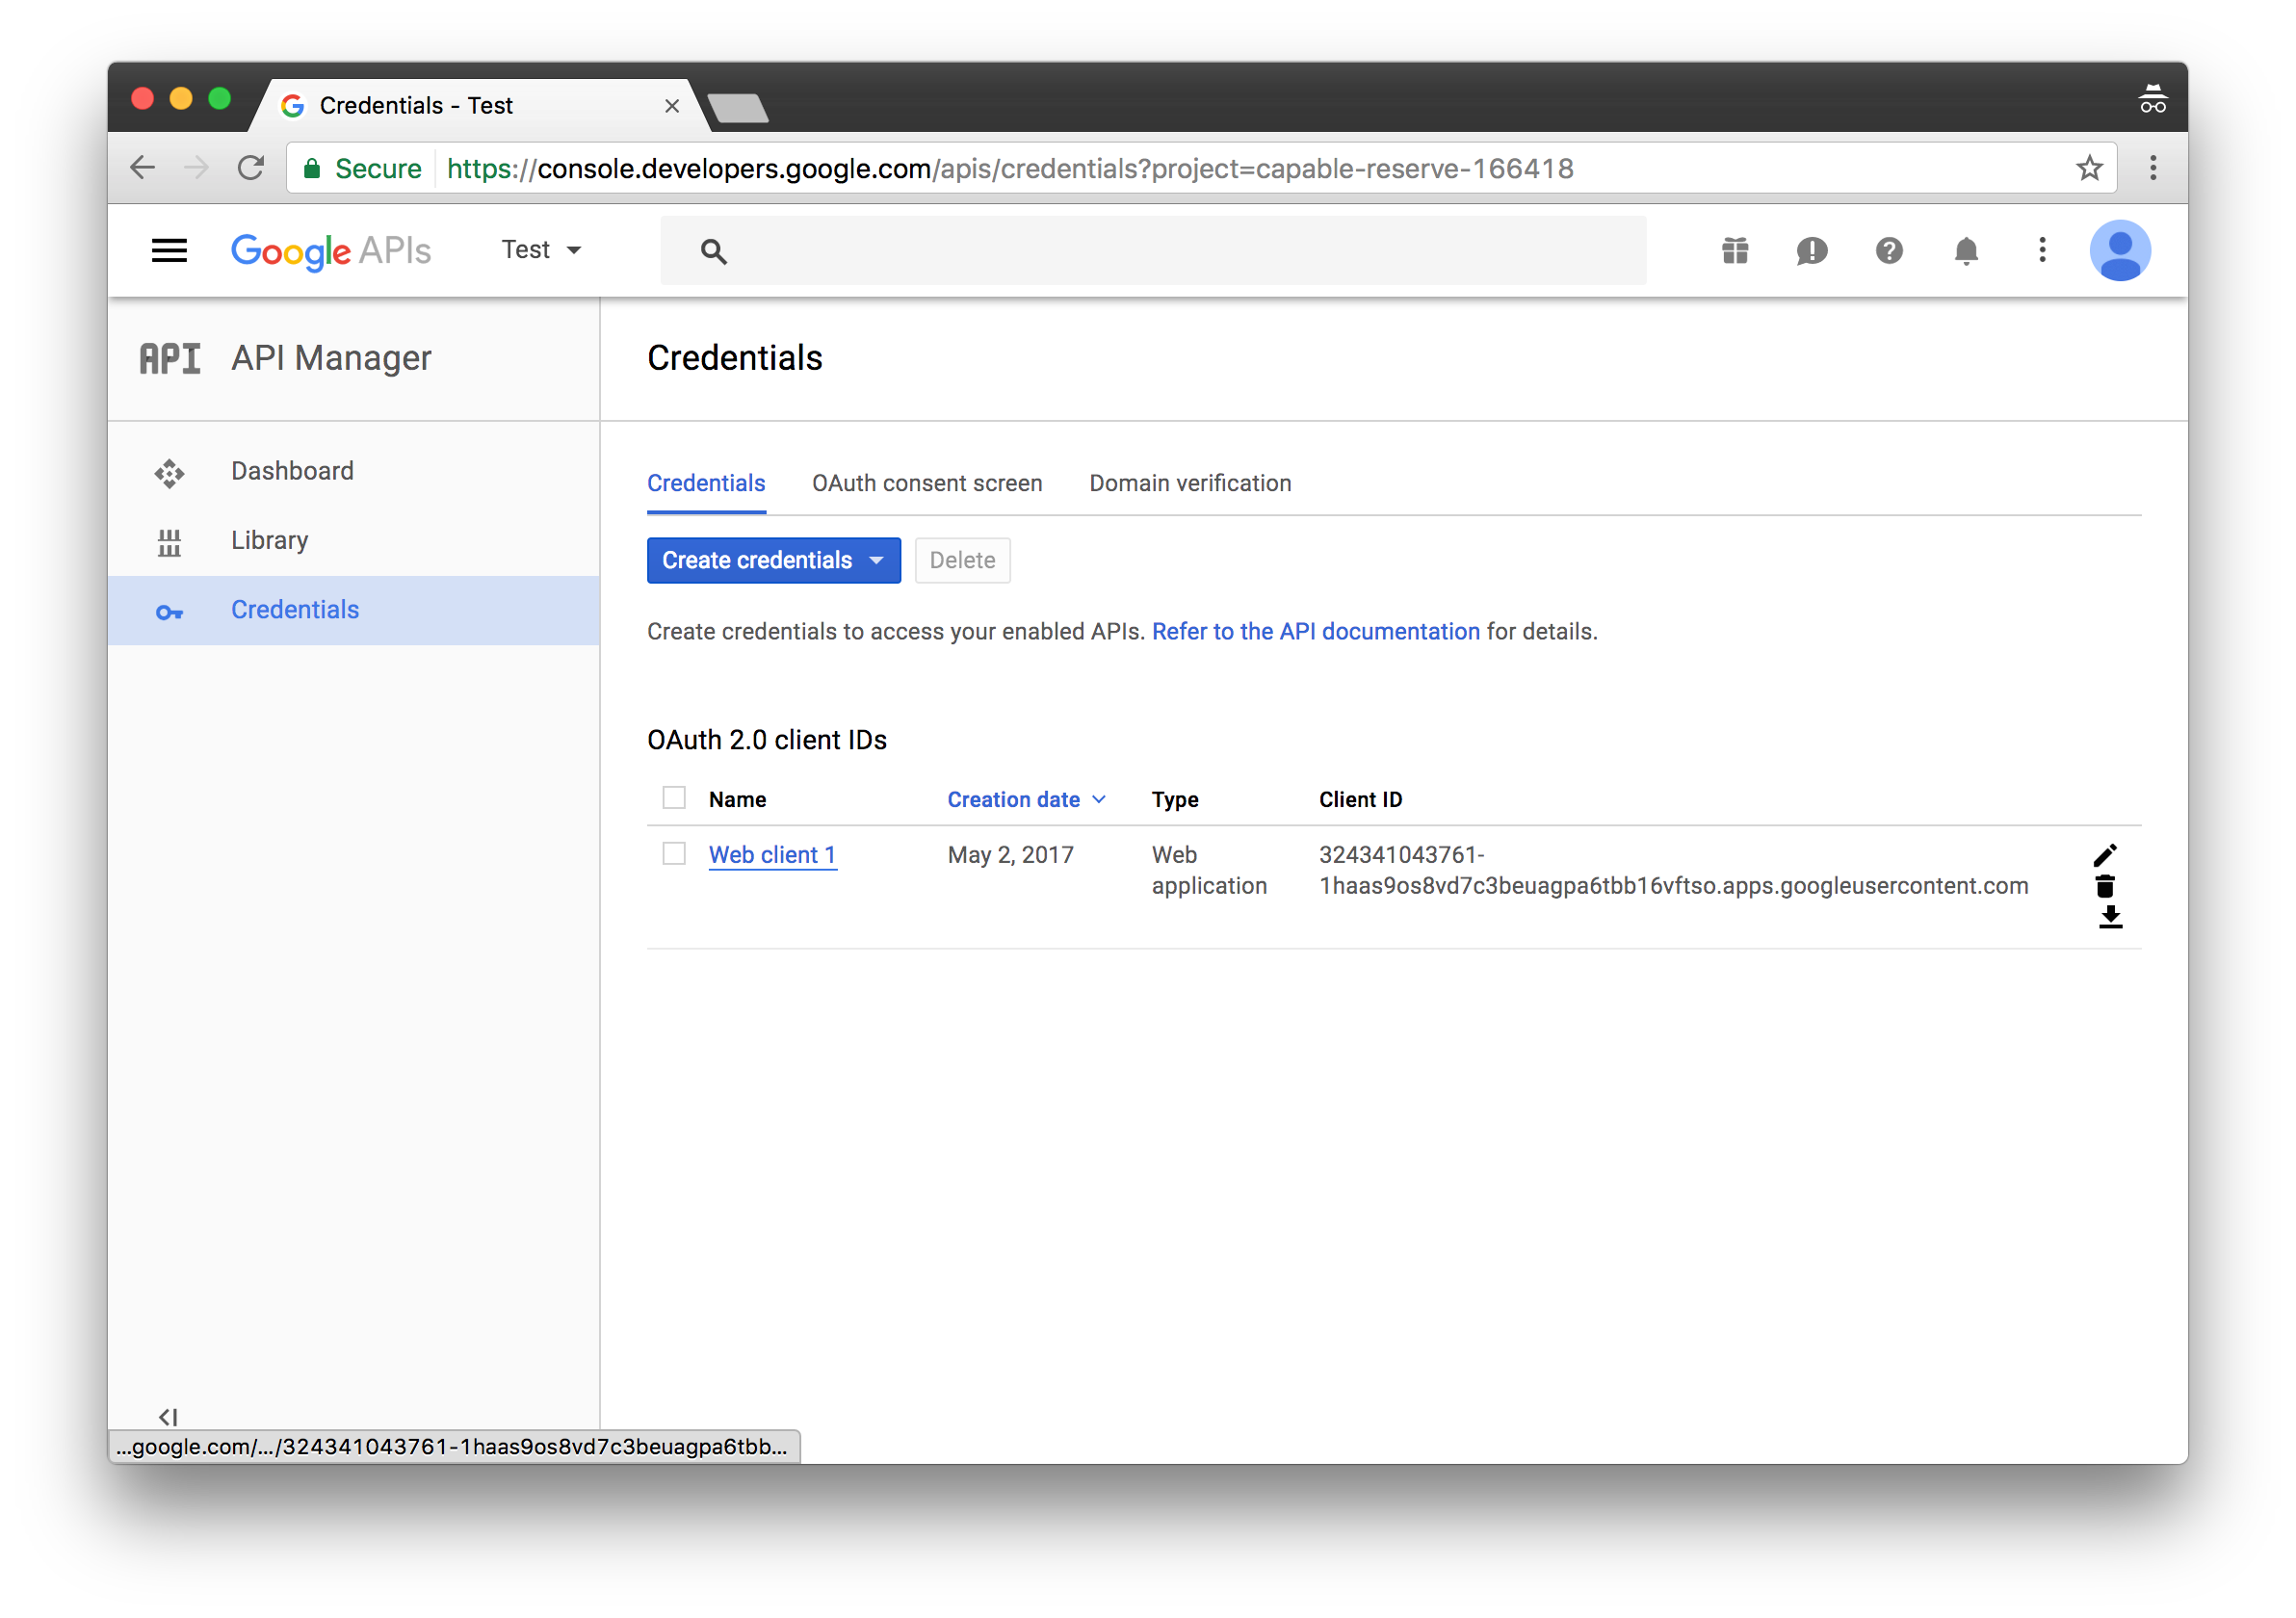
- Click on the client that you just created.
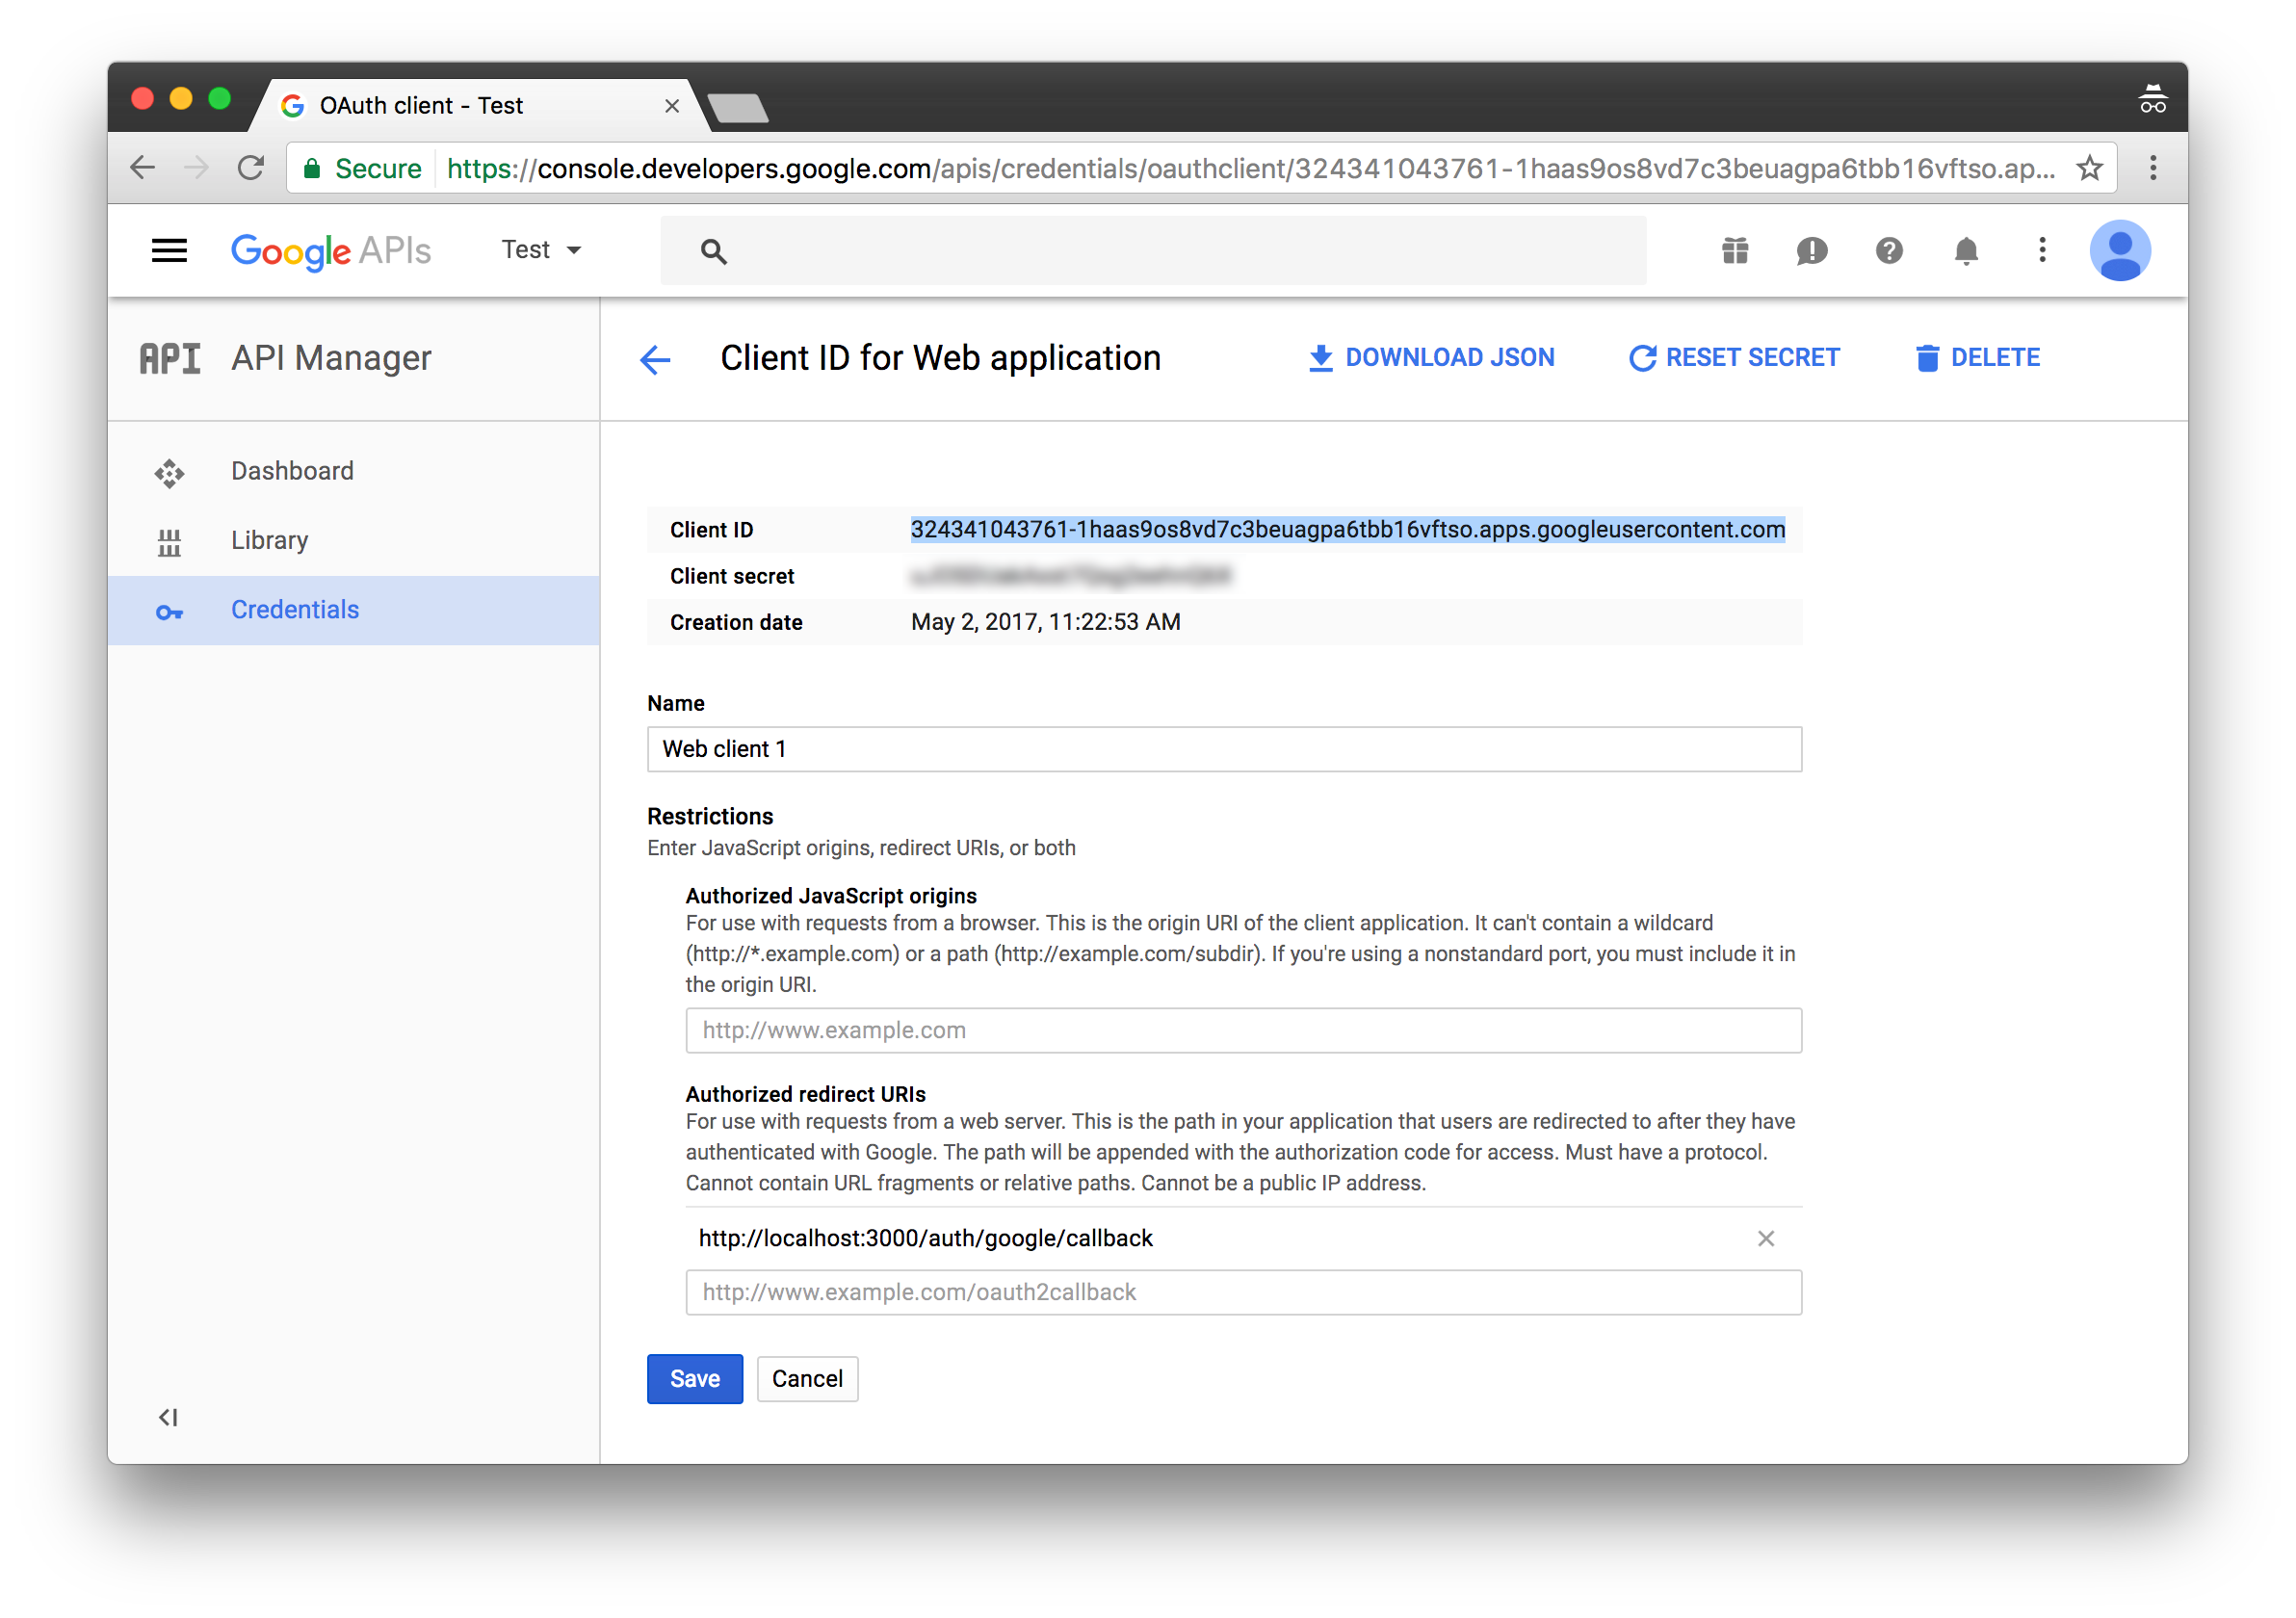
- Copy Client ID and Client Secret and paste them somewhere to use later on.
And we’re done with those apps. Keep the Client IDs and Secrets that you copied handy. We’ll need them in the next steps.
Initialize New Project
Let’s start off by creating a new project. Open Terminal App and run these commands to initialize a new project
react-native init OAuthLogin;
cd OAuthLogin;
Backend
Now, let’s set up the backend that handles user authentication via Facebook and Google OAuth apps that we created in the previous steps.
These are the tools that we’re going to use:
- Node.js. A platform that allows JavaScript to be used outside the Web Browsers, for creating web and network applications.
- Express. Node.js web application framework.
- Passport. An authentication middleware for Node.js.
- Passport-Facebook. Facebook authentication strategy for Passport and Node.js.
- Passport-Google-OAuth20. Google (OAuth 2.0) authentication strategy for Passport.
So, let’s get down to it.
Initialize Node.js Project
- Create a new folder called
backend:
mkdir backend;
cd backend;
- Run
npm initto create thepackage.jsonfile, so we can install backend dependencies separately from React Native app:
npm init;
It’s going to ask you a few questions. You can just press return to give the default answers for each question.
Install Dependencies
First, install dev dependencies that we’ll going to need during development:
npm install --save-dev babel babel-cli babel-preset-es2015 babel-preset-stage-0 nodemon
And next, install the dependencies that we’ll use to do some work:
npm i --save express cookie-session passport passport-facebook passport-google-oauth20
Create .babelrc File
- Create a new file called
.babelrcwith the following content:
{
  "presets": ["es2015", "stage-0"]
}
That will allow us to use ES6 standard of JavaScript that we have access to when developing React Native apps.
Add Start Script
Next, let’s add the start script to run the backend.
- Open
package.jsonfile and findscriptsobject:
  "scripts": {
    "test": "echo \"Error: no test specified\" && exit 1"
  },
- Add one more line after
test:
  "scripts": {
    "test": "echo \"Error: no test specified\" && exit 1",
    "start": "node_modules/nodemon/bin/nodemon.js -- node_modules/babel-cli/bin/babel-node.js server.js"
  },
We’ll be using nodemon to automatically restart the server when we change anything in the code.
Create Config File
We’re going to store Facebook and Google OAuth app IDs and secrets that we got in the previous steps in this file.
- Create a new file called
config.jswith the following content.
export const facebook = {
  clientID: 'INSERT-CLIENT-ID-HERE',
  clientSecret: 'INSERT-CLIENT-SECRET-HERE',
  callbackURL: 'http://localhost:3000/auth/facebook/callback',
  profileFields: ['id', 'name', 'displayName', 'picture', 'email'],
};

export const google = {
  clientID: 'INSERT-CLIENT-ID-HERE',
  clientSecret: 'INSERT-CLIENT-SECRET-HERE',
  callbackURL: 'http://localhost:3000/auth/google/callback',
};
- Replace
INSERT-CLIENT-ID-HEREandINSERT-CLIENT-SECRET-HEREplaceholders with your actual IDs and secrets.
Create the Server
Let’s create a script that will run an HTTP server and handle incoming requests.
- Create a new file called
server.jswith the following content.
import express from 'express';
import passport from 'passport';
import FacebookStrategy from 'passport-facebook';
import GoogleStrategy from 'passport-google-oauth20';
// Import Facebook and Google OAuth apps configs
import { facebook, google } from './config';

// Transform Facebook profile because Facebook and Google profile objects look different
// and we want to transform them into user objects that have the same set of attributes
const transformFacebookProfile = (profile) => ({
  name: profile.name,
  avatar: profile.picture.data.url,
});

// Transform Google profile into user object
const transformGoogleProfile = (profile) => ({
  name: profile.displayName,
  avatar: profile.image.url,
});

// Register Facebook Passport strategy
passport.use(new FacebookStrategy(facebook,
  // Gets called when user authorizes access to their profile
  async (accessToken, refreshToken, profile, done)
    // Return done callback and pass transformed user object
    => done(null, transformFacebookProfile(profile._json))
));

// Register Google Passport strategy
passport.use(new GoogleStrategy(google,
  async (accessToken, refreshToken, profile, done)
    => done(null, transformGoogleProfile(profile._json))
));

// Serialize user into the sessions
passport.serializeUser((user, done) => done(null, user));

// Deserialize user from the sessions
passport.deserializeUser((user, done) => done(null, user));

// Initialize http server
const app = express();

// Initialize Passport
app.use(passport.initialize());
app.use(passport.session());

// Set up Facebook auth routes
app.get('/auth/facebook', passport.authenticate('facebook'));

app.get('/auth/facebook/callback',
  passport.authenticate('facebook', { failureRedirect: '/auth/facebook' }),
  // Redirect user back to the mobile app using Linking with a custom protocol OAuthLogin
  (req, res) => res.redirect('OAuthLogin://login?user=' + JSON.stringify(req.user)));

// Set up Google auth routes
app.get('/auth/google', passport.authenticate('google', { scope: ['profile'] }));

app.get('/auth/google/callback',
  passport.authenticate('google', { failureRedirect: '/auth/google' }),
  (req, res) => res.redirect('OAuthLogin://login?user=' + JSON.stringify(req.user)));

// Launch the server on the port 3000
const server = app.listen(3000, () => {
  const { address, port } = server.address();
  console.log(`Listening at http://${address}:${port}`);
});
Read through the comments to see what’s going on. Basically, we’re just setting up Passport to handle users authentication, transform Facebook and Google profiles into a unified user object and stringify it when redirecting users back to the mobile app.
Launch the Server
Let’s launch the server and see how it works.
- Open Terminal App and execute:
npm start
You should see a confirmation that it’s running in your terminal.
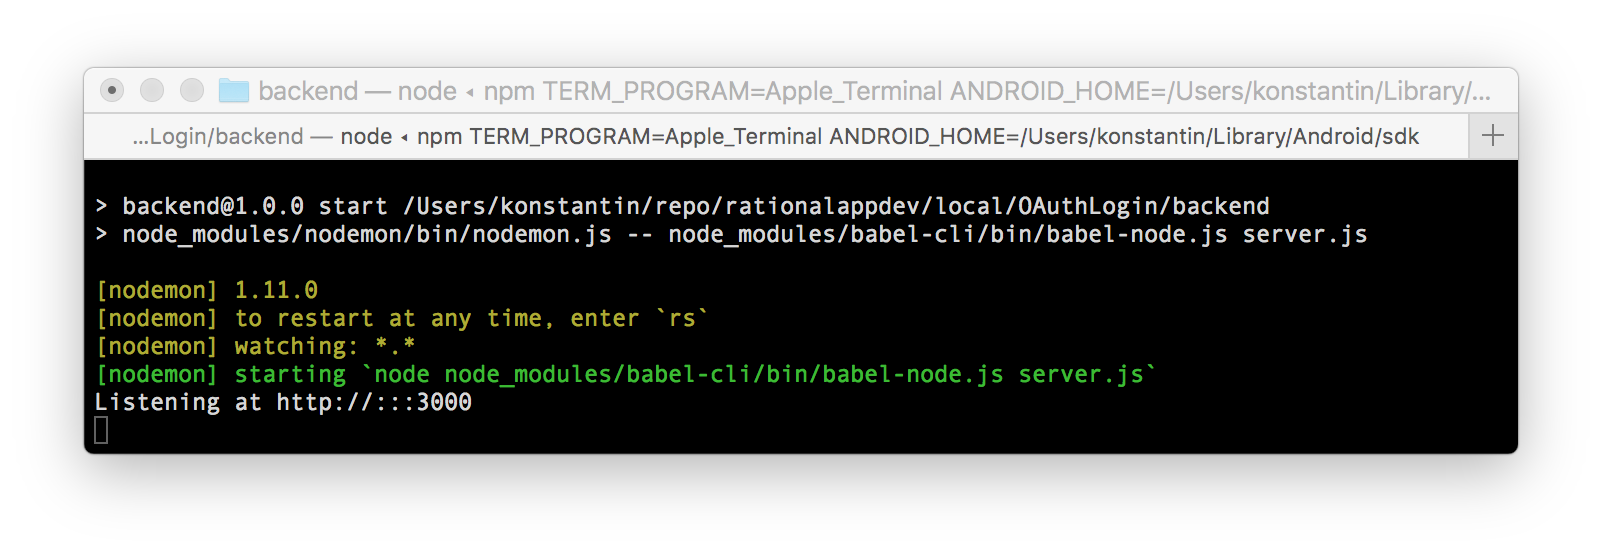
That means the server works. That’s great. Keep it running and let’s continue to the mobile app.
Mobile App
Now that we have our backend ready let’s build the mobile app.
Open new Terminal window and go to OAuthLogin folder:
cd OAuthLogin;
Install Dependencies
First of all, let’s install a couple of new dependencies.
- React Native Safari View. A React Native wrapper for Safari View Controller. It opens a URL in a view inside of the app without going to Safari app. We’ll use it to send users over to the backend that we built in the previous step for authorization.
If you have worked with Linking before you might be wondering why am I suggesting to use Safari View instead of just using
Linking.openURLthat opens a URL in Safari app. That’s because it’s considered bad UX and Apple won’t approve your app if you were to publish it to Apple Store.
npm install --save react-native-safari-view
- React Native Vector Icons. We’ll use for Facebook and Google icons on the buttons.
npm install --save react-native-vector-icons
Now, let’s link libraries and other dependencies required by the packages that we just installed.
react-native link
Setting Up Linking
Linking allows us to handle incoming requests. By using a special URL Scheme we are able to redirect users from the backend to the mobile app once they were authenticated.
On iOS you’ll need to link RCTLinking to your project by following the steps below.
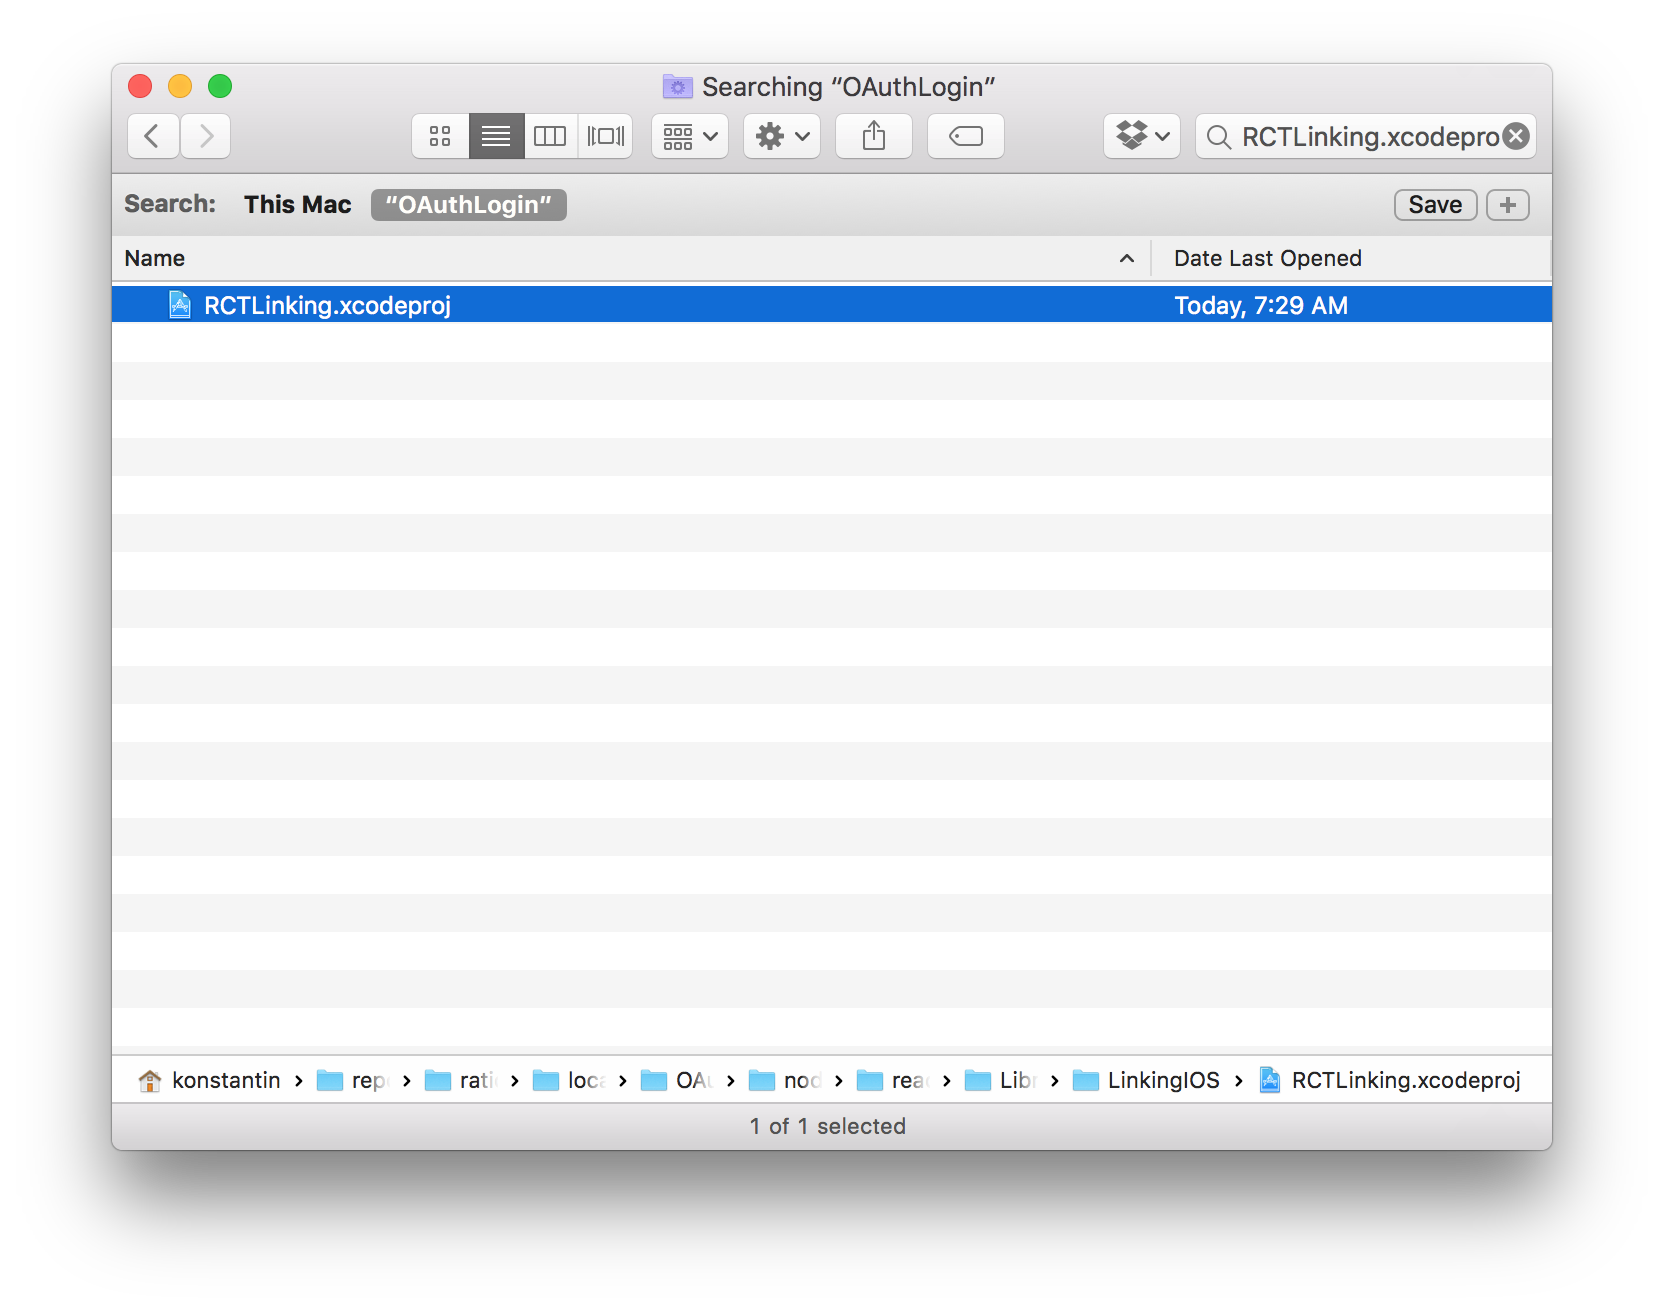
- Find
RCTLinking.xcodeprojfile inside your project’s folder. It’s located innode_modules/react-native/Libraries/LinkingIOS/folder.
- Open
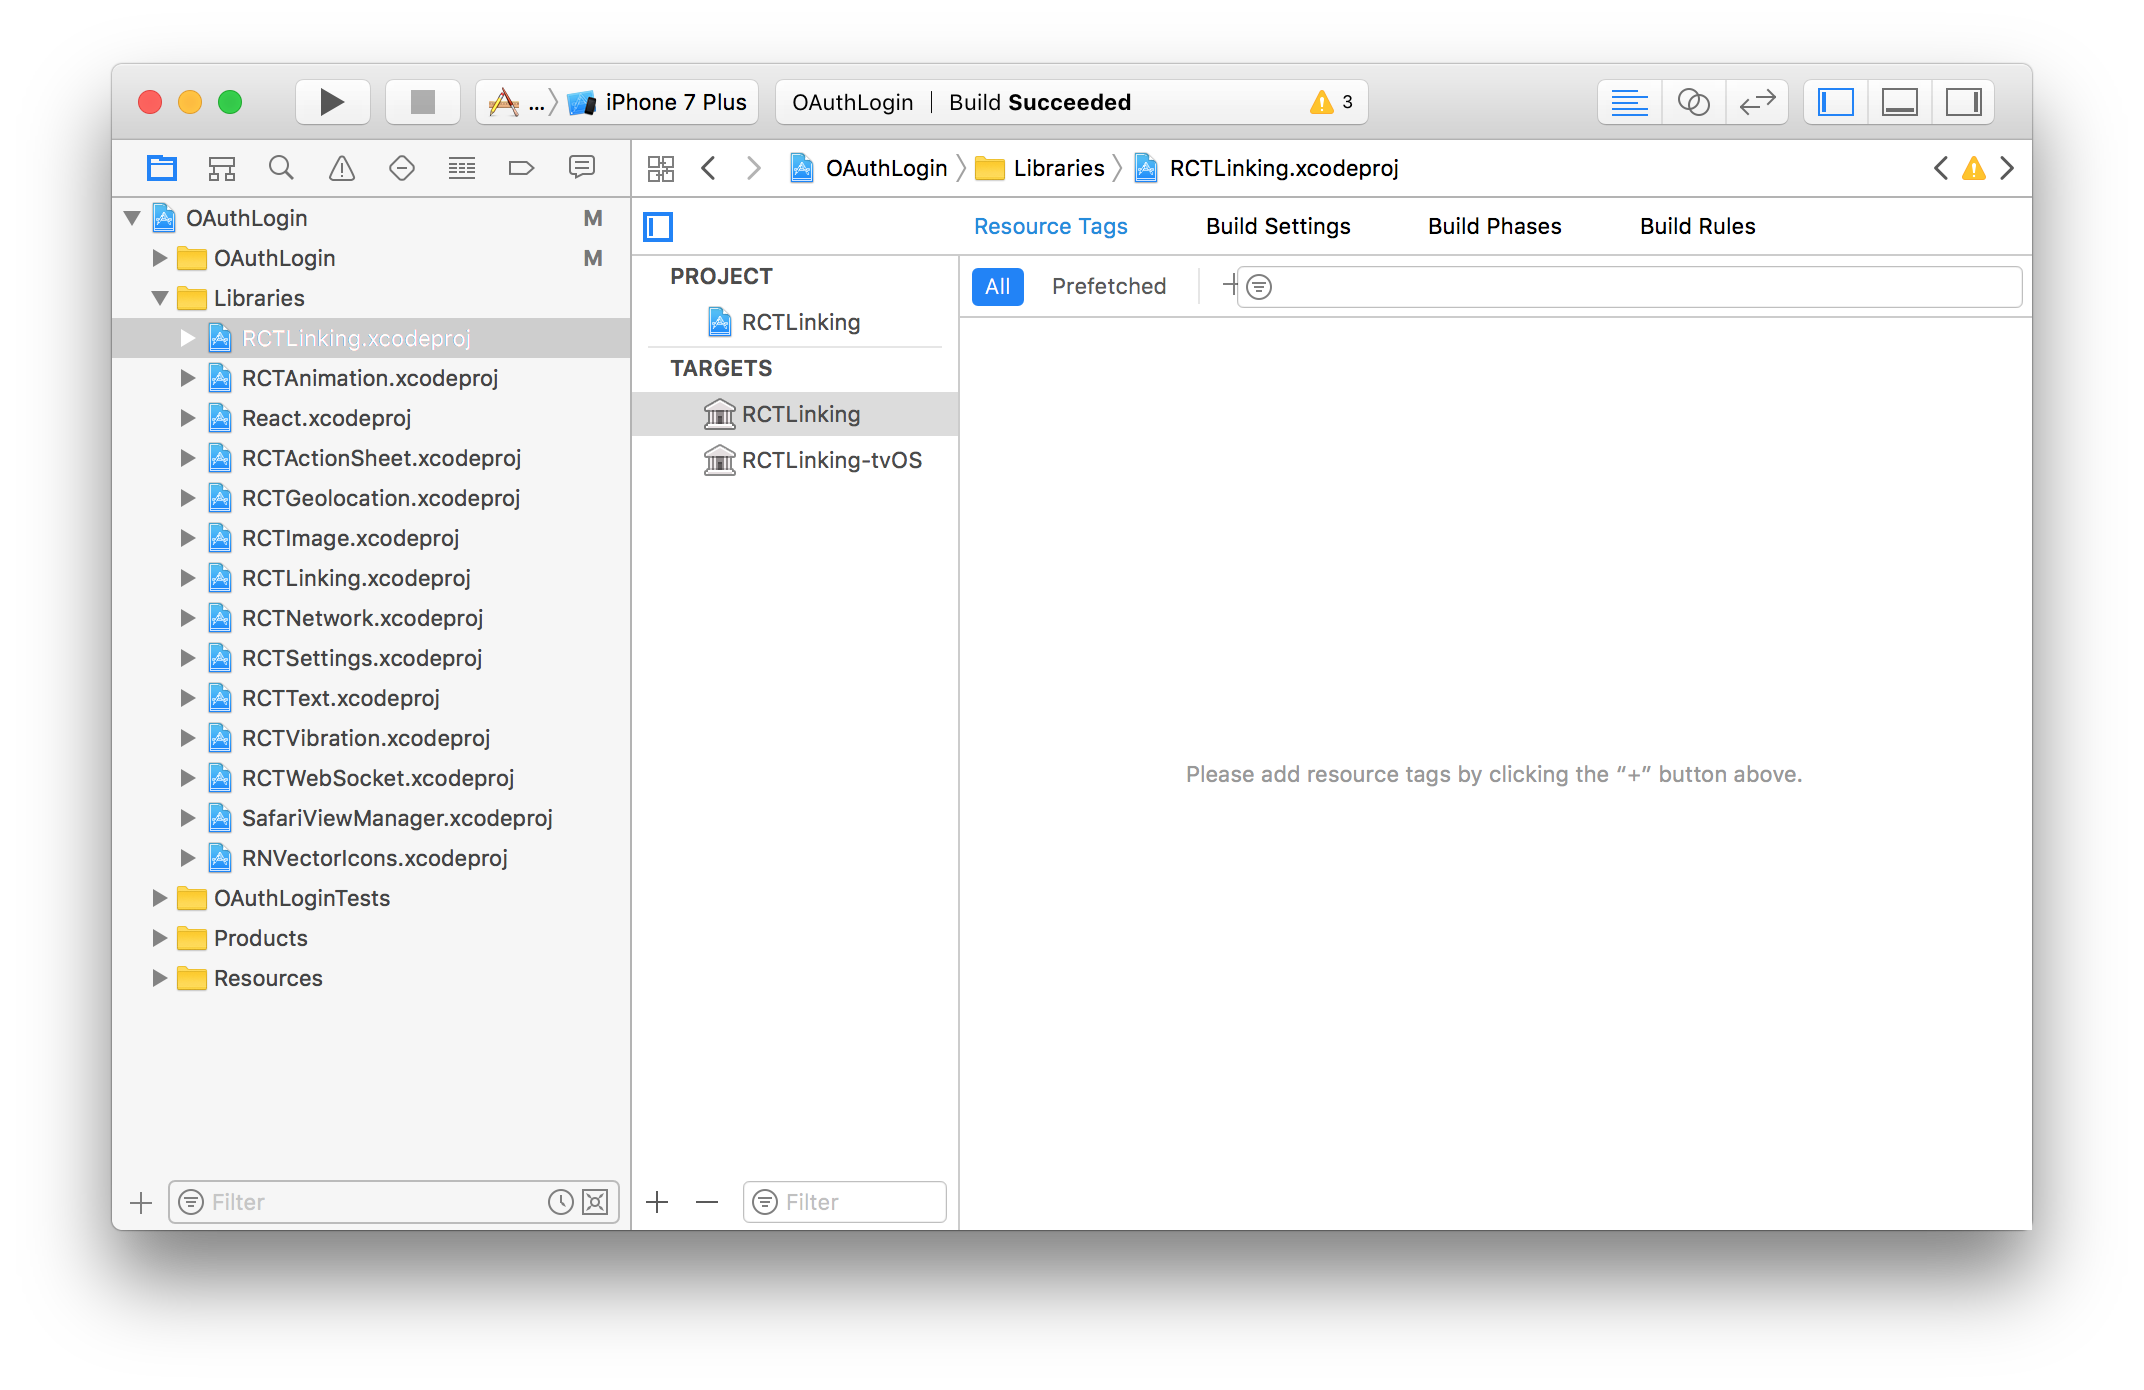
ios/OAuthLogin.xcodeprojfile. - Drag
RCTLinking.xcodeprojfile intoLibrariesfolder on the left.
- Open
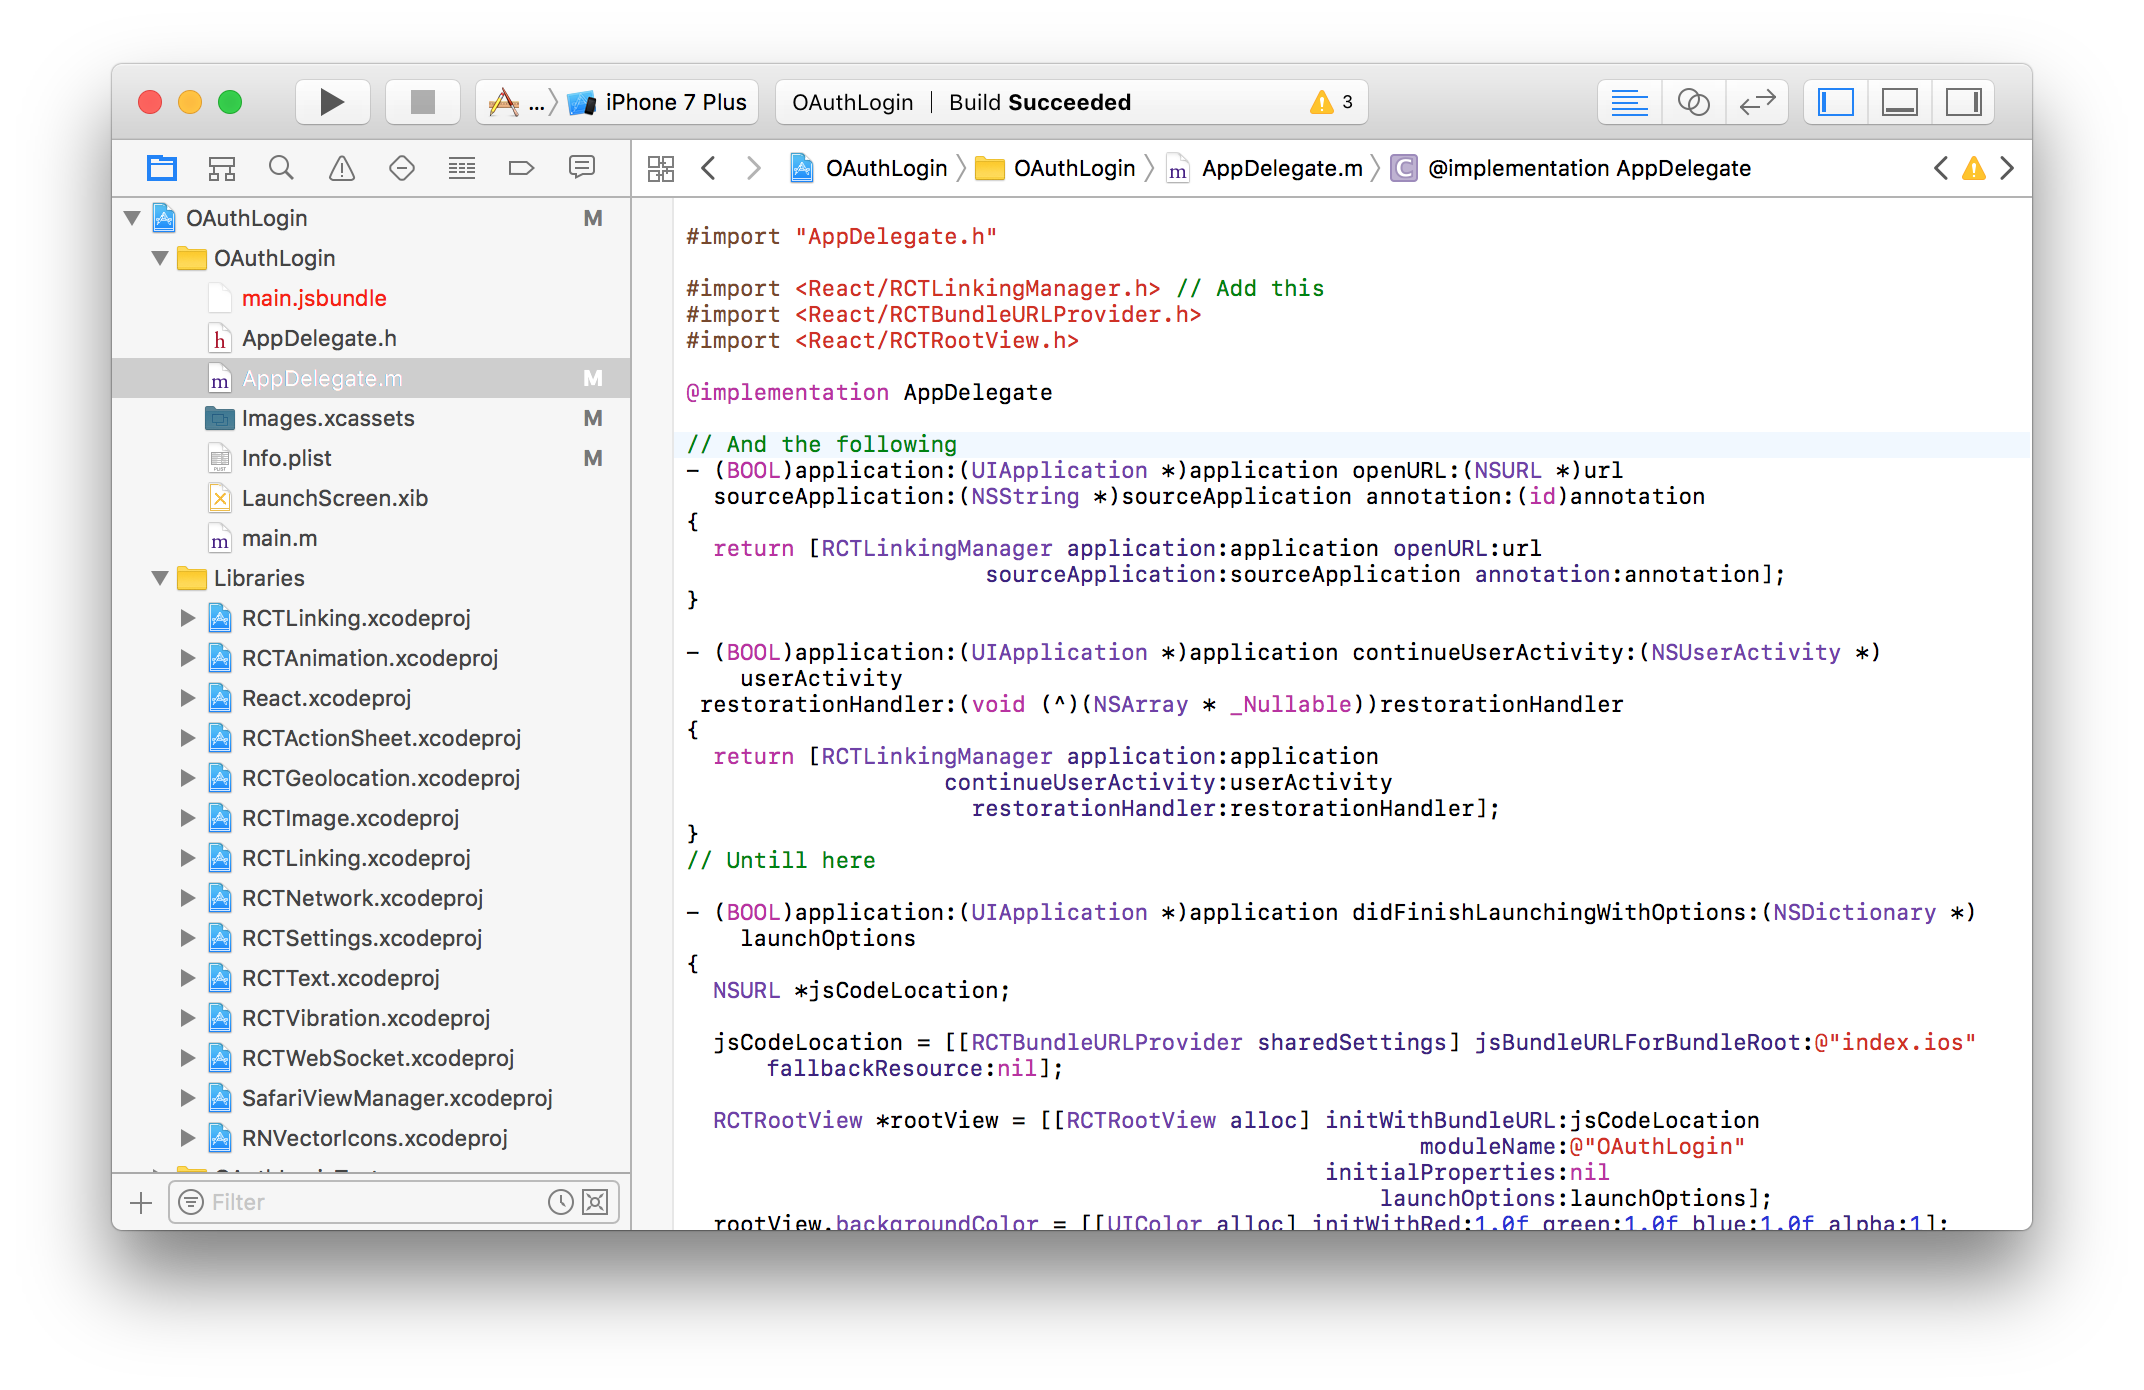
Edit AppDelegate.mfile.
- Add
#import <React/RCTLinkingManager.h>next to other imports.
#import <React/RCTLinkingManager.h>
- Add the following right after
@implementation AppDelegateline.
- (BOOL)application:(UIApplication *)application openURL:(NSURL *)url
  sourceApplication:(NSString *)sourceApplication annotation:(id)annotation
{
  return [RCTLinkingManager application:application openURL:url
                      sourceApplication:sourceApplication annotation:annotation];
}

- (BOOL)application:(UIApplication *)application continueUserActivity:(NSUserActivity *)userActivity
 restorationHandler:(void (^)(NSArray * _Nullable))restorationHandler
{
  return [RCTLinkingManager application:application
                   continueUserActivity:userActivity
                     restorationHandler:restorationHandler];
}
- Click on OAuthLogin on the top of the left sidebar and then click Info tab on the right.
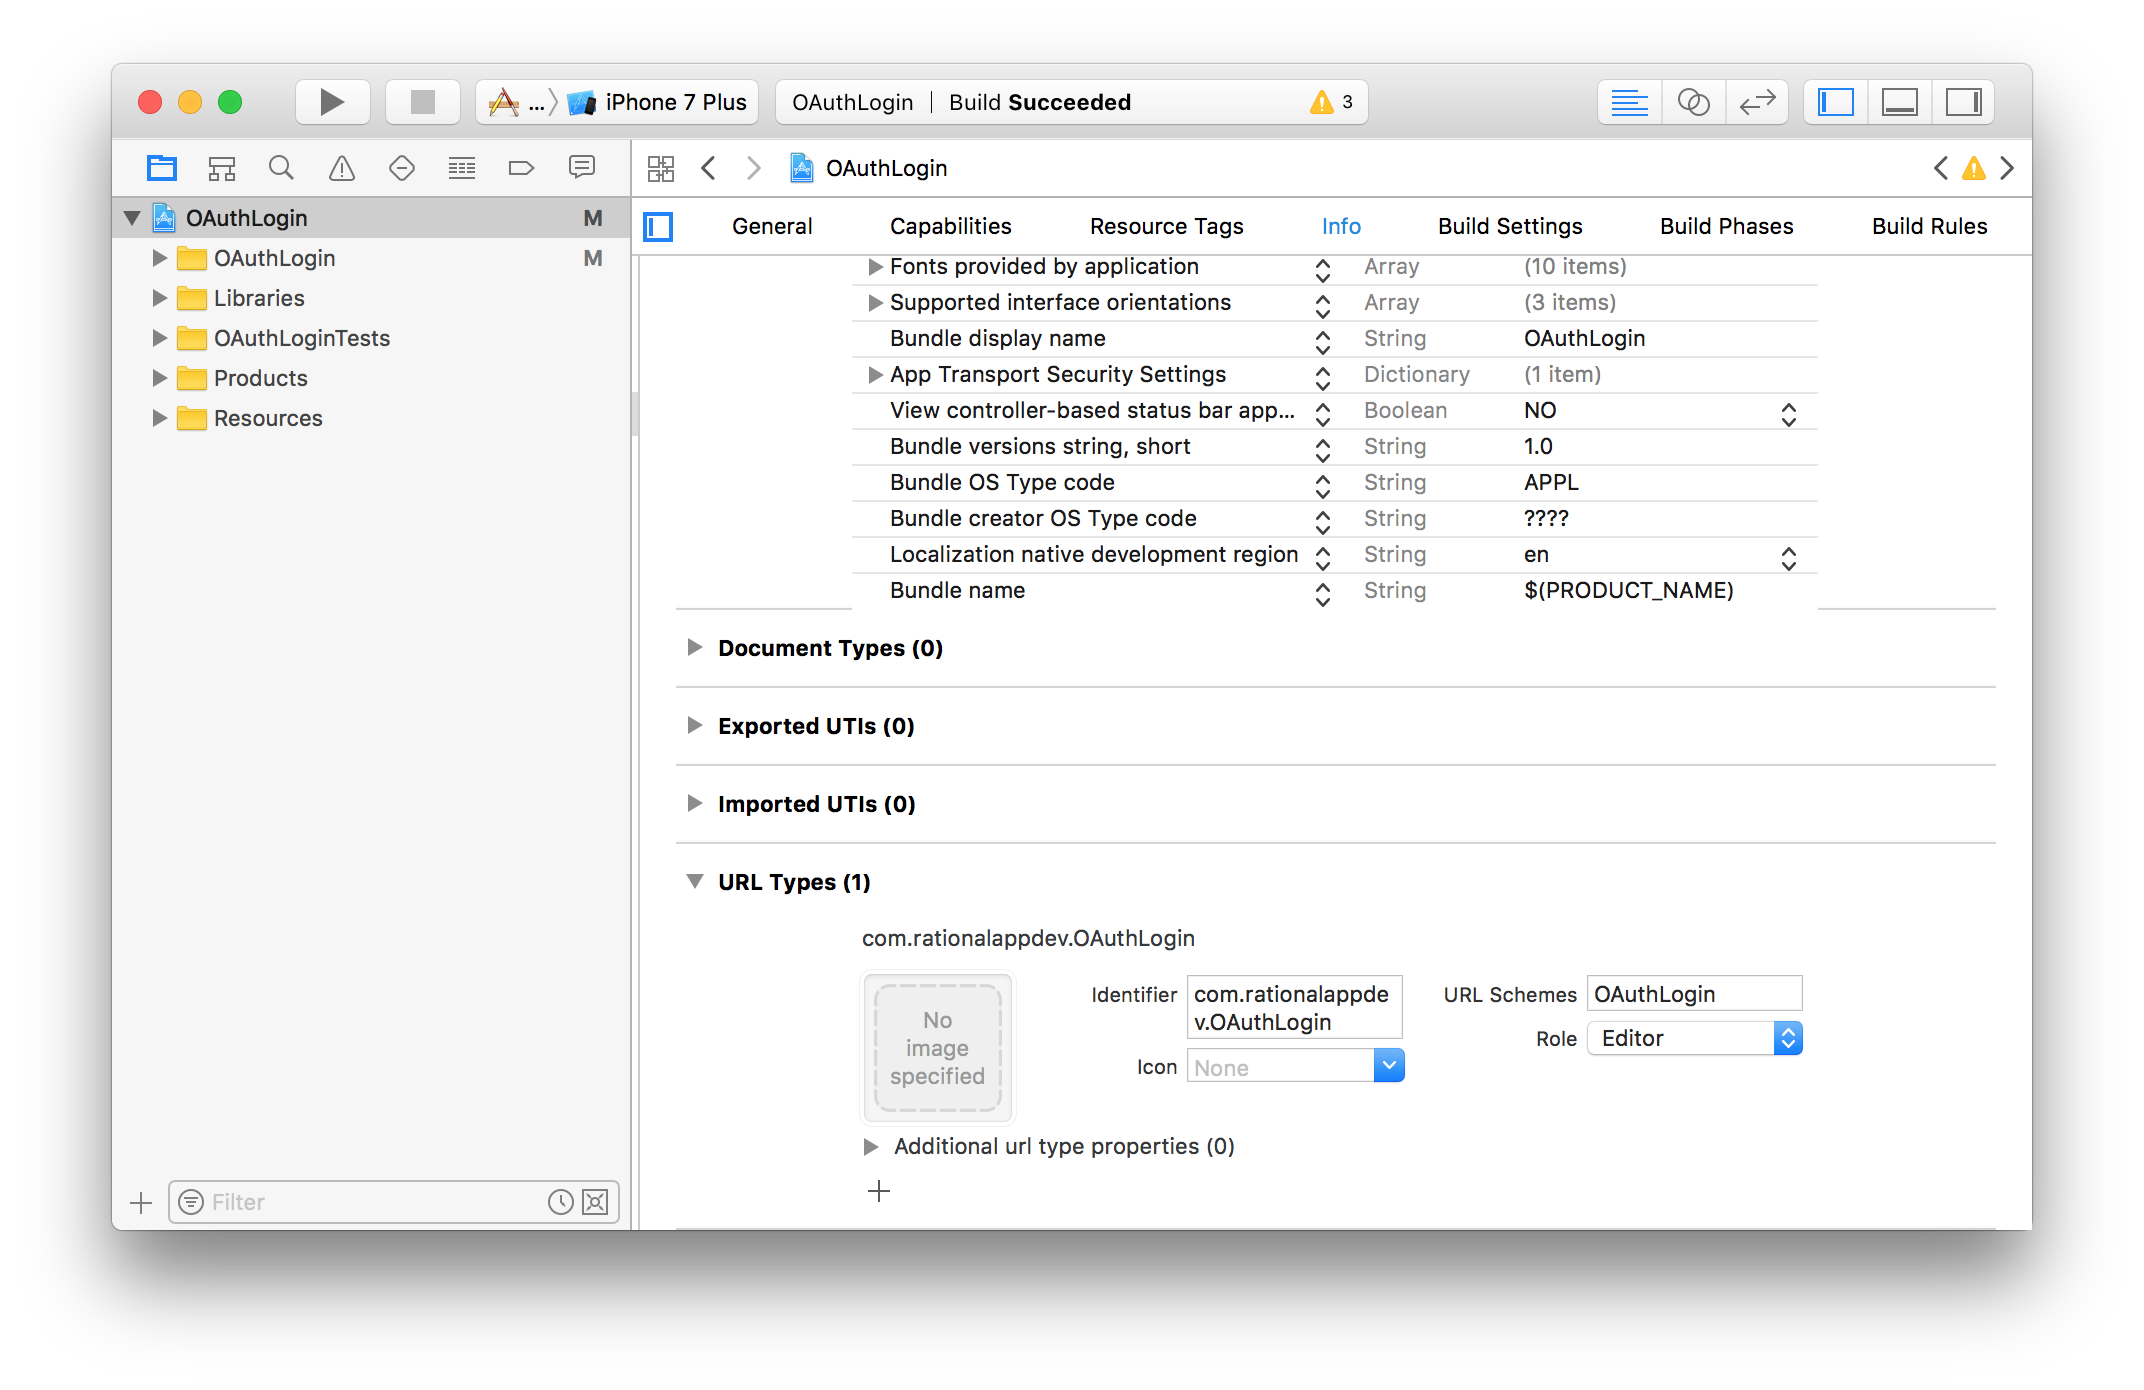
- Scroll down to URL Types section and add a new URL type with
OAuthLoginURL Schema. That’s the schema used by our backend to redirect users back to the mobile app.
On Android you’ll need to edit android/app/src/main/AndroidManifest.xml file to add an intent-filter to handle incoming requests.
- Find this code:
    <activity
        android:name=".MainActivity"
        android:label="@string/app_name"
        android:configChanges="keyboard|keyboardHidden|orientation|screenSize"
        android:windowSoftInputMode="adjustResize">
        <intent-filter>
            <action android:name="android.intent.action.MAIN" />
            <category android:name="android.intent.category.LAUNCHER" />
        </intent-filter>
        // Add new <intent-filter> here
      </activity>
- And add another
<intent-filter>after existing one:
    <intent-filter>
            <action android:name="android.intent.action.VIEW" />
            <category android:name="android.intent.category.DEFAULT" />
            <category android:name="android.intent.category.BROWSABLE" />
            <data android:scheme="oauthlogin" android:host="login" />
        </intent-filter>
Launch the Simulator
Now, let’s run the app in the simulator.
react-native run-ios;
Enable Hot Reloading
Once your app is up and running, press ⌘D and select Enable Hot Reloading. This will save you some time having to reload the app manually every time you make a change.
Index Files
Next, let’s update our index files. Since we’re going to re-use the same code for both, iOS and Android, we don’t need two different index files. We’ll be using the same App component in both index files.
- Open
index.ios.jsfile and scrap all of the React Native boilerplate code to start from scratch. Do the same forindex.android.js. And add the following code to both of those files.
import { AppRegistry } from 'react-native';
import App from './app';

AppRegistry.registerComponent('OAuthLogin', () => App);
This code imports App component from src/app.js file and registers it as the main app container.
App Component
Now, let’s create App component.
- Create a new file called
app.jswith the following content.
import React, { Component } from 'react';
import {
  Image,
  Linking,
  StyleSheet,
  Platform,
  Text,
  View
} from 'react-native';
import Icon from 'react-native-vector-icons/FontAwesome';
import SafariView from 'react-native-safari-view';

export default class App extends Component {

  state = {
    user: undefined, // user has not logged in yet
  };

  // Set up Linking
  componentDidMount() {
    // Add event listener to handle OAuthLogin:// URLs
    Linking.addEventListener('url', this.handleOpenURL);
    // Launched from an external URL
    Linking.getInitialURL().then((url) => {
      if (url) {
        this.handleOpenURL({ url });
      }
    });
  };

  componentWillUnmount() {
    // Remove event listener
    Linking.removeEventListener('url', this.handleOpenURL);
  };

  handleOpenURL = ({ url }) => {
    // Extract stringified user string out of the URL
    const [, user_string] = url.match(/user=([^#]+)/);
    this.setState({
      // Decode the user string and parse it into JSON
      user: JSON.parse(decodeURI(user_string))
    });
    if (Platform.OS === 'ios') {
      SafariView.dismiss();
    }
  };

  // Handle Login with Facebook button tap
  loginWithFacebook = () => this.openURL('https://localhost:3000/auth/facebook');

  // Handle Login with Google button tap
  loginWithGoogle = () => this.openURL('https://localhost:3000/auth/google');

  // Open URL in a browser
  openURL = (url) => {
    // Use SafariView on iOS
    if (Platform.OS === 'ios') {
      SafariView.show({
        url: url,
        fromBottom: true,
      });
    }
    // Or Linking.openURL on Android
    else {
      Linking.openURL(url);
    }
  };

  render() {
    const { user } = this.state;
    return (
      <View style={styles.container}>
        { user
          ? // Show user info if already logged in
            <View style={styles.content}>
              <Text style={styles.header}>
                Welcome {user.name}!
              </Text>
              <View style={styles.avatar}>
                <Image source={{ uri: user.avatar }} style={styles.avatarImage} />
              </View>
            </View>
          : // Show Please log in message if not
            <View style={styles.content}>
              <Text style={styles.header}>
                Welcome Stranger!
              </Text>
              <View style={styles.avatar}>
                <Icon name="user-circle" size={100} color="rgba(0,0,0,.09)" />
              </View>
              <Text style={styles.text}>
                Please log in to continue {'\n'}
                to the awesomness
              </Text>
            </View>
        }
        {/* Login buttons */}
        <View style={styles.buttons}>
          <Icon.Button
            name="facebook"
            backgroundColor="#3b5998"
            onPress={this.loginWithFacebook}
            {...iconStyles}
          >
            Login with Facebook
          </Icon.Button>
          <Icon.Button
            name="google"
            backgroundColor="#DD4B39"
            onPress={this.loginWithGoogle}
            {...iconStyles}
          >
            Or with Google
          </Icon.Button>
        </View>
      </View>
    );
  }
}

const iconStyles = {
  borderRadius: 10,
  iconStyle: { paddingVertical: 5 },
};

const styles = StyleSheet.create({
  container: {
    flex: 1,
    backgroundColor: '#FFF',
  },
  content: {
    flex: 1,
    justifyContent: 'center',
    alignItems: 'center',
  },
  avatar: {
    margin: 20,
  },
  avatarImage: {
    borderRadius: 50,
    height: 100,
    width: 100,
  },
  header: {
    fontSize: 20,
    textAlign: 'center',
    margin: 10,
  },
  text: {
    textAlign: 'center',
    color: '#333',
    marginBottom: 5,
  },
  buttons: {
    justifyContent: 'space-between',
    flexDirection: 'row',
    margin: 20,
    marginBottom: 30,
  },
});
It’s a pretty straightforward component. There are a welcome message and two login buttons at the bottom.
The Result
Bring up the simulator window and enjoy the result.
Wrapping Up
Hopefully, you’ve learned a lot and will be able to use that knowledge when building your apps! Subscribe to get notified about new tutorials. And if you have any questions or ideas for new tutorials, just leave a comment below the post.

