Table of contents
What We Will Be Building
Now that we know how to log users in using Facebook or Google OAuth let’s build a comments component. It’ll show existing comments, and allow users to submit new comments.
There’s going to be two main parts:
- Node.js backend. Authenticates users via Facebook or Google OAuth and stores users their comments in MongoDB database.
- React Native mobile app. Has Login and Comments screens. The former is to log users in, and the latter is to show user comments and to post new ones.
Let’s Get Started
Let’s start off by pulling the code from Logging Into React Native Apps with Facebook or Google tutorial to use it as a boilerplate and build on top of it.
git clone https://github.com/rationalappdev/react-native-oauth-login-tutorial.git Comments;
cd Comments;
rm -rf .git;
And then install dependencies.
npm install;
Backend
First, let’s modify our backend code so that it can handle user and comment creation using MongoDB.
MongoDB
If you don’t have MongoDB installed yet, open Terminal App and execute:
brew install mongodb
Then create a folder that MongoDB will use to store the database data:
sudo mkdir -p /data/db
And set the correct permissions:
sudo chmod 777 /data/db
Finally, launch MongoDB:
mongod&
Install Dependencies
- Install existing dependencies.
cd backend;
npm install;
- Install Mongoose and body-parser.
npm install mongoose body-parser --save;
Models
Now, let’s create Mongoose models for users and comments. We’ll use those to store users and comments in MongoDB.
- Create a new folder called
modelswithinbackedfolder.
User Model
- Create a new file called
user.jswithinmodelsfolder.
import mongoose, { Schema } from 'mongoose';

// Define model schema
export const schema = new Schema({
  oauth_id: {
    type: String,
    unique: true,
    index: true,
  },
  name: String,
  avatar: String,
});

// Export Mongoose model
export default mongoose.model('User', schema);
Comment Model
- Create a new file called
comment.jswithinmodelsfolder.
import mongoose, { Schema } from 'mongoose';

// Define model schema
export const schema = new Schema({
  // References User model
  user: {
    type: Schema.ObjectId,
    ref: 'User',
  },
  content: String,
  created: Date
});

// Export Mongoose model
export default mongoose.model('Comment', schema);
Controllers
Currently, we have all of the authorization logic in one file server.js. But since our app is getting bigger and we’re adding comments it would be better to break the code down into different controllers to divide responsibilities. Generally, it’s a good idea to follow Single Responsibility Principle.
The single responsibility principle is a computer programming principle that states that every module or class should have responsibility over a single part of the functionality provided by the software, and that responsibility should be entirely encapsulated by the class. – Wikipedia.
- Create a new folder called
controllerswithinbackedfolder.
Auth Controller
Let’s move all authorization logic from server.js to auth.js controller.
- Create a new file called
auth.jswithincontrollersfolder.
import passport from 'passport';
import FacebookStrategy from 'passport-facebook';
import GoogleStrategy from 'passport-google-oauth20';
import User from '../models/user';
// Import Facebook and Google OAuth apps configs
import { facebook, google } from '../config';

// Transform Facebook profile because Facebook and Google profile objects look different
// and we want to transform them into user objects that have the same set of attributes
const transformFacebookProfile = (profile) => ({
  oauth_id: profile.id,
  name: profile.name,
  avatar: profile.picture.data.url,
});

// Transform Google profile into user object
const transformGoogleProfile = (profile) => ({
  oauth_id: profile.id,
  name: profile.displayName,
  avatar: profile.image.url,
});

// Register Facebook Passport strategy
passport.use(new FacebookStrategy(facebook,
  // Gets called when user authorizes access to their profile
  async (accessToken, refreshToken, profile, done)
    // Return done callback and pass transformed user object
    => done(null, await createOrGetUserFromDatabase(transformFacebookProfile(profile._json)))
));

// Register Google Passport strategy
passport.use(new GoogleStrategy(google,
  async (accessToken, refreshToken, profile, done)
    => done(null, await createOrGetUserFromDatabase(transformGoogleProfile(profile._json)))
));

const createOrGetUserFromDatabase = async (userProfile) => {
  let user = await User.findOne({ 'oauth_id': userProfile.oauth_id }).exec();
  if (!user) {
    user = new User({
      oauth_id: userProfile.oauth_id,
      name: userProfile.name,
      avatar: userProfile.avatar,
    });
    await user.save();
  }
  return user;
};

// Serialize user into the sessions
passport.serializeUser((user, done) => done(null, user));

// Deserialize user from the sessions
passport.deserializeUser((user, done) => done(null, user));

// Facebook
export const facebookLogin = passport.authenticate('facebook');
export const facebookMiddleware = passport.authenticate('facebook', { failureRedirect: '/auth/facebook' });

// Google
export const googleLogin = passport.authenticate('google', { scope: ['profile'] });
export const googleMiddleware = passport.authenticate('google', { failureRedirect: '/auth/google' });

// Callback
export const oauthCallback = async (req, res) => {
  res.redirect('OAuthLogin://login?user=' + JSON.stringify(req.user));
};
Comments Controller
Now, let’s create comments.js controller with two actions: list and create. list returns all existing comments from the database, and create adds new comments.
- Create a new file called
comments.jswithincontrollersfolder.
import Comment from '../models/comment';

// User relation for .populate()
const userRelation = {
  path: 'user',
  select: ['name', 'avatar'],
  model: 'User',
};

// List existing comments
export const list = async (req, res, next) => {
  // Get all comments and populate User models
  const comments = await Comment.find()
    .sort({ 'created': -1 })
    .populate(userRelation)
    .exec();

  res.json({
    comments
  });
};

// Create new comment
export const create = async (req, res, next) => {
  const { user_id, content } = req.body;
  // Save comment
  const comment = await new Comment({
    user: user_id,
    content: content,
    created: new Date,
  }).save();

  res.json({
    // Get the comment and populate User model
    comment: await Comment.findById(comment._id)
      .populate(userRelation)
      .exec()
  });
};
Server
In the next step let’s update server.js to import controller actions that we just created and register the routes.
- Open
server.jsfile and replace its content with the following.
import express from 'express';
import bodyParser from 'body-parser';
import passport from 'passport';
import mongoose from 'mongoose';
import {
  facebookLogin,
  facebookMiddleware,
  googleLogin,
  googleMiddleware,
  oauthCallback,
} from './controllers/auth';
import { list, create } from './controllers/comments';

// Connect to MongoDB
mongoose.Promise = global.Promise;
mongoose.connect('mongodb://localhost/react-native-comments');

// Initialize http server
const app = express();
app.use(bodyParser.json());
// Initialize Passport
app.use(passport.initialize());
app.use(passport.session());

// Set up auth routes
app.get('/auth/facebook', facebookLogin);
app.get('/auth/google', googleLogin);
app.get('/auth/facebook/callback', facebookMiddleware, oauthCallback);
app.get('/auth/google/callback', googleMiddleware, oauthCallback);

// Set up comment routes
app.route('/comments')
  .get(list)
  .put(create);

// Launch the server on the port 3000
const server = app.listen(3000, () => {
  const { address, port } = server.address();
  console.log(`Listening at http://${address}:${port}`);
});
Launch the Backend
We’re done making changes to the backend. Let’s launch it to make sure it still works.
- Open Terminal App and execute:
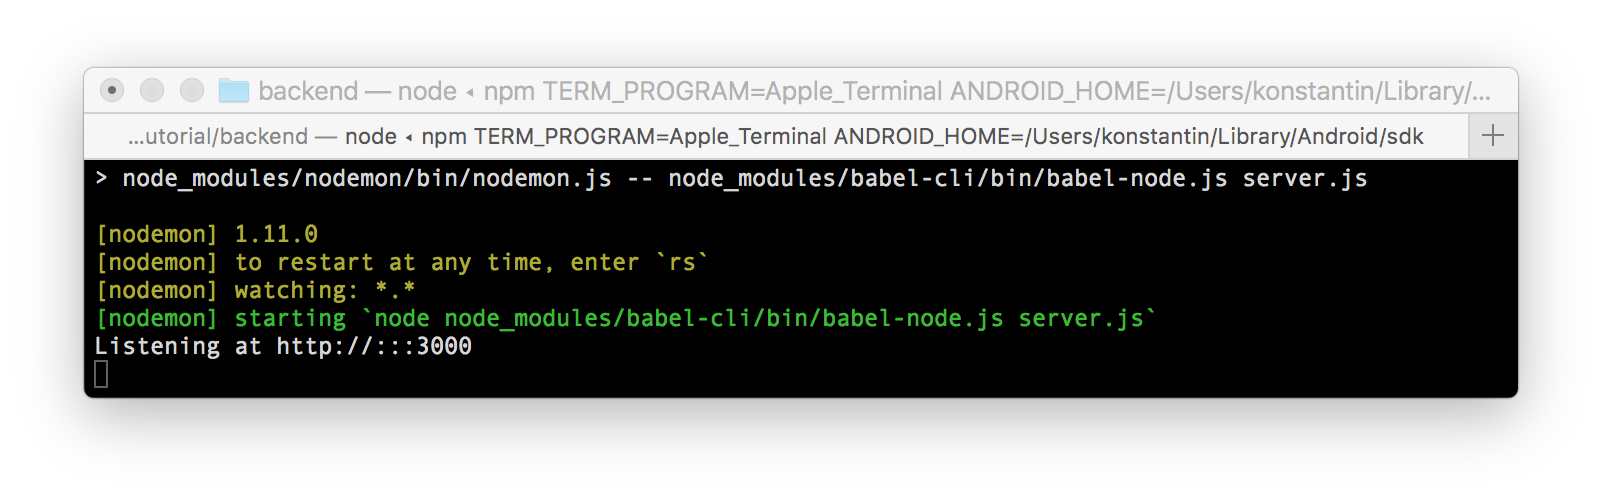
npm start
You should see a confirmation that it’s running in your terminal.
Now, let’s open a browser and go to http://127.0.0.1:3000/comments.
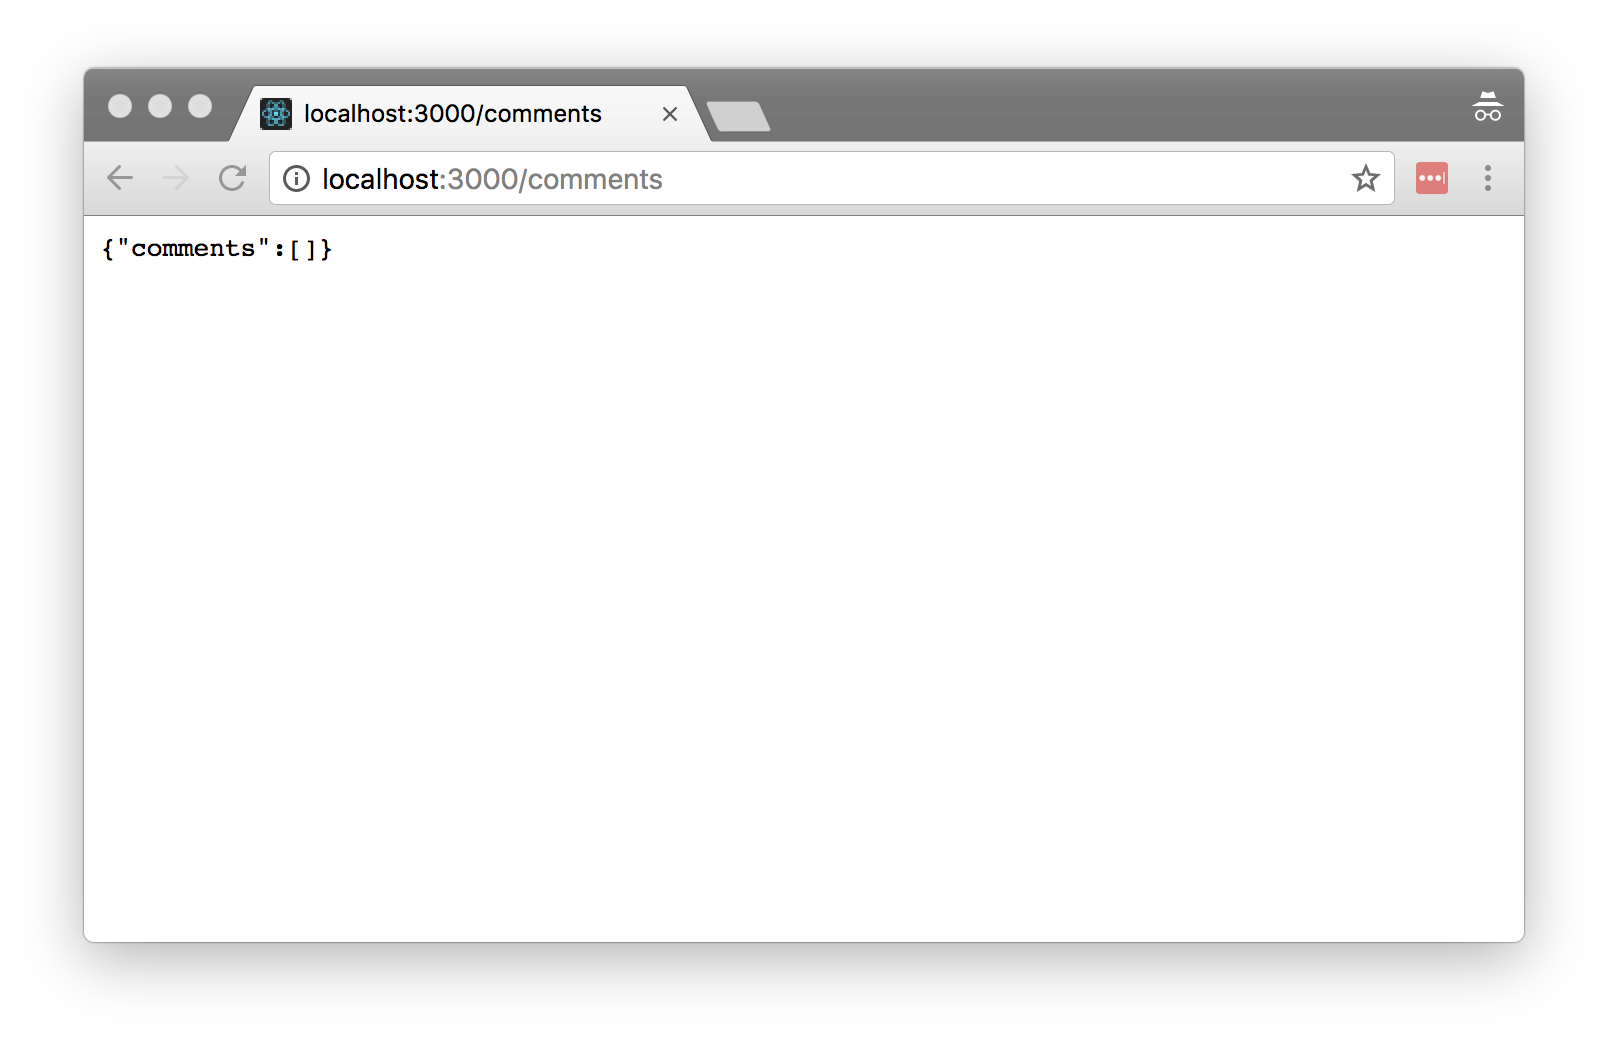
There are no comments yet, but the server works, which is great. Keep it running and let’s work on the mobile app.
Mobile App
Now that we’re done with the backend let’s go ahead and make use of it and build a mobile app!
Install Dependencies
- Install existing dependencies.
cd Comments;
npm install;
- Install moment that’ll help us out with formatting date times in comments.
npm install moment --save;
Login Component
Since, again, our app is getting bigger and more complicated let’s break everything down into different components. And start off by moving all of the login logic from app.js to its own component called Login.
- Create a new folder called
components. - Create a new file called
login.jswithincomponentsfolder.
import React, { Component, PropTypes } from 'react';
import {
  Linking,
  StyleSheet,
  Platform,
  Text,
  View
} from 'react-native';
import Icon from 'react-native-vector-icons/FontAwesome';
import SafariView from 'react-native-safari-view';

export default class Login extends Component {

  static propTypes = {
    onLoggedIn: PropTypes.func.isRequired
  };

  // Set up Linking
  componentDidMount() {
    // Add event listener to handle OAuthLogin:// URLs
    Linking.addEventListener('url', this.handleOpenURL);
    // Launched from an external URL
    Linking.getInitialURL().then((url) => {
      if (url) {
        this.handleOpenURL({ url });
      }
    });
  };

  componentWillUnmount() {
    // Remove event listener
    Linking.removeEventListener('url', this.handleOpenURL);
  };

  handleOpenURL = ({ url }) => {
    // Extract stringified user string out of the URL
    const [, user_string] = url.match(/user=([^#]+)/);
    // Decode the user string and parse it into JSON
    const user = JSON.parse(decodeURI(user_string));
    // Call onLoggedIn function of parent component and pass user object
    this.props.onLoggedIn(user);
    if (Platform.OS === 'ios') {
      SafariView.dismiss();
    }
  };

  // Handle Login with Facebook button tap
  loginWithFacebook = () => this.openURL('https://localhost:3000/auth/facebook');

  // Handle Login with Google button tap
  loginWithGoogle = () => this.openURL('https://localhost:3000/auth/google');

  // Open URL in a browser
  openURL = (url) => {
    // Use SafariView on iOS
    if (Platform.OS === 'ios') {
      SafariView.show({
        url: url,
        fromBottom: true,
      });
    }
    // Or Linking.openURL on Android
    else {
      Linking.openURL(url);
    }
  };

  render() {
    return (
      <View style={styles.container}>

        <View style={styles.content}>
          <Text style={styles.header}>
            Welcome Stranger!
          </Text>
          <View style={styles.avatar}>
            <Icon name="user-circle" size={100} color="rgba(0,0,0,.09)" />
          </View>
          <Text style={styles.text}>
            Please log in to continue {'\n'}
            to the awesomness
          </Text>
        </View>

        <View style={styles.buttons}>
          <Icon.Button
            name="facebook"
            backgroundColor="#3b5998"
            onPress={this.loginWithFacebook}
            {...iconStyles}
          >
            Login with Facebook
          </Icon.Button>
          <Icon.Button
            name="google"
            backgroundColor="#DD4B39"
            onPress={this.loginWithGoogle}
            {...iconStyles}
          >
            Or with Google
          </Icon.Button>
        </View>

      </View>
    );
  }
}

const iconStyles = {
  borderRadius: 10,
  iconStyle: { paddingVertical: 5 },
};

const styles = StyleSheet.create({
  container: {
    flex: 1,
    backgroundColor: '#FFF',
  },
  content: {
    flex: 1,
    justifyContent: 'center',
    alignItems: 'center',
  },
  avatar: {
    margin: 20,
  },
  avatarImage: {
    borderRadius: 50,
    height: 100,
    width: 100,
  },
  header: {
    fontSize: 20,
    textAlign: 'center',
    margin: 10,
  },
  text: {
    textAlign: 'center',
    color: '#333',
    marginBottom: 5,
  },
  buttons: {
    justifyContent: 'space-between',
    flexDirection: 'row',
    margin: 20,
    marginBottom: 30,
  },
});
API Helpers
Before we get started building comment components, let’s create a couple of helper functions that will help us make API calls.
- Create a new file called
api.jswithin project root folder.
// Our API backend's URL
const API = 'http://localhost:3000';

const headers = {
  'Accept': 'application/json',
  'Content-Type': 'application/json',
  'X-Requested-With': 'XMLHttpRequest'
};

export const get = async (uri) => await fetch(`${API}/${uri}`, {
  method: 'GET',
  headers,
});

export const put = async (uri, body) => await fetch(`${API}/${uri}`, {
  method: 'PUT',
  body: JSON.stringify(body),
  headers,
});
For now, we just need to make GET and PUT calls to fetch or post new comments. If you decided to add a comment deletion feature, you could easily add new delete function.
Comments Components
For comments we’re going to have three different components:
- List. Renders a scrollable list of comments and an input field for posting new comments using
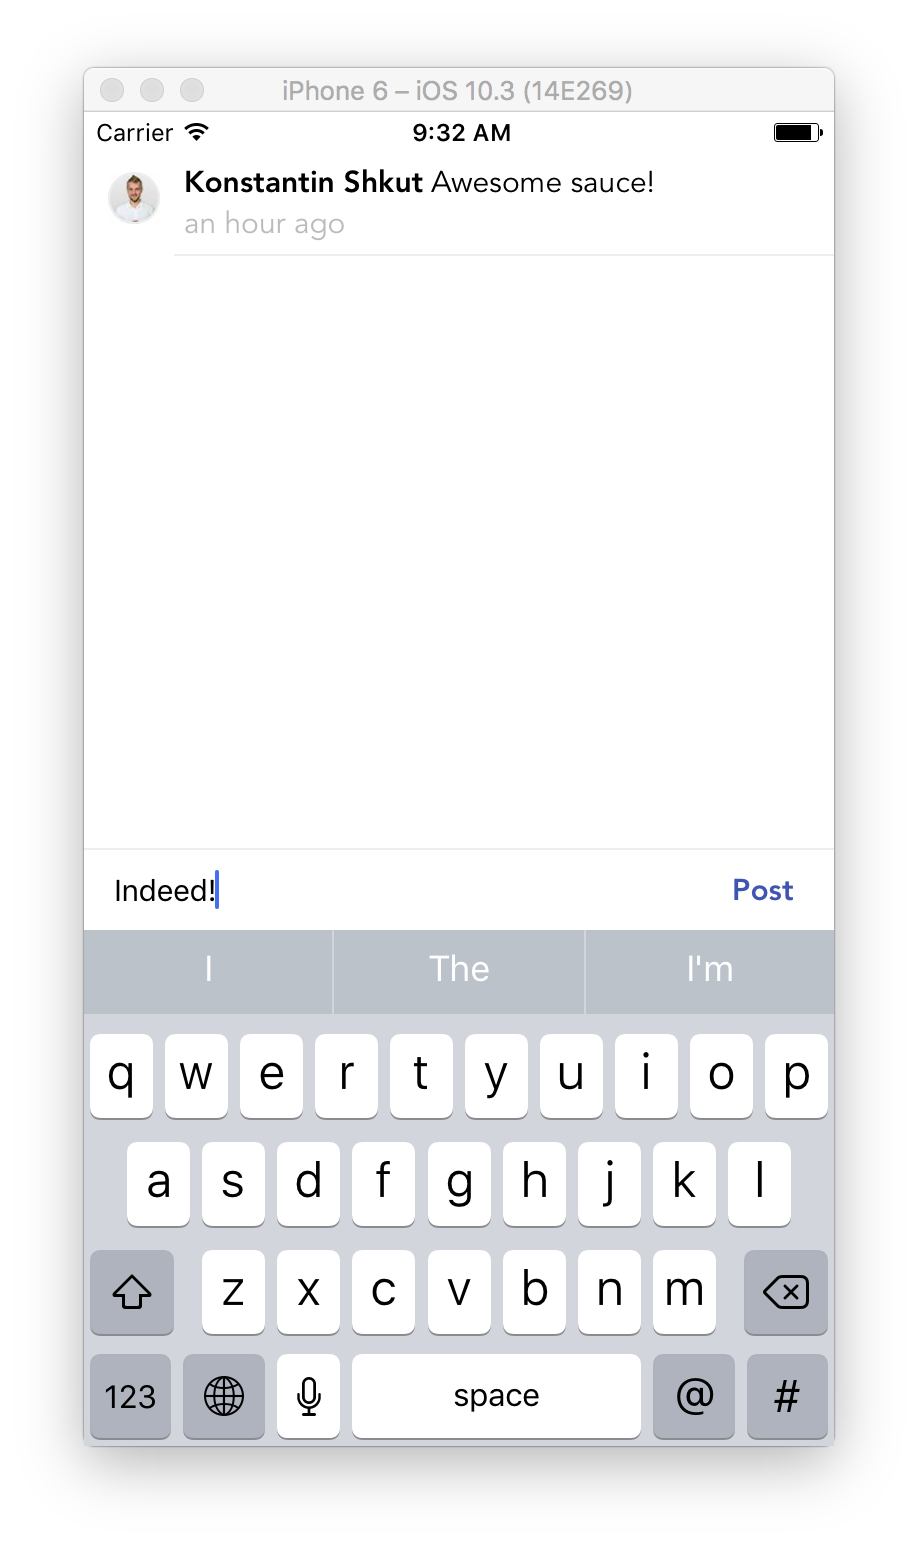
CommentandInputcomponents respectively. - Comment. Renders a single comment with an avatar, user name, content and how long ago it was posted.
- Input. Renders an input field for posting new comments.
- Create a new folder called
commentswithincomponentsfolder.
Comment Component
First, let’s create Comment component that renders each component.
- Create a new file called
comment.jswithincommentsfolder.
import React, { PureComponent, PropTypes } from 'react';
import {
  Image,
  StyleSheet,
  Text,
  View
} from 'react-native';
import moment from 'moment';

export default class Comment extends PureComponent {

  static propTypes = {
    // Comment object shape
    comment: PropTypes.shape({
      content: PropTypes.string.isRequired,
      created: PropTypes.string.isRequired,
      // User object shape
      user: PropTypes.shape({
        name: PropTypes.string.isRequired,
        avatar: PropTypes.string.isRequired,
      }).isRequired,
    }).isRequired,
  };

  render() {
    // Pull comment object out of props
    const { comment } = this.props;
    // Pull data needed to display a comment out of comment object
    const { content, created, user } = comment;
    // Pull user name and avatar out of user object
    const { name, avatar } = user;
    return (
      <View style={styles.container}>
        <View style={styles.avatarContainer}>
          {avatar && <Image
            resizeMode='contain'
            style={styles.avatar}
            source={{ uri: avatar }}
          />}
        </View>
        <View style={styles.contentContainer}>
          <Text>
            <Text style={[styles.text, styles.name]}>{name}</Text>
            {' '}
            <Text style={styles.text}>{content}</Text>
          </Text>
          <Text style={[styles.text, styles.created]}>{moment(created).fromNow()}</Text>
        </View>
      </View>
    );
  }

}

const styles = StyleSheet.create({
  container: {
    flexDirection: 'row',
  },
  avatarContainer: {
    alignItems: 'center',
    marginLeft: 5,
    paddingTop: 10,
    width: 40,
  },
  contentContainer: {
    flex: 1,
    borderBottomWidth: 1,
    borderColor: '#EEE',
    padding: 5,
  },
  avatar: {
    borderWidth: 1,
    borderColor: '#EEE',
    borderRadius: 13,
    width: 26,
    height: 26,
  },
  text: {
    color: '#000',
    fontFamily: 'Avenir',
    fontSize: 15,
  },
  name: {
    fontWeight: 'bold',
  },
  created: {
    color: '#BBB',
  },
});
It’s a pretty basic component that takes in comment object as a prop and renders user’s avatar, name, their comment and how long ago it was posted.
Input Component
Next, let’s build Input component that allows users to post new comments.
- Create a new file called
input.jswithincommentsfolder.
import React, { Component, PropTypes } from 'react';
import {
  KeyboardAvoidingView,
  StyleSheet,
  TextInput,
  Text,
  View, TouchableOpacity
} from 'react-native';

export default class Input extends Component {

  static propTypes = {
    onSubmit: PropTypes.func.isRequired,
  };

  state = {
    text: undefined, // user's input
  };

  // Update state when input changes
  onChangeText = (text) => this.setState({ text });

  // Handle return press on the keyboard
  // NOTE: You don't really need it for this example, because
  // we're using a keyboard without return button, but I left it here
  // in case you'd want to switch to a different keyboard
  onSubmitEditing = ({ nativeEvent: { text } }) => this.setState({ text }, this.submit);

  // Call this.props.onSubmit handler and pass the comment
  submit = () => {
    const { text } = this.state;
    if (text) {
      this.setState({ text: undefined }, () => this.props.onSubmit(text));
    } else {
      alert('Please enter your comment first');
    }
  };

  render() {
    return (
      // This moves children view with input field and submit button
      // up above the keyboard when it's active
      <KeyboardAvoidingView
        behavior='position'
      >
        <View style={styles.container}>
          {/* Comment input field */}
          <TextInput
            placeholder="Add a comment..."
            keyboardType="twitter" // keyboard with no return button
            autoFocus={true} // focus and show the keyboard
            style={styles.input}
            value={this.state.text}
            onChangeText={this.onChangeText} // handle input changes
            onSubmitEditing={this.onSubmitEditing} // handle submit event
          />
          {/* Post button */}
          <TouchableOpacity
            style={styles.button}
            onPress={this.submit}
          >
            {/* Apply inactive style if no input */}
            <Text style={[styles.text, !this.state.text ? styles.inactive : []]}>Post</Text>
          </TouchableOpacity>
        </View>
      </KeyboardAvoidingView>
    );
  }

}

const styles = StyleSheet.create({
  container: {
    backgroundColor: '#FFF',
    flexDirection: 'row',
    borderTopWidth: 1,
    borderColor: '#EEE',
    alignItems: 'center',
    paddingLeft: 15,
  },
  input: {
    flex: 1,
    height: 40,
    fontSize: 15,
  },
  button: {
    height: 40,
    paddingHorizontal: 20,
    alignItems: 'center',
    justifyContent: 'center',
  },
  inactive: {
    color: '#CCC',
  },
  text: {
    color: '#3F51B5',
    fontWeight: 'bold',
    fontFamily: 'Avenir',
    textAlign: 'center',
    fontSize: 15,
  },
});
This component has an input field that takes users input and passes that input to onSubmit function passed as a prop when they press Post button.
List Component
Finally, let’s make use of two components we just build in previous steps.
- Create a new file called
list.jswithincommentsfolder.
import React, { Component, PropTypes } from 'react';
import {
  RefreshControl,
  ScrollView,
  StyleSheet,
  View
} from 'react-native';
import { get, put } from '../../api';
import Comment from './comment';
import Input from './input';

export default class List extends Component {

  static propTypes = {
    // User object shape
    user: PropTypes.shape({
      _id: PropTypes.string.isRequired,
    }).isRequired,
  };

  state = {
    comments: [], // array for comments fetched from the API backend
    refreshing: true, // whether comments list is being refreshed or not
  };

  // Fetch comments when component is about to mount
  componentWillMount = () => this.fetchComments();

  // Re-fetch comments when user pulls the list down
  onRefresh = () => this.fetchComments();

  // Call API to fetch comments
  fetchComments = async () => {
    this.setState({ refreshing: true });
    try {
      // Make API call
      const response = await get('comments');
      // Convert response to JSON
      const json = await response.json();
      this.setState({
        refreshing: false,
        comments: json.comments
      });
    }
    catch (error) {
      alert(error);
    }
  };

  // Call API to submit a new comment
  submitComment = async (comment) => {
    const { user } = this.props;
    this._scrollView.scrollTo({ y: 0 });
    try {
      // Make API call
      const response = await put('comments', {
        user_id: user._id,
        content: comment,
      });
      // Convert response to JSON
      const json = await response.json();
      this.setState({
        // Push new comment to state before existing ones
        comments: [json.comment, ...this.state.comments]
      });
    }
    catch (error) {
      alert(error);
    }
  };

  render() {
    // Pull comments out of state
    const { comments } = this.state;
    return (
      <View style={styles.container}>
        {/* Scrollable list */}
        <ScrollView
          ref={(scrollView) => { this._scrollView = scrollView; }}
          refreshControl={
            <RefreshControl
              refreshing={this.state.refreshing}
              onRefresh={this.onRefresh}
            />
          }
        >
          {/* Render each comment with Comment component */}
          {comments.map((comment, index) => <Comment comment={comment} key={index} />)}
        </ScrollView>
        {/* Comment input box */}
        <Input onSubmit={this.submitComment} />
      </View>
    );
  }

}

const styles = StyleSheet.create({
  container: {
    flex: 1,
    backgroundColor: '#FFF',
    paddingTop: 20,
  }
});
This component makes an API call to fetch existing comments when being loaded for the first time. Then it renders a scrollable list with comments rendered as Comment components and an input field rendered by Input component. It also allows users to refresh comments by pulling down the list.
App Component
And in the final step let’s update App component to use our new Login and Comments components.
- Open
app.jswithin project root folder.
import React, { Component } from 'react';
import Login from './components/login';
import Comments from './components/comments/list';

export default class App extends Component {

  state = {
    user: undefined, // not logged in yet
  };

  // Gets called after user logs in with Facebook or Google
  onLoggedIn = (user) => {
    this.setState({ user });
  };

  render() {
    const { user } = this.state;
    return user
      // Show comments if user is logged in
      ? <Comments user={user} />
      // Show login screen otherwise
      : <Login onLoggedIn={this.onLoggedIn} />;
  }
}
All Set
And we’re all done. Let’s launch our app to make sure that everything is working as expected.
- Make sure our Node.js backend is still up and running.
- Launch the mobile app by executing
react-native run-iosin the terminal.
Wrapping Up
Hopefully, you’ve learned a lot and will be able to use that knowledge when building your apps! Subscribe to get notified about new tutorials. And if you have any questions or ideas for new tutorials, just leave a comment below the post.