Table of contents
What We Will Be Building
We’re going to build an app that parses JSON file exported from Adobe After Effects with bodymovin plugin and renders it natively on mobile. To do that we’ll use lottie-react-native library made by Airbnb.
For your reference, the final code for the app we’re building can be found in this GitHub repo.
Initialize New Project
Let’s start off by creating a new app. Open Terminal App and run these commands to initialize a new project.
react-native init BouncingBall;
cd BouncingBall;
Install Lottie
Next, let’s install lottie-react-native. That’s a React Native library made by Airbnb. Lottie allows to import animations made with Adobe After Effects into React Native apps.
npm i --save lottie-react-native;
react-native link lottie-ios;
react-native link lottie-react-native;
Link Lottie Library
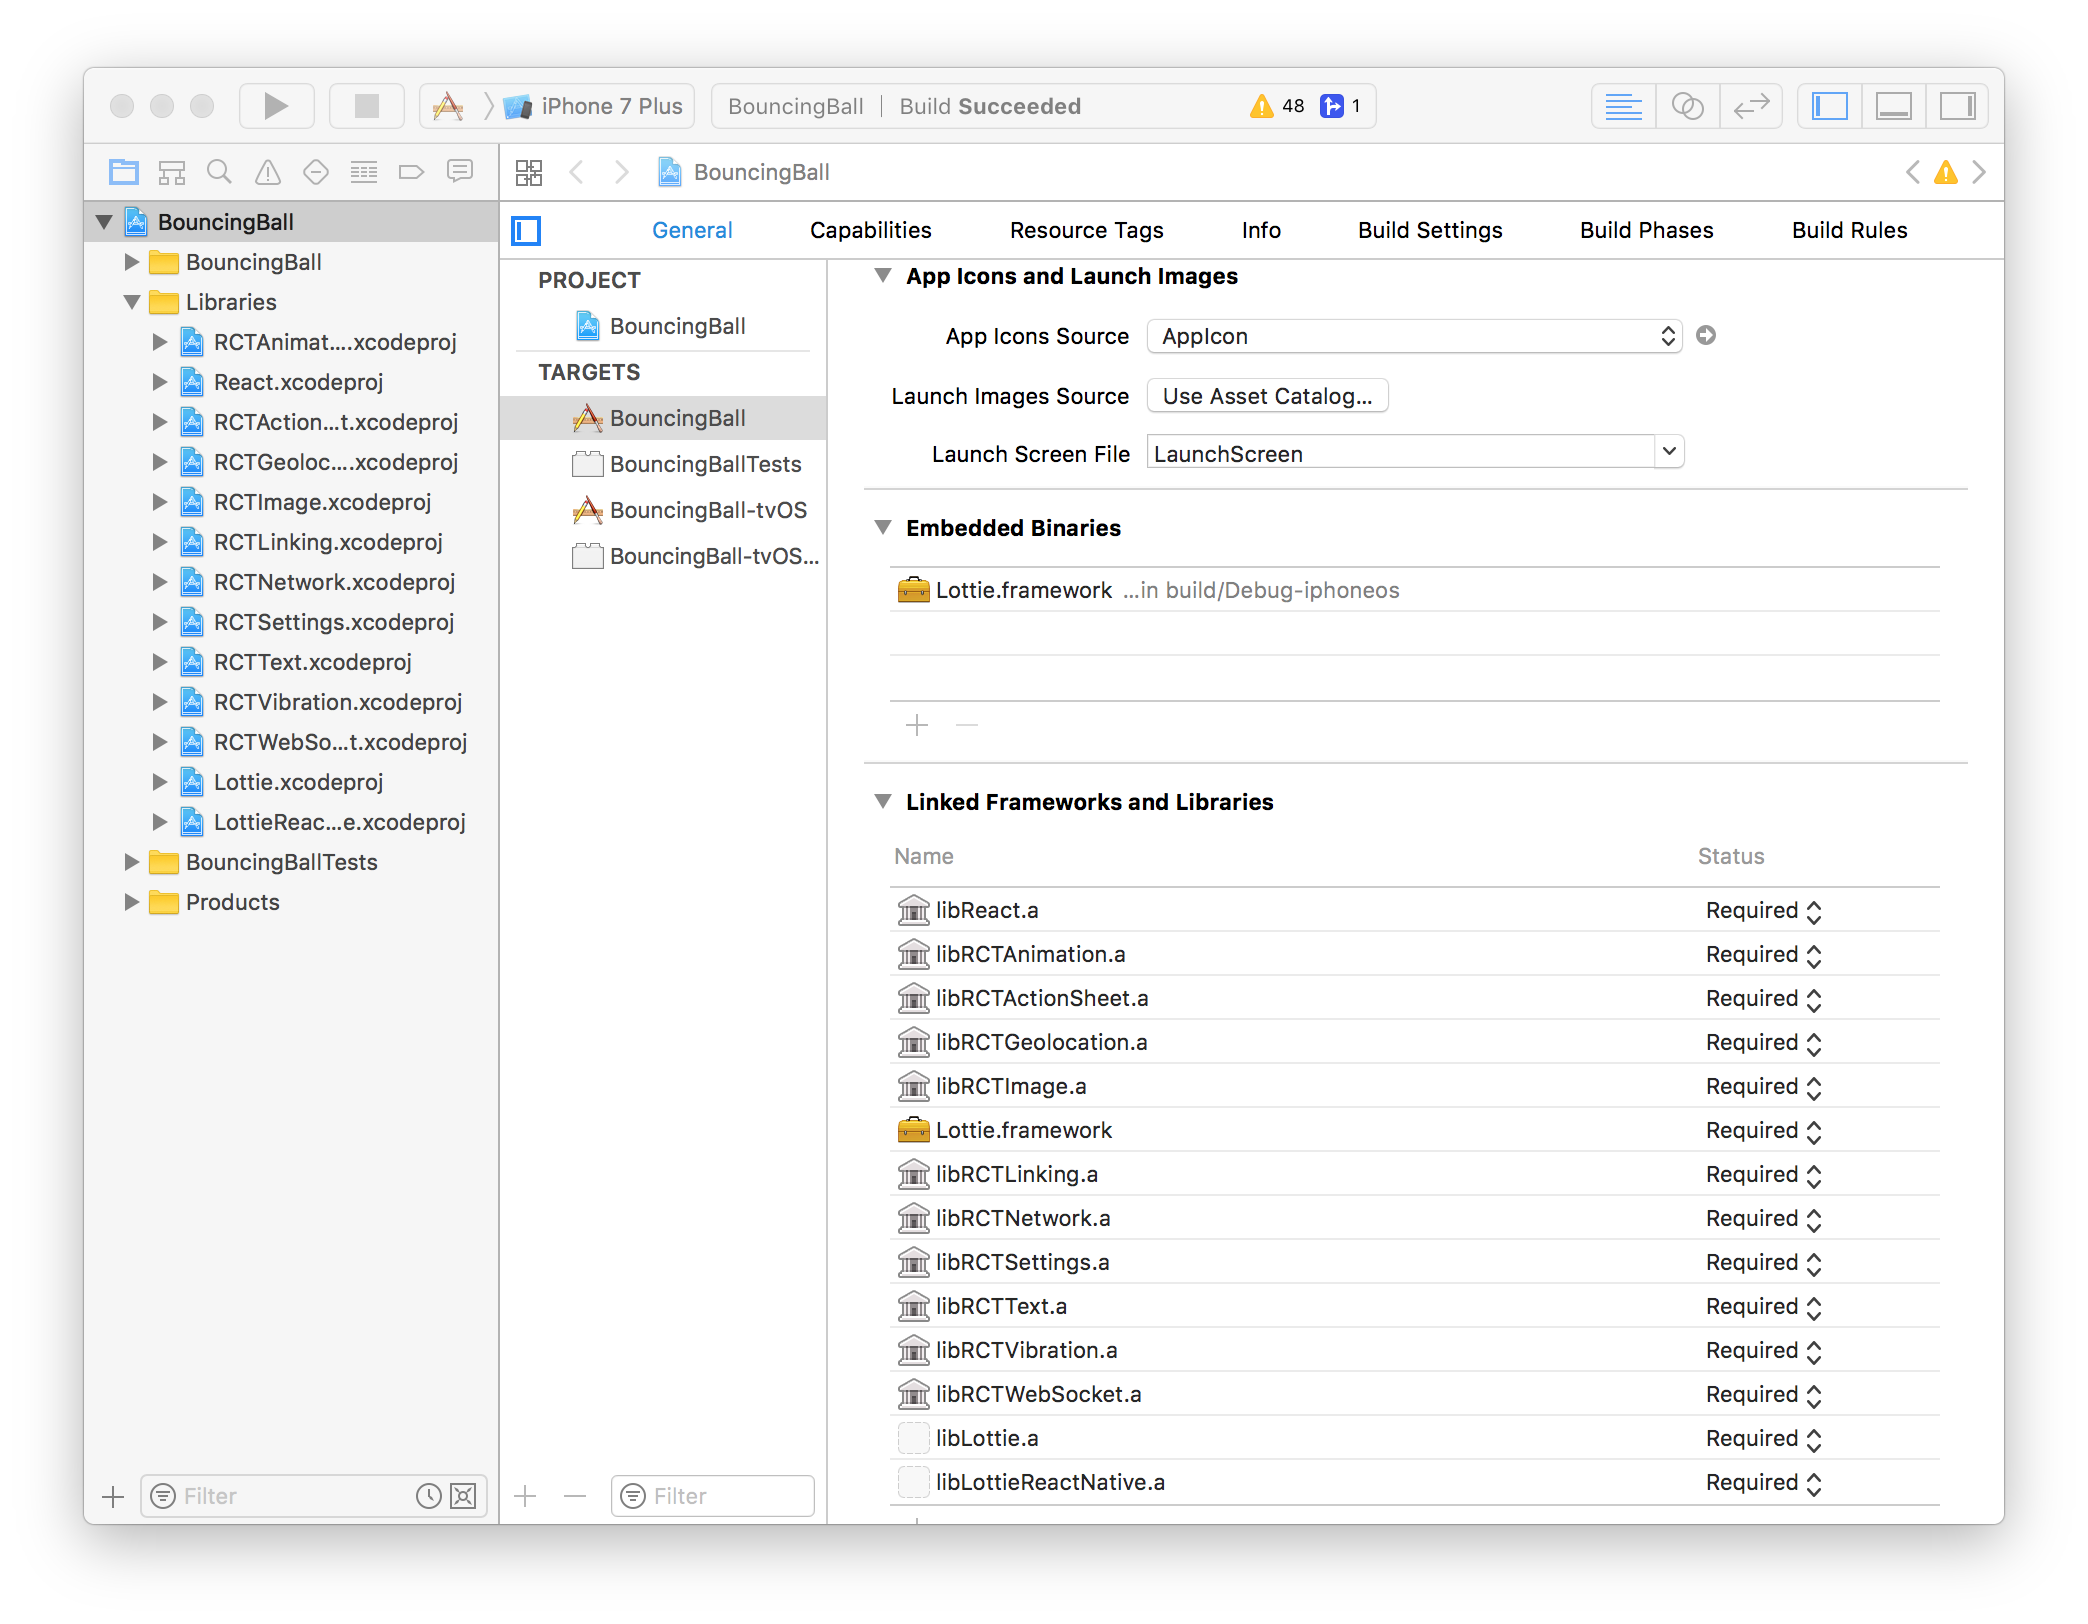
- Open
ios/BouncingBall.xcodeprojfile with Xcode. - Scroll down to Embedded Binaries section, and click
+button.

- Choose
Lottie.framework.iOSand clickAdd.
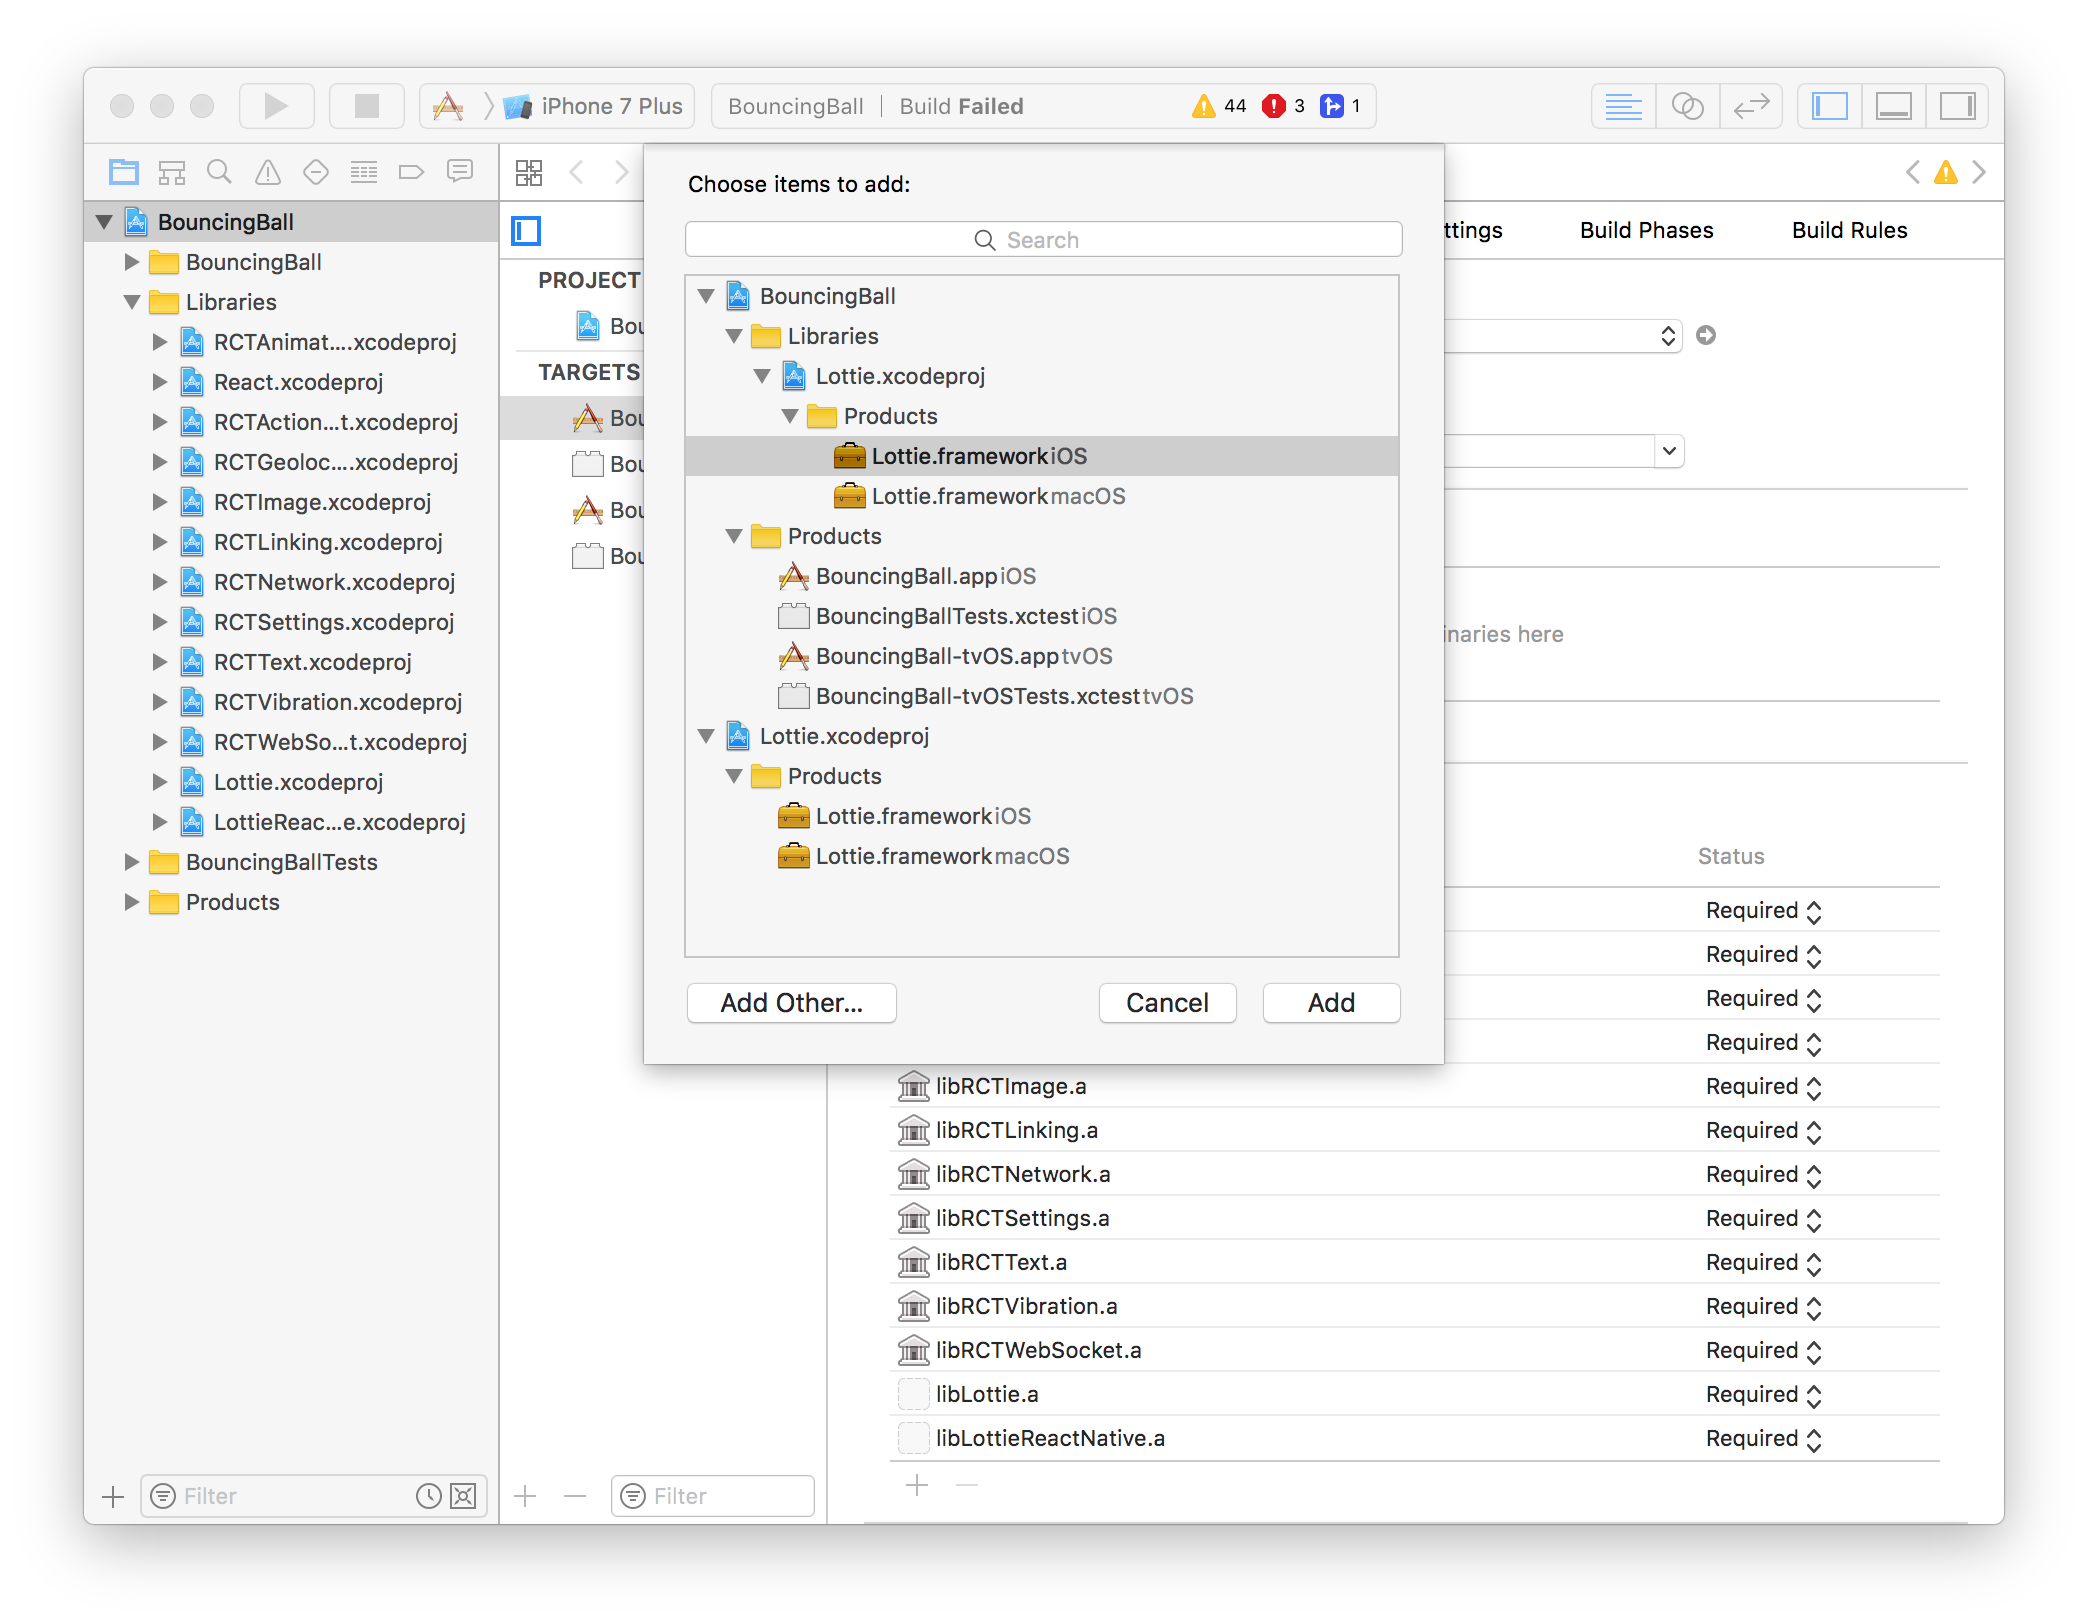
You should see Lottie.framework.iOS added to Embedded Binaries list.
Download JSON Animation File
Download ball.json file and save it into your app’s folder.
Launch the Simulator
Now, let’s run the app in the simulator.
react-native run-ios;
Enable Hot Reloading
Once your app is up and running, press ⌘D and select Enable Hot Reloading. This will save you some time having to reload the app manually every time you make a change.
Index Files
Next, let’s update our index files. Since we’re going to re-use the same code for both, iOS and Android, so we don’t need two different index files. We’ll be using the same App component in both index files.
- Open
index.ios.jsfile and scrap all of the React Native boilerplate code to start from scratch. Do the same forindex.android.js. And add the following code to both of index files.
import { AppRegistry } from 'react-native';
import App from './app';

AppRegistry.registerComponent('BouncingBall', () => App);
This code imports App component from app.js file and registers it as main app container.
The Code
- Create a new file called
app.jswith the following code:
import React, { Component } from 'react';
import {
  Animated,
  Easing,
  Dimensions
} from 'react-native';
import Animation from 'lottie-react-native';

// Get screen dimensions
const { width, height } = Dimensions.get('window');

export default class App extends Component {

  state = {
    // Used by Animation component to run animation
    progress: new Animated.Value(0),
  };

  componentDidMount() {
    // Wait for 1 second before starting animation
    setTimeout(this.animate, 1000);
  }

  animate = () => {
    Animated.timing(this.state.progress, {
      // Change from 0 to 1 to run animation
      toValue: 1,
      // Animation duration
      duration: 24000, // higher the value slower the animation and vice versa
      // Linear easings
      easing: Easing.linear,
    }).start(() => {
      // Reset progress to zero after animation is done
      this.state.progress.setValue(0);
      // Animate again
      this.animate();
    });
  }

  render() {
    return (
      <Animation
        style={{
          // Black background
          backgroundColor: '#000',
          // Screen width
          width: width,
          // Screen height
          height: height,
        }}
        // Load animation from json file
        source={require('./ball.json')}
        // Animate json file
        progress={this.state.progress}
      />
    );
  }
}
That’s It!
And we’re done. Let’s bring up the simulator window. You should be able to see a bouncing ball!

Wrapping Up
Hopefully, you’ve learned a lot on how to create animations with React Native.
Subscribe to get notified about new tutorials. And if you have any questions or ideas for new tutorials, just leave a comment below the post.