Table of contents
What we will be building
Today we’re building a horizontal calendar. You can use it for filtering date related data such as events, movie screenings, flights, etc. or for user input. Suppose you had a todo app and you could use this calendar to allow your users setting due dates for their tasks.
In this tutorial, we’re going to focus on filtering the data. To keep it simple we’ll generate some fake data, so it looks like a list of events.
You can easily replace fake data with any API data. Check out Charts in React Native (Part 2) for inspiration on how to work with APIs.
Take a look at the screenshot below to get a better idea of how it’s going to look like.
For your reference, the final code for the app we’re building can be found in this GitHub repo.
Creating new project
Let’s get starting by initializing a new project using create-react-native-app.
If you’re not familiar with
create-react-native-appcheck out Building React Native Apps on any Platform without Xcode or Android Studio.
Open Terminal and run these commands to initialize a new project.
create-react-native-app HorizontalCalendar;
cd HorizontalCalendar;
Run
npm install -g create-react-native-appin terminal if you don’t havecreate-react-native-appinstalled.
Now there are three options how to run the app during the development process.
- To run in iOS simulator execute:
npm run ios
- To run in Android simulator launch your virtual device first and then execute:
npm run android
- To start the packager and run the app on your mobile device first execute:
npm start
- Then launch Expo app (iOS, Android) on your mobile device and scan the barcode outputted in the terminal.
Once you’re done, you should see this screen either in the simulator or on your phone.
Installing dependencies
We’re going to need to install a couple of dependencies for the project.
Execute the following command in Terminal to install those:
npm install --save faker moment
Installing Flow
Flow is a static type checker for JavaScript. We’ll be using it to type hint React component, Redux actions, reducers, etc. Flow improves code readability, finds errors instantly, and allows you to refactor code more confidently, which is especially important as your app grows bigger.
- Open
.flowconfigin project root folderHorizontalCalendarand scroll down to the bottom to find out flow version. Let’s say it’s0.49.1. - Open Terminal and execute the following putting flow version after
flow-bin@:
npm install --save-dev [email protected]
- Open
package.jsonfile and add"flow": "flow"to the bottom ofscriptssection aftertest:
  "scripts": {
    "start": "react-native-scripts start",
    "eject": "react-native-scripts eject",
    "android": "react-native-scripts android",
    "ios": "react-native-scripts ios",
    "test": "node node_modules/jest/bin/jest.js --watch",
    "flow": "flow"
  },
- Open Terminal and run
npm run flow. You should seeNo errors!message.
npm run flow
Starting coding
First of all, let’s create a new folder for all of our source files, so all code is contained in one location for easier navigation around different components we’re about to create.
- Create a new folder called
srcwithin the project root folder. We’ll be creating all new source files and folders within this folder.
Calendar component
Let’s start off by creating Calendar component with some basic functionality. We’ll define all the props we’re going to need and the state.
We’re going to have only one required prop which is onSelectDate that expects a function and passes Moment object of the date that user taps on.
By default, the component will start with today as the pre-selected date. This can be changed by passing a date string like 2017-12-31 or Moment date to currentDate prop.
And it will show showDaysBeforeCurrent dates before today and showDaysAfterCurrent after. Those are set to 5 by default and can be changed via props.
So let’s dive right into it.
- Create a new folder called
calendarwithinsrcfolder to store all calendar specific files in that folder. - Create a new file called
Calendar.jswithinsrc/calendarfolder.
// @flow
import React, { PureComponent } from 'react';
import {
ScrollView,
StyleSheet,
Text,
View,
} from 'react-native';
import moment from 'moment';
import type Moment from 'moment';
type Props = {
// Optional prop to pass a custom date to use instead of today
currentDate?: string | Moment,
// Callback executed when user taps on a date
onSelectDate: (date: Moment) => any,
// Number of days to show before today or custom current date
showDaysAfterCurrent?: number,
// Number of days to show after
showDaysBeforeCurrent?: number,
};
type State = {
// True when all dates have rendered
allDatesHaveRendered: boolean,
// Currently chosen date index
currentDateIndex: ?number,
// Store months and years of the dates visible on the screen
// for rendering month(s) and year(s) above the dates
visibleMonths: ?Array<string>,
visibleYears: ?Array<string>,
// Array of dates to show
dates: Array<Moment>,
// Store each day with to help with scrolling to specific days
// and calculating which days are visible on the screen
dayWidths: ?{| [index: number]: number |},
// Store current scroll position
scrollPositionX: number,
};
export default class Calendar extends PureComponent {
props: Props;
state: State;
static defaultProps = {
// Show 5 days before the current day
showDaysBeforeCurrent: 5,
// And after
showDaysAfterCurrent: 5,
};
_scrollView;
// Initialize the state with default values
constructor(props: Props) {
super(props);
this.state = {
allDatesHaveRendered: false,
currentDateIndex: props.showDaysBeforeCurrent,
dates: this.getDates(),
dayWidths: undefined,
scrollPositionX: 0,
visibleMonths: undefined,
visibleYears: undefined,
};
}
// Get an array of dates for showing in a horizontal scroll view
getDates = (): Array<Moment> => {
const {
currentDate,
showDaysBeforeCurrent,
showDaysAfterCurrent,
} = this.props;
// Go `showDaysBeforeCurrent` ago before today or custom `currentDate`
const startDay = moment(currentDate || undefined)
.subtract(showDaysBeforeCurrent + 1, 'days');
// Number of days in total
const totalDaysCount = showDaysBeforeCurrent + showDaysAfterCurrent + 1;
// And return an array of `totalDaysCount` dates
return [...Array(totalDaysCount)]
.map(_ => startDay.add(1, 'day').clone());
};
render() {
return (
<View>
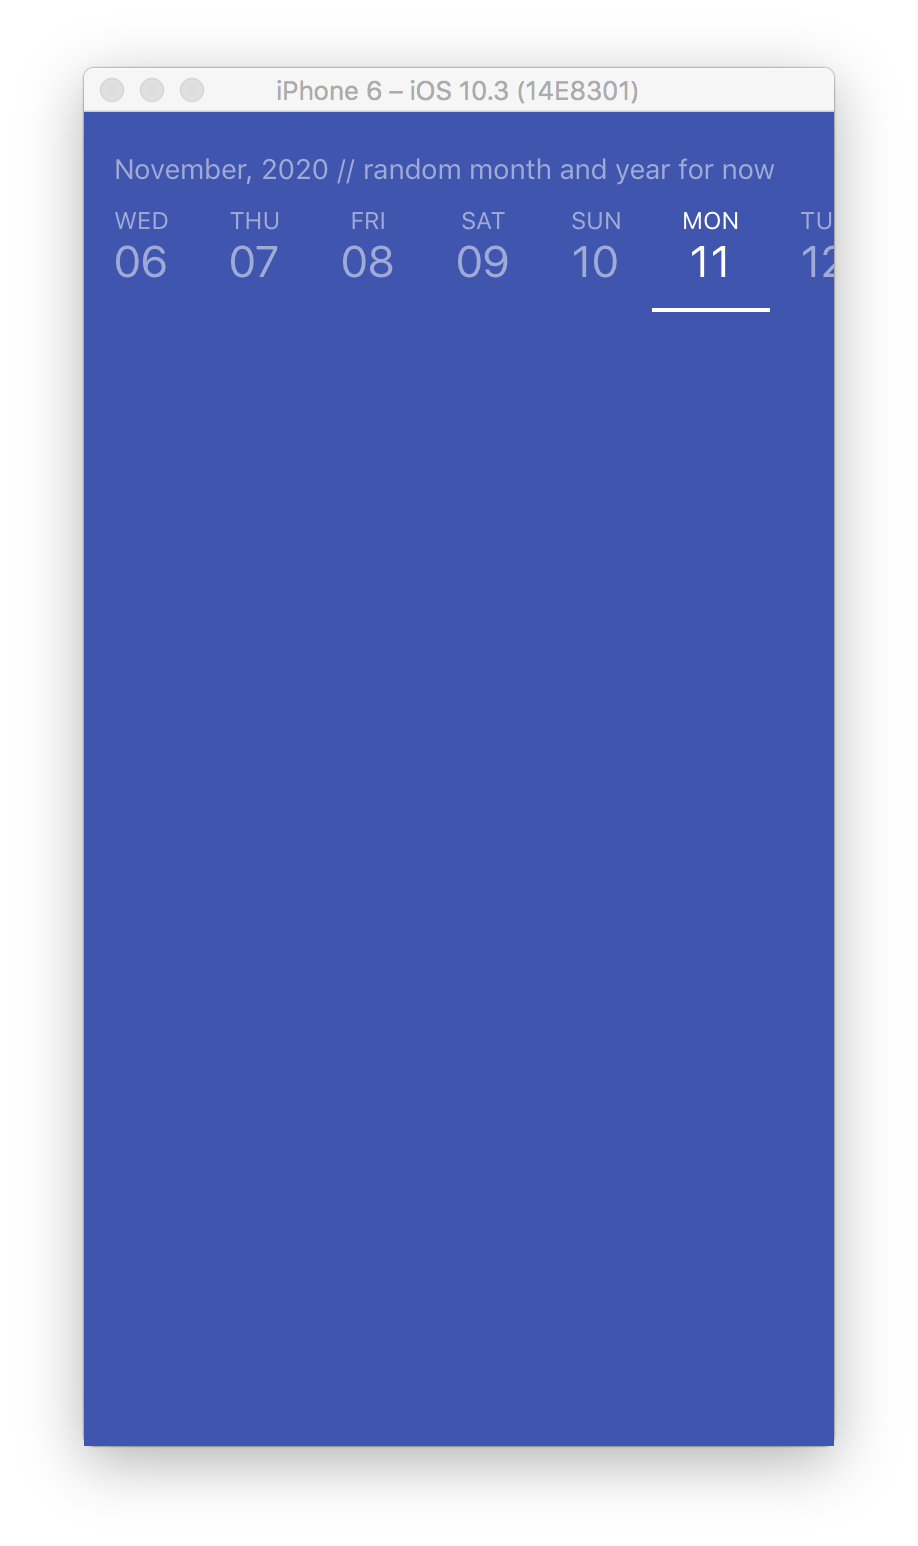
<Text style={styles.visibleMonthAndYear}>
November, 2020 // random month and year for now
</Text>
<ScrollView
ref={scrollView => { this._scrollView = scrollView; }}
horizontal={true} // Enable horizontal scrolling
showsHorizontalScrollIndicator={false} // Hide horizontal scroll indicators
automaticallyAdjustContentInsets={false} // Do not adjust content automatically
>
<Text>{JSON.stringify(this.state.dates, null, 2)}</Text>
</ScrollView>
</View>
);
}
}
const styles = StyleSheet.create({
visibleMonthAndYear: {
color: 'rgba(255, 255, 255, 0.5)',
paddingHorizontal: 15,
textAlign: 'left',
},
});
Updating App.js
Now let’s update App.js to use our newly created Calendar component.
- Open
App.jsfile within the project root folder and replace all of the boilerplate code with the following.
// @flow

import React from 'react';
import {
  StyleSheet,
  StatusBar,
  View,
} from 'react-native';
import Calendar from './src/calendar/Calendar';
import type Moment from 'moment';

export default class App extends React.Component {

  onSelectDate = (date: Moment) => {
    alert(date.calendar());
  };

  render() {
    return (
      <View style={styles.container}>
        <StatusBar hidden={true} />
        <Calendar onSelectDate={this.onSelectDate} />
      </View>
    );
  }
}

const styles = StyleSheet.create({
  container: {
    flex: 1,
    backgroundColor: '#3F53B1',
    paddingTop: 20,
  },
});
We imported Calendar component and passed onSelectDate handler that just shows a notification with the selected date for now.
Checking out the progress
Now, bring up the simulator and see what we’ve got so far.
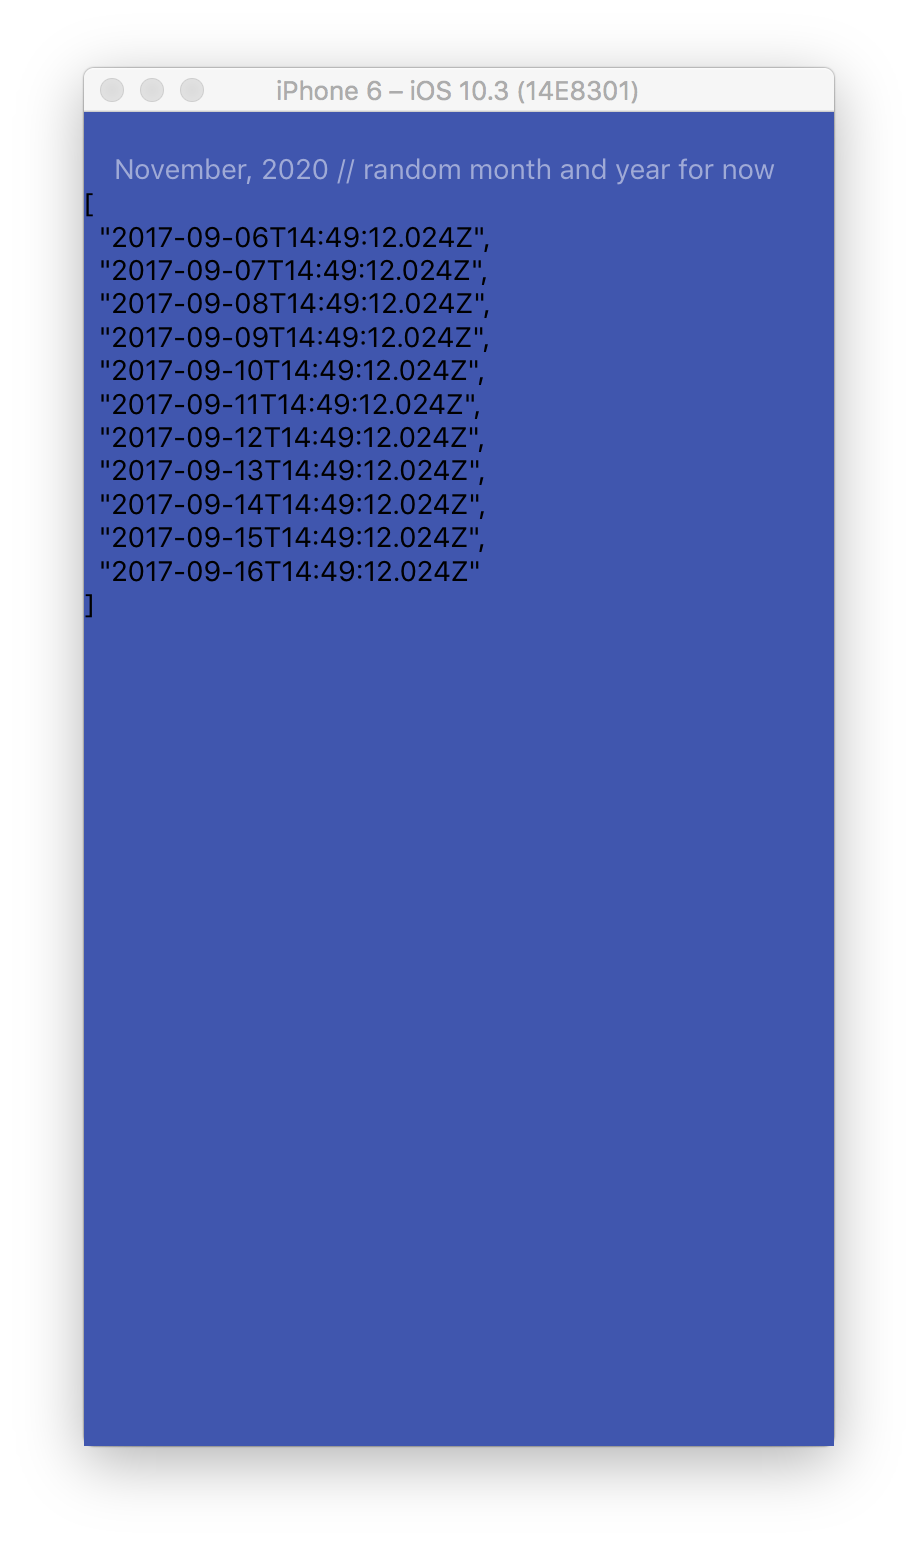
As you can see we put some dummy month and year at the top for now and outputted this.state.dates to see if all expected dates are in the state. Everything looks great since today at the time of writing is September 11th, and we have five dates before it and five after.
Date component
Next, let’s turn that basic list of dates into a nice horizontally scrollable list with dates along with their respective days of weeks.
First, we’ll create a presentational component that renders each particular date and highlights currently active one using a brighter color and a white line below the date.
- Create a new file called
Date.jswithinsrc/calendarfolder.
// @flow

import React, { PureComponent } from 'react';
import {
  Text,
  TouchableOpacity,
} from 'react-native';
import type Moment from 'moment';

export default class Date extends PureComponent {

  props: {
    // Date to render
    date: Moment,
    // Index for `onPress` and `onRender` callbacks
    index: number,
    // Whether it's the currently selected date or no
    isActive: boolean,
    // Called when user taps a date
    onPress: (index: number) => void,
    // Called after date is rendered to pass its width up to the parent component
    onRender: (index: number, width: number) => void,
  };

  // Style helper functions that merge active date styles with the default ones
  // when rendering a date that was selected by user or was set active by default

  getContainerStyle = () => ({
    ...styles.container,
    ...(this.props.isActive ? styles.containerActive : {})
  });

  getDayStyle = () => ({
    ...styles.text,
    ...styles.day,
    ...(this.props.isActive ? styles.textActive : {})
  });

  getDateStyle = () => ({
    ...styles.text,
    ...styles.date,
    ...(this.props.isActive ? styles.textActive : {})
  });

  // Call `onRender` and pass component's with when rendered
  onLayout = (event: { nativeEvent: { layout: { x: number, y: number, width: number, height: number } } }) => {
    const {
      index,
      onRender,
    } = this.props;
    const { nativeEvent: { layout: { width } } } = event;
    onRender(index, width);
  };

  // Call `onPress` passed from the parent component when date is pressed
  onPress = () => {
    const { index, onPress } = this.props;
    onPress(index);
  };

  render() {
    const { date } = this.props;
    return (
      <TouchableOpacity
        style={this.getContainerStyle()}
        onLayout={this.onLayout}
        onPress={this.onPress}
      >
        <Text style={this.getDayStyle()}>{date.format('ddd').toUpperCase()}</Text>
        <Text style={this.getDateStyle()}>{date.format('DD')}</Text>
      </TouchableOpacity>
    );
  }

}

const styles = {
  container: {
    borderBottomColor: 'transparent',
    borderBottomWidth: 2,
    paddingHorizontal: 15,
    paddingVertical: 10,
  },
  containerActive: {
    borderBottomColor: '#FFFFFF',
  },
  day: {
    fontSize: 12,
  },
  date: {
    fontSize: 22,
  },
  text: {
    color: 'rgba(255, 255, 255, 0.5)',
    textAlign: 'center',
  },
  textActive: {
    color: '#FFFFFF',
  },
};
Dates component
Next, let’s create a component that iterates through generated dates and renders each one using Date component we created in the previous step.
- Create a new file called
Dates.jswithinsrc/calendarfolder.
// @flow

import React, { PureComponent } from 'react';
import {
  StyleSheet,
  View,
} from 'react-native';
import Date from './Date';
import type Moment from 'moment';

export default class Dates extends PureComponent {

  props: {
    // Currently active date index
    currentDateIndex: ?number,
    // Array of dates to render
    dates: Array<Moment>,
    // Callback to handle date select
    onSelectDay: (index: number) => void,
    // Callback to handle date render
    onRenderDay: (index: number, width: number) => void,
  };

  render() {
    const {
      currentDateIndex,
      dates,
      onSelectDay,
      onRenderDay,
    } = this.props;
    return (
      <View style={styles.container}>
        {dates.map((date, index) =>
          <View key={index}>
            <Date
              date={date}
              index={index}
              isActive={index === currentDateIndex}
              onPress={onSelectDay}
              onRender={onRenderDay}
              key={index}
            />
          </View>
        )}
      </View>
    );
  }

}

const styles = StyleSheet.create({
  container: {
    flexDirection: 'row',
  },
});
Updating calendar components
Now, let’s update Calendar component to replace that ugly list with Dates component we just created before.
- Open
Calendar.jsfile withinsrc/calendarfolder to make a couple of changes. - First of all, import
Datescomponent.
import moment from 'moment';
import Dates from './Dates';
import type Moment from 'moment';
The lines you need to add or change are highlighted in the code.
- Next, let’s add
onSelectDayandonRenderDayhandlers.
  getDates = (): Array<Moment> => {...};

  onSelectDay = (index: number) => {
    const { dates } = this.state;
    const { onSelectDate } = this.props;
    this.setState({ currentDateIndex: index });
    onSelectDate(dates[index]);
  };

  onRenderDay = (index: number, width: number) => {
    const { dayWidths } = this.state;
    const {
      showDaysBeforeCurrent,
      showDaysAfterCurrent,
    } = this.props;

    // Check whether all date have been rendered already
    const allDatesHaveRendered = dayWidths
      && Object.keys(dayWidths).length >= showDaysBeforeCurrent + showDaysAfterCurrent;

    this.setState(prevState => ({
      allDatesHaveRendered,
      dayWidths: {
        // keep all existing widths added previously
        ...prevState.dayWidths,
        // keep the index for calculating scrolling position for each day
        [index]: width,
      },
    }));
  };

  render() {
- And finally, update
render()function to renderDatescomponent instead of{JSON.stringify(this.state.dates, null, 2)}.
  render() {
    const {
      dates,
      currentDateIndex,
    } = this.state;

    return (
      <View>
        <Text style={styles.visibleMonthAndYear}>
          November, 2020 // random month and year for now
        </Text>
        <ScrollView
          ref={scrollView => { this._scrollView = scrollView; }}
          horizontal={true}                         // Enable horizontal scrolling
          showsHorizontalScrollIndicator={false}    // Hide horizontal scroll indicators
          automaticallyAdjustContentInsets={false}  // Do not adjust content automatically
        >
          <Dates
            dates={dates}
            currentDateIndex={currentDateIndex}
            onSelectDay={this.onSelectDay}
            onRenderDay={this.onRenderDay}
          />
        </ScrollView>
      </View>
    );
  }
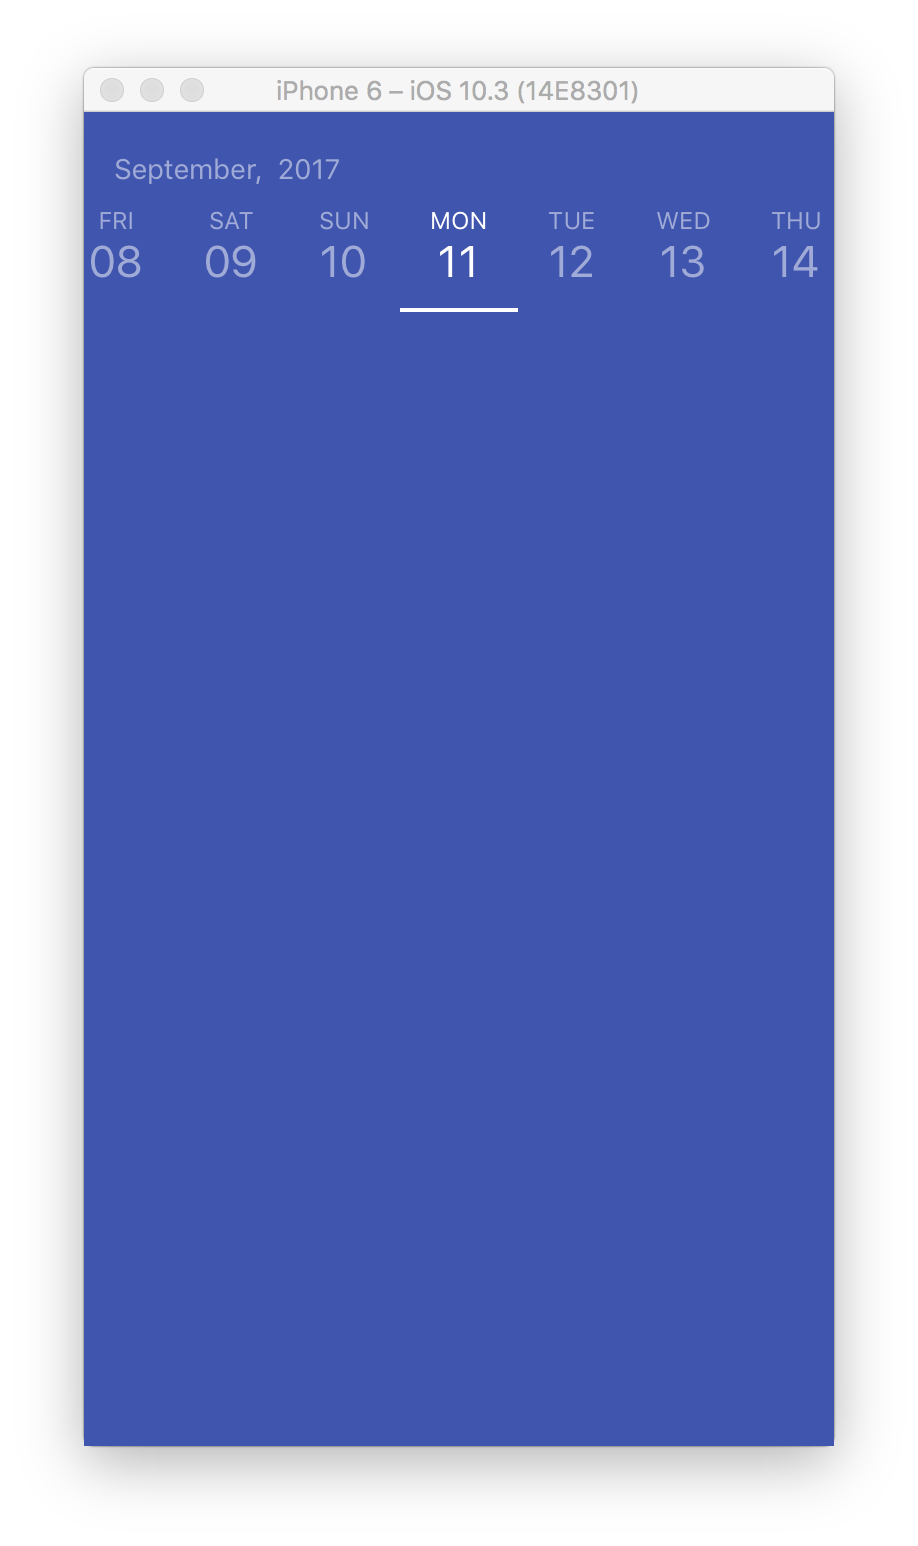
Let’s take a look at the simulator again. Now we have all dates nicely arranged in a row and today is highlighted by default. Click on other dates to see how they get highlighted and how onSelectDate() in App.js gets called and shows an alert.
Showing current month and year
Next, let’s replace that November, 2020 with a month or months and year or year of the dates that are actually visible on the screen at any given moment.
- Open
Calendar.jsfile withinsrc/calendarfolder to make a couple of changes. - Import
Dimensionsfromreact-nativeto get screen width for calculations.
import {
  Dimensions,
  ScrollView,
  StyleSheet,
  Text,
  View,
} from 'react-native';
- Add
screenWidthvariable andformatMonth()andformatYear()helper functions.
  scrollPositionX: number,
};

const { width: screenWidth } = Dimensions.get('window');

const formatMonth = (date: Moment): string => date.format('MMMM');

const formatYear = (date: Moment): string => date.format('YYYY');

export default class Calendar extends PureComponent {
- Add
getVisibleDates()function that iterates throughdayWidthsstored in state and finds which dates are currently visible on the screen.
  getDates = (): Array<Moment> => {...};

  // Returns a subset of dates currently visible on the screen
  getVisibleDates = (): ?Array<Moment> => {

    const {
      dates,
      dayWidths,
      scrollPositionX,
    } = this.state;

    if (!dayWidths) {
      return;
    }

    let datePositionX = 0;
    let firstVisibleDateIndex = undefined;
    let lastVisibleDateIndex = undefined;

    // Iterate through `dayWidths` to  $FlowFixMe
    Object.values(dayWidths).some((width: number, index: number) => {

      if (firstVisibleDateIndex === undefined       // not set yet
        && datePositionX >= scrollPositionX  // first date visible
      ) {
        firstVisibleDateIndex = index > 0 ? index - 1 : index;
      }

      if (lastVisibleDateIndex === undefined                      // not set yet
        && datePositionX >= scrollPositionX + screenWidth  // first date not visible behind the right edge
      ) {
        lastVisibleDateIndex = index;
      }

      // Increment date position by its width for the next iteration
      datePositionX += width;

      // return true when both first and last visible days found to break out of loop
      return !!(firstVisibleDateIndex && lastVisibleDateIndex);
    });

    // Return a subset of visible dates only
    return dates.slice(firstVisibleDateIndex, lastVisibleDateIndex);
  };

  onSelectDay = (index: number) => {...};
- Add
getVisibleMonthAndYear()function that formats currently visible dates month(s) and year(s) to show above the calendar.
  getVisibleDates = (): ?Array<Moment> => {...};

  // Format as a string the month(s) and the year(s) of the dates currently visible
  getVisibleMonthAndYear = (): ?string => {
    const {
      dates,
      visibleMonths,
      visibleYears,
    } = this.state;

    // No `visibleMonths` or `visibleYears` yet
    if (!visibleMonths || !visibleYears) {
      // Return the month and the year of the very first date
      if (dates) {
        const firstDate = dates[0];
        return `${formatMonth(firstDate)}, ${formatYear(firstDate)}`;
      }
      return undefined;
    }

    // One or two months withing the same year
    if (visibleYears.length === 1) {
      return `${visibleMonths.join(' – ')},  ${visibleYears[0]}`;
    }

    // Two months within different years
    return visibleMonths
      .map((month, index) => `${month}, ${visibleYears[index]}`)
      .join(' – ');
  };

  onSelectDay = (index: number) => {...};
- Add
updateVisibleMonthAndYear()function that updatesvisibleMonthsandvisibleYearsin the state.
  getVisibleMonthAndYear = (): ?string => {...};

    // Update visible month(s) and year(s) of the dates currently visible on the screen
  updateVisibleMonthAndYear = () => {

    const { allDatesHaveRendered } = this.state;

    if (!allDatesHaveRendered) {
      return;
    }

    const visibleDates = this.getVisibleDates();

    if (!visibleDates) {
      return;
    }

    let visibleMonths = [];
    let visibleYears = [];

    visibleDates.forEach((date: Moment) => {
      const month = formatMonth(date);
      const year = formatYear(date);
      if (!visibleMonths.includes(month)) {
        visibleMonths.push(month);
      }
      if (!visibleYears.includes(year)) {
        visibleYears.push(year);
      }
    });

    this.setState({
      visibleMonths,
      visibleYears,
    });
  };

  onSelectDay = (index: number) => {...};
- Add
onScroll()handler that updatesscrollPositionXin the state and callsthis.updateVisibleMonthAndYear()after.
  onRenderDay = (index: number, width: number) => {...};

  onScroll = (event: { nativeEvent: { contentOffset: { x: number, y: number } } }) => {
    const { nativeEvent: { contentOffset: { x } } } = event;
    this.setState({ scrollPositionX: x }, this.updateVisibleMonthAndYear);
  };

  render() {...}
- Replace
November, 2020inrender()and addonScrollhandler toScrollView.
  render() {
    const {
      dates,
      currentDateIndex,
    } = this.state;
    const visibleMonthAndYear = this.getVisibleMonthAndYear();

    return (
      <View>
        <Text style={styles.visibleMonthAndYear}>
          {visibleMonthAndYear}
        </Text>
        <ScrollView
          ref={scrollView => { this._scrollView = scrollView; }}
          horizontal={true}                         // Enable horizontal scrolling
          showsHorizontalScrollIndicator={false}    // Hide horizontal scroll indicators
          automaticallyAdjustContentInsets={false}  // Do not adjust content automatically
          scrollEventThrottle={100}
          onScroll={this.onScroll}
        >
          <Dates
            dates={dates}
            currentDateIndex={currentDateIndex}
            onSelectDay={this.onSelectDay}
            onRenderDay={this.onRenderDay}
          />
        </ScrollView>
      </View>
    );
  }
And that’s it. Now we have the month and the year of the dates present above the calendar.
Let’s add more days to the calendar so when can see how our code is updating the current month and the year when switching between different months scrolling through dates.
- Open
App.jsfile within the project root folder and addshowDaysAfterCurrentprop to<Calendar />.
  render() {
    return (
      <View style={styles.container}>
        <StatusBar hidden={true} />
        <Calendar showDaysAfterCurrent={30} onSelectDate={this.onSelectDate} />
      </View>
    );
  }
Now, bring up the simulator and try scrolling right and left. Notice how the top changes from September, 2017 to September – October, 2017 and then October, 2017 when we’re scrolling right.
Centering active date
Next, let’s make active day centered on the screen.
- Open
Calendar.jsfile withinsrc/calendarfolder to make a couple of changes. - Add
scrollToCurrentDay()function that scrolls<ScrollView />to center the active date on the screen.
  updateVisibleMonthAndYear = () => {...};

  scrollToCurrentDay = () => {
    const {
      allDatesHaveRendered,
      currentDateIndex,
      dayWidths,
    } = this.state;

    // Make sure we have all required values
    if (!allDatesHaveRendered || currentDateIndex === undefined || currentDateIndex === null) {
      return;
    }

    // Put all day width values into a simple array $FlowFixMe
    const dayWidthsArray: Array<number> = Object.values(dayWidths);
    // Total width all days take
    const allDaysWidth = dayWidthsArray.reduce((total, width) => width + total, 0);
    // Current day button width
    const currentDayWidth = dayWidthsArray[currentDateIndex];
    // Minimal possible X position value to prevent scrolling before the first day
    const minX = 0;
    // Maximum possible X position value to prevent scrolling after the last day
    const maxX = allDaysWidth > screenWidth
      ? allDaysWidth - screenWidth
      : 0; // no scrolling if there's nowhere to scroll

    let scrollToX;

    scrollToX = dayWidthsArray
      // get all days before the target one
      .slice(0, currentDateIndex + 1)
      // and calculate the total width
      .reduce((total, width) => width + total, 0)
      // Subtract half of the screen width so the target day is centered
      - screenWidth / 2 - currentDayWidth / 2;

    // Do not scroll over the left edge
    if (scrollToX < minX) {
      scrollToX = 0;
    }
    // Do not scroll over the right edge
    else if (scrollToX > maxX) {
      scrollToX = maxX;
    }

    this._scrollView.scrollTo({ x: scrollToX });
  };

  onSelectDay = (index: number) => {...};
- Call
scrollToCurrentDay()after updating the state withinonSelectDay ().
  onSelectDay = (index: number) => {
    const { dates } = this.state;
    const { onSelectDate } = this.props;
    this.setState({ currentDateIndex: index }, this.scrollToCurrentDay);
    onSelectDate(dates[index]);
  };
- Call
scrollToCurrentDay()andupdateVisibleMonthAndYear()after updating the state withinonRenderDay()if all dates have rendered.
  onRenderDay = (index: number, width: number) => {
    const { dayWidths } = this.state;
    const {
      showDaysBeforeCurrent,
      showDaysAfterCurrent,
    } = this.props;

    // Check whether all date have been rendered already
    const allDatesHaveRendered = dayWidths
      && Object.keys(dayWidths).length >= showDaysBeforeCurrent + showDaysAfterCurrent;

    this.setState(prevState => ({
      allDatesHaveRendered,
      dayWidths: {
        // keep all existing widths added previously
        ...prevState.dayWidths,
        // keep the index for calculating scrolling position for each day
        [index]: width,
      },
    }), () => {
      if (allDatesHaveRendered) {
        this.scrollToCurrentDay();
        this.updateVisibleMonthAndYear();
      }
    });
  };
Ok, now the active date is nice and centered. And if you tap another date it’ll become centered as well.
Adding data for filtering
At this point, we have a fully functional horizontal calendar. Now, let’s add some data that we can filter using the calendar and build the presentational components to show it.
Generating fake data
First of all, let’s generate some data.
- Open
App.jsfile within the project root folder. - Import
fakerandmoment.
} from 'react-native';
import faker from 'faker';
import moment from 'moment';
import Calendar from './src/calendar/Calendar';
- Define
EventTypeflow type to describe how we want an event object to look like, generate fake data usingmomentandfakerintoFAKE_EVENTSconstant, and addfilterEvents()helper function to filter fake events by calendar date.
import type Moment from 'moment';

export type EventType = {
  date: Moment,
  title: string,
  description: string,
  image: string,
};

// Generate fake event data
const FAKE_EVENTS: Array<EventType> = (() => {
  const startDay = moment().subtract(5, 'days').startOf('day');
  return [...new Array(64)].map(_ => ({
    date: startDay.add(4, 'hours').clone(),
    title: faker.company.companyName(),
    description: faker.lorem.sentence(),
    // use random dimensions to get random urls
    image: faker.image.nightlife(Math.floor(Math.random() * 200) + 100, Math.floor(Math.random() * 200) + 100),
  }));
})();

// Filter events by date
const filterEvents = (date: Moment): ?Array<EventType> =>
  FAKE_EVENTS.filter(event => event.date.isSame(date, 'day'));

export default class App extends React.Component {
Building presentational components
Ok, now that we have some data and know how event object looks like let’s build a couple of presentational components to render that data.
- Create a new folder called
eventswithinsrcfolder to store all event specific files in that folder.
Event component
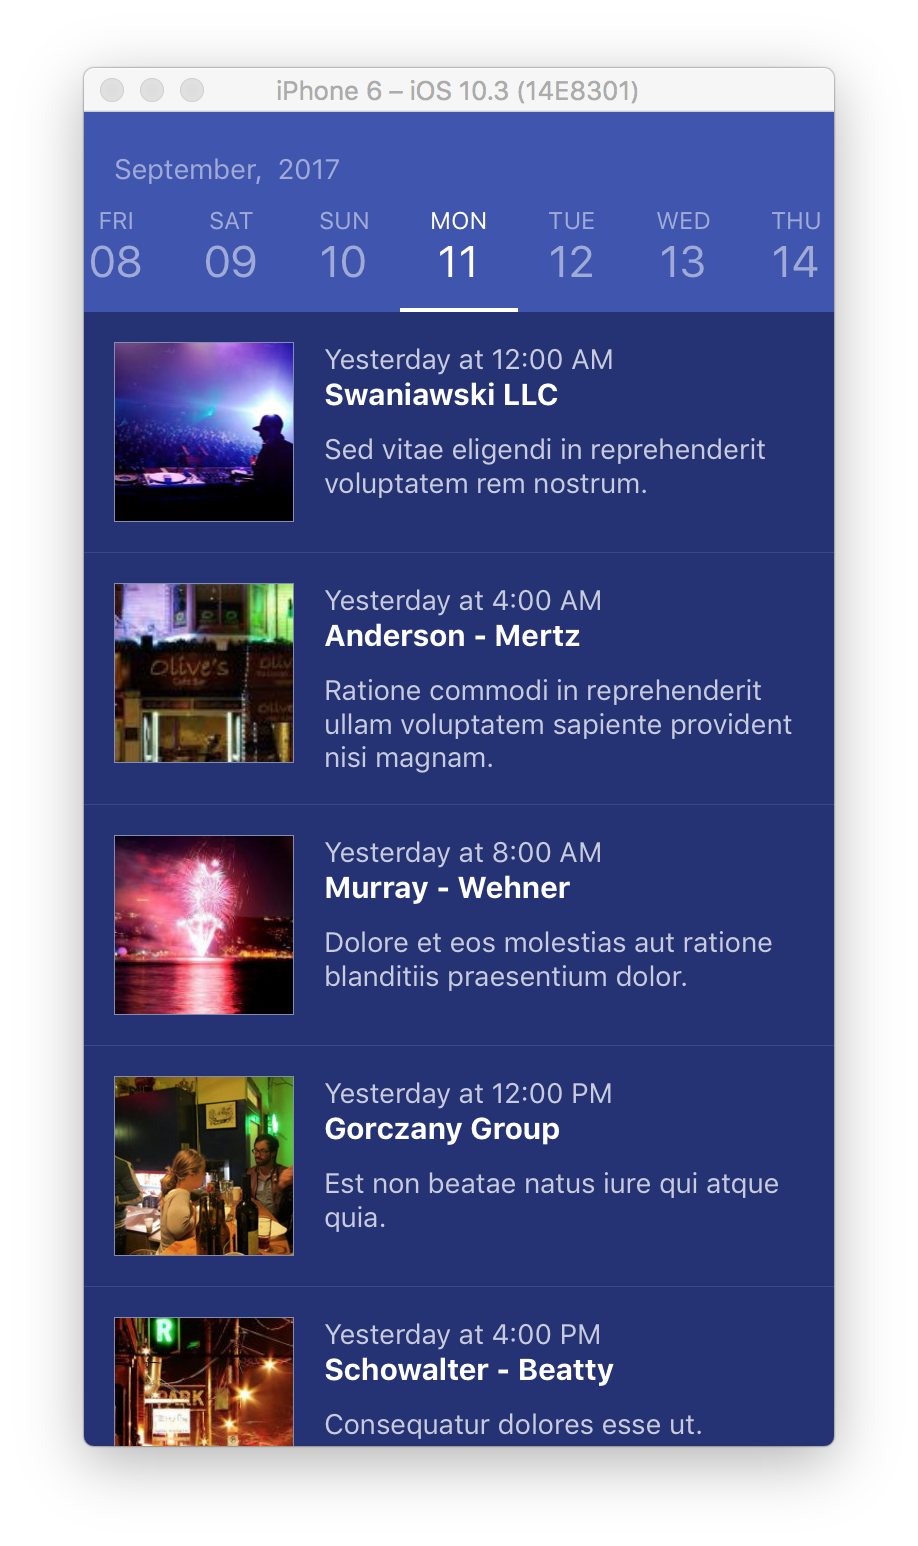
This component renders each event row in the list. It renders a picture on the left and date, title and description on the right.
- Create a new file called
Event.jswithinsrc/eventsfolder.
// @flow

import React, { Component } from 'react';
import {
  Image,
  StyleSheet,
  Text,
  View,
} from 'react-native';
import type { EventType } from '../../App';

export default class Event extends Component {

  props: {
    event: EventType,
  };

  render() {
    const { event } = this.props;
    const {
      date,
      title,
      description,
      image,
    } = event;
    return (
      <View style={styles.container}>
        <View style={styles.imageContainer}>
          <Image
            source={{ uri: image }}
            style={styles.image}
          />
        </View>
        <View style={styles.textContainer}>
          <Text style={styles.text}>{date.calendar()}</Text>
          <Text style={[styles.text, styles.title]}>{title}</Text>
          <Text style={styles.text}>{description}</Text>
        </View>
      </View>
    );
  }

}

const styles = StyleSheet.create({
  container: {
    flex: 1,
    flexDirection: 'row',
    borderBottomColor: 'rgba(255, 255, 255, 0.1)',
    borderBottomWidth: StyleSheet.hairlineWidth,
    padding: 15,
  },
  imageContainer: {
    backgroundColor: 'rgba(255, 255, 255, 0.25)',
    borderColor: 'rgba(255, 255, 255, 0.25)',
    borderWidth: StyleSheet.hairlineWidth,
    marginRight: 15,
    width: 90,
    height: 90,
  },
  textContainer: {
    flex: 1,
  },
  image: {
    width: 89,
    height: 89,
  },
  text: {
    color: 'rgba(255, 255, 255, 0.75)',
  },
  title: {
    color: '#FFFFFF',
    fontSize: 15,
    fontWeight: 'bold',
    marginBottom: 10,
  },
});
Events component
This component takes events passed to it and renders each inside a scrollable list using <Event /> component we created in the previous step.
- Create a new file called
Events.jswithinsrc/eventsfolder.
// @flow

import React, { Component } from 'react';
import {
  ScrollView,
  StyleSheet,
  View,
} from 'react-native';
import Event from './Event';
import type { EventType } from '../../App';

export default class Events extends Component {

  props: {
    events: ?Array<EventType>,
  };

  render() {
    const { events } = this.props;
    return (
      <View style={styles.container}>
        <ScrollView>
          {events && events.map((event, index) =>
            <Event event={event} key={index} />)}
        </ScrollView>
      </View>
    );
  }

}

const styles = StyleSheet.create({
  container: {
    flex: 1,
    backgroundColor: '#243177',
  },
});
Updating App.js
And finally, let’s update App.js to render those fake event we generated darling using the components we just built.
- Open
App.jsfile within the project root folder. - Import
Eventscomponent we created in the previous step.
import Calendar from './src/calendar/Calendar';
import Events from './src/events/Events';
import type Moment from 'moment';
- Add
eventsto the state and updateonSelectDate()to update it usingfilterEvents()when the date is changed.
export default class App extends React.Component {

  state = {
    events: filterEvents(moment()),
  };

  onSelectDate = (date: Moment) => {
    this.setState({ events: filterEvents(date) });
  };
- Update
rebder()to pulleventsout of the state and pass them to<Events />component.
  render() {
    const { events } = this.state;
    return (
      <View style={styles.container}>
        <StatusBar hidden={true} />
        <Calendar showDaysAfterCurrent={30} onSelectDate={this.onSelectDate} />
        <Events events={events} />
      </View>
    );
  }
And that’s it! Bring up the simulator and check out how the list gets updated with the events that have the same date as the one you select.
Wrapping up
Thanks for tuning in! I hope you’ve enjoyed the process and have learned a lot! Don’t forget to subscribe to get notified about new tutorials. And if you have any questions or ideas for new tutorials, just leave a comment below the post.